Can Insulation Get Wet?

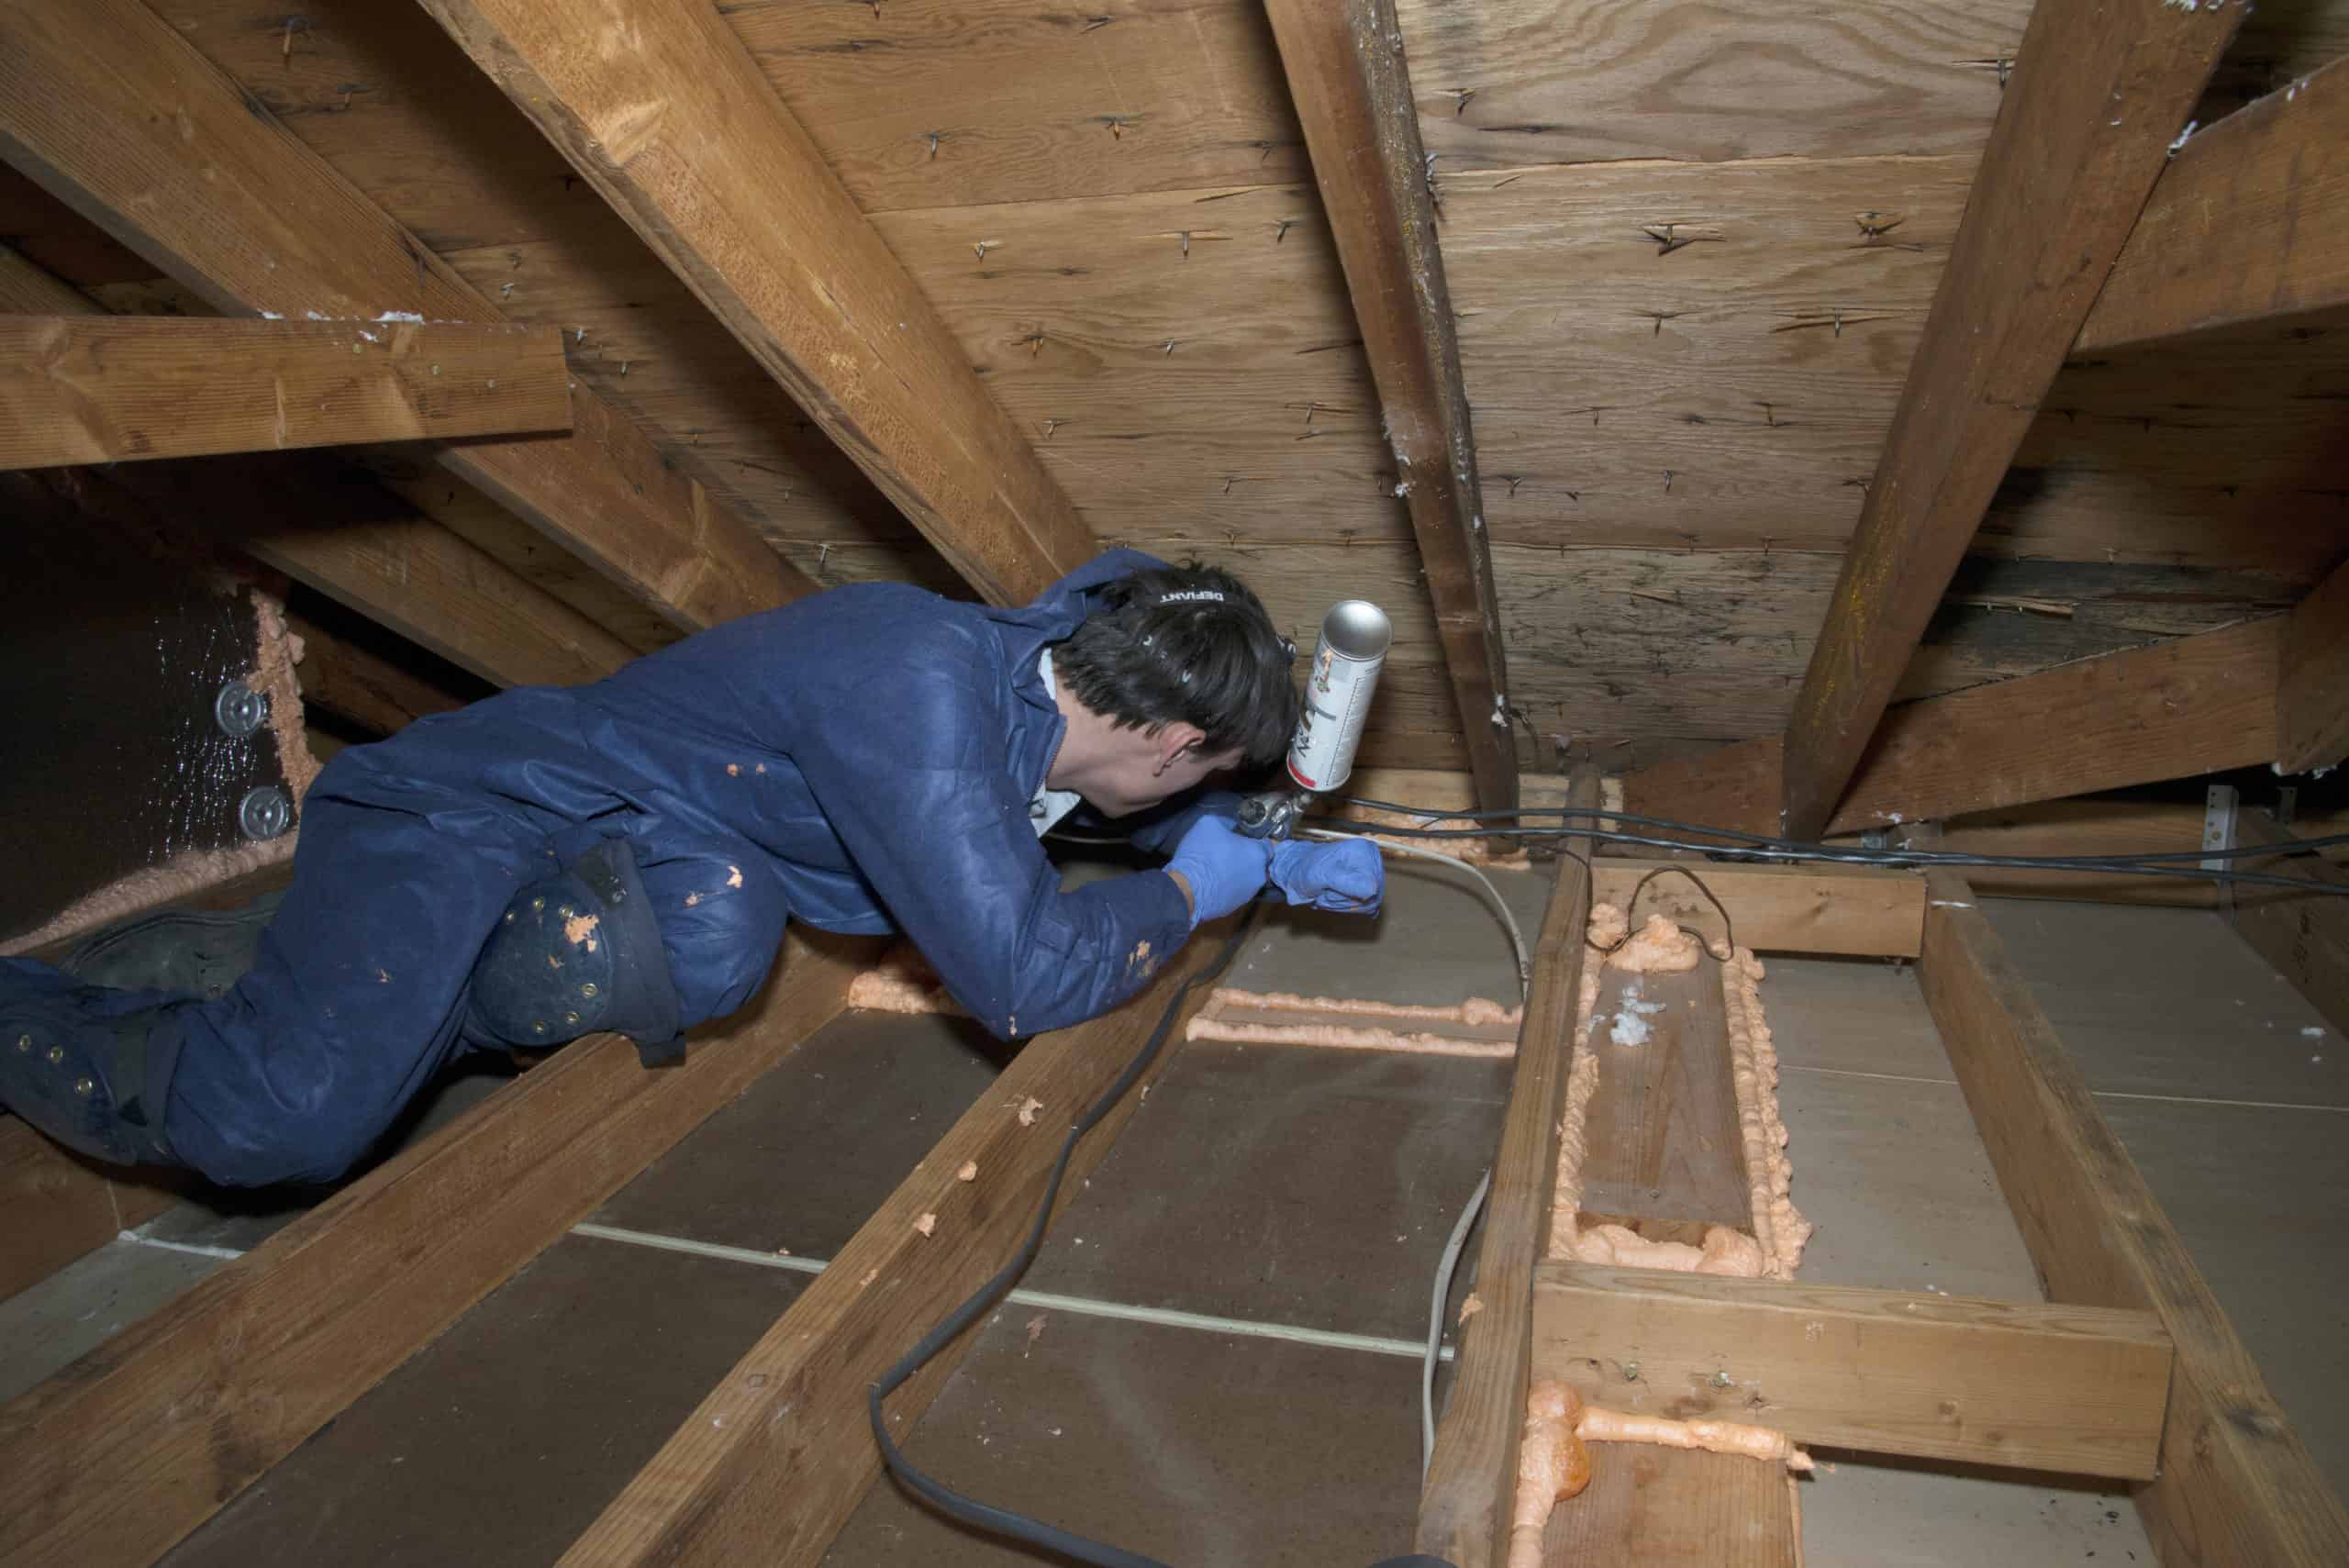
What happens when your insulation gets wet? Does moisture ruin your insulation? Will the insulation do its job properly if it gets wet, and can you dry out wet insulation? These are some of the questions that most homeowners who look for attic insulation in Houston ask. While insulation can get wet, different types of insulation may get affected differently by moisture. But even before discussing how moisture affects insulation and what to do if your insulation gets wet, you must understand what may cause your insulation to get wet.

What Causes Insulation to Get Wet?

There are many reasons why insulation may get wet. Common ones include:

Leaky gutters or roofs: If your gutters or roofs are in bad condition, they can allow water to enter your home and wet your insulation. 

Plumbing leaks: If you have any appliances or pipes running through your insulation, a leak in those pipes can wet your insulation.

Increased humidity: If the air in your house is highly humid, it can cause moisture to collect on your insulation and make it wet.

Flooding: If your home experiences a flood, the water from the flood can enter your insulation and wet it.

Poor ventilation: Inadequate ventilation in your crawl space or attic can trap moisture in your insulation and make it wet. 

What are the Effects of Wet Insulation?

While most insulation is designed to be moisture-resistant, it can cause havoc in your home if it gets wet. It can lose its insulation properties, leading to loss of heat, bad air quality, and increased energy bills. Listed below are some of the effects of wet insulation:

R-Value

Every type of insulation has an R-value. This indicates how effectively the insulation can trap heat in the building. The higher the R-value, the better the insulation is. When your insulation becomes wet, its R-value decreases as the water displaces the trapped air. As a result, the insulation will become inefficient and increase your heating and cooling costs. The insulation will then become a conductor of heat and will transmit heat instead of blocking it. 

Air Quality and Mold Growth

Mold growth can cause serious health problems in damp areas. Mold thrives in dark and moist areas and can be challenging to eliminate. It can cause health problems like coughing and asthma attacks. Since insulation is installed in small areas for moisture to escape, it can become the perfect place for mold growth if it becomes wet. Eventually, the mold will show itself on the walls as black spots and spread in the room, affecting the air quality.

Signs of Wet Insulation

Since walls, ceilings, or floors hide insulation, you may not even notice that it has got wet or moist till you start seeing the damage the moisture has caused. Certain signs may indicate moist insulation in your home. Listed below are a few of those signs:

  • Mold growth
  • Damp or moist smell
  • Stains on the wall
  • Peeling wallpaper
  • Flaky or peeling paint

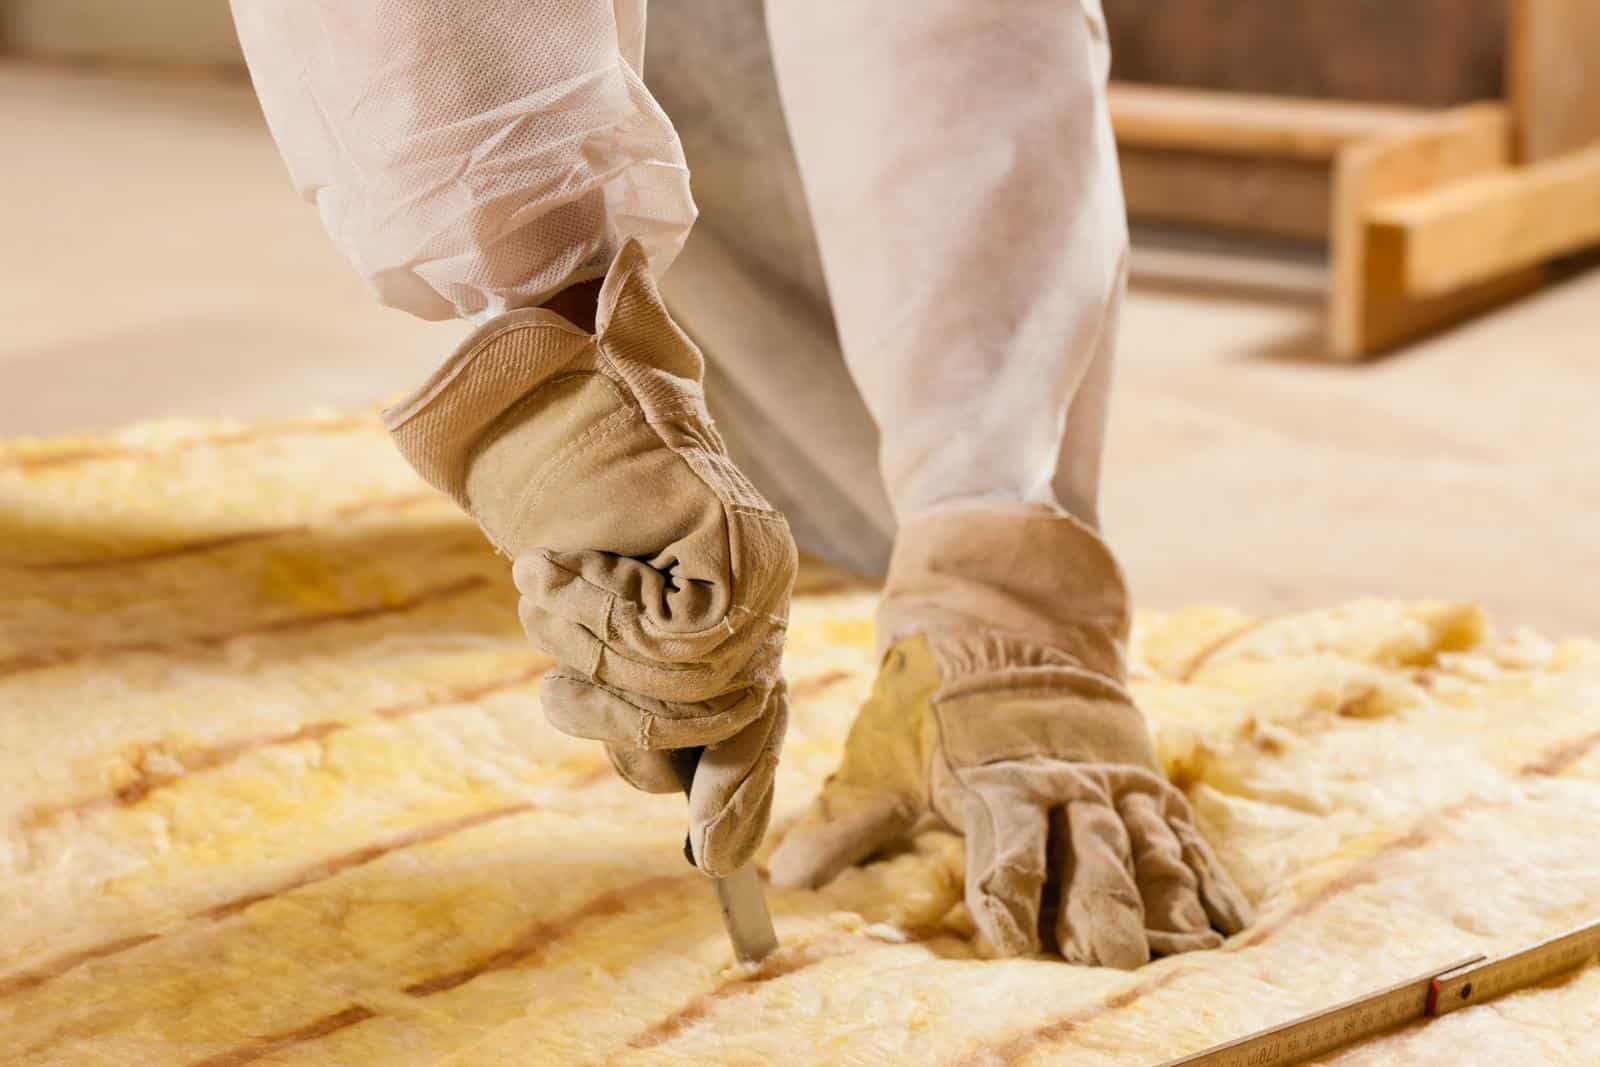
If you suspect your insulation is wet, you can check for increased moisture levels in the wall cavities using a moisture meter. Most of the time, however, you must open the wall cavity to see if the insulation is wet. 

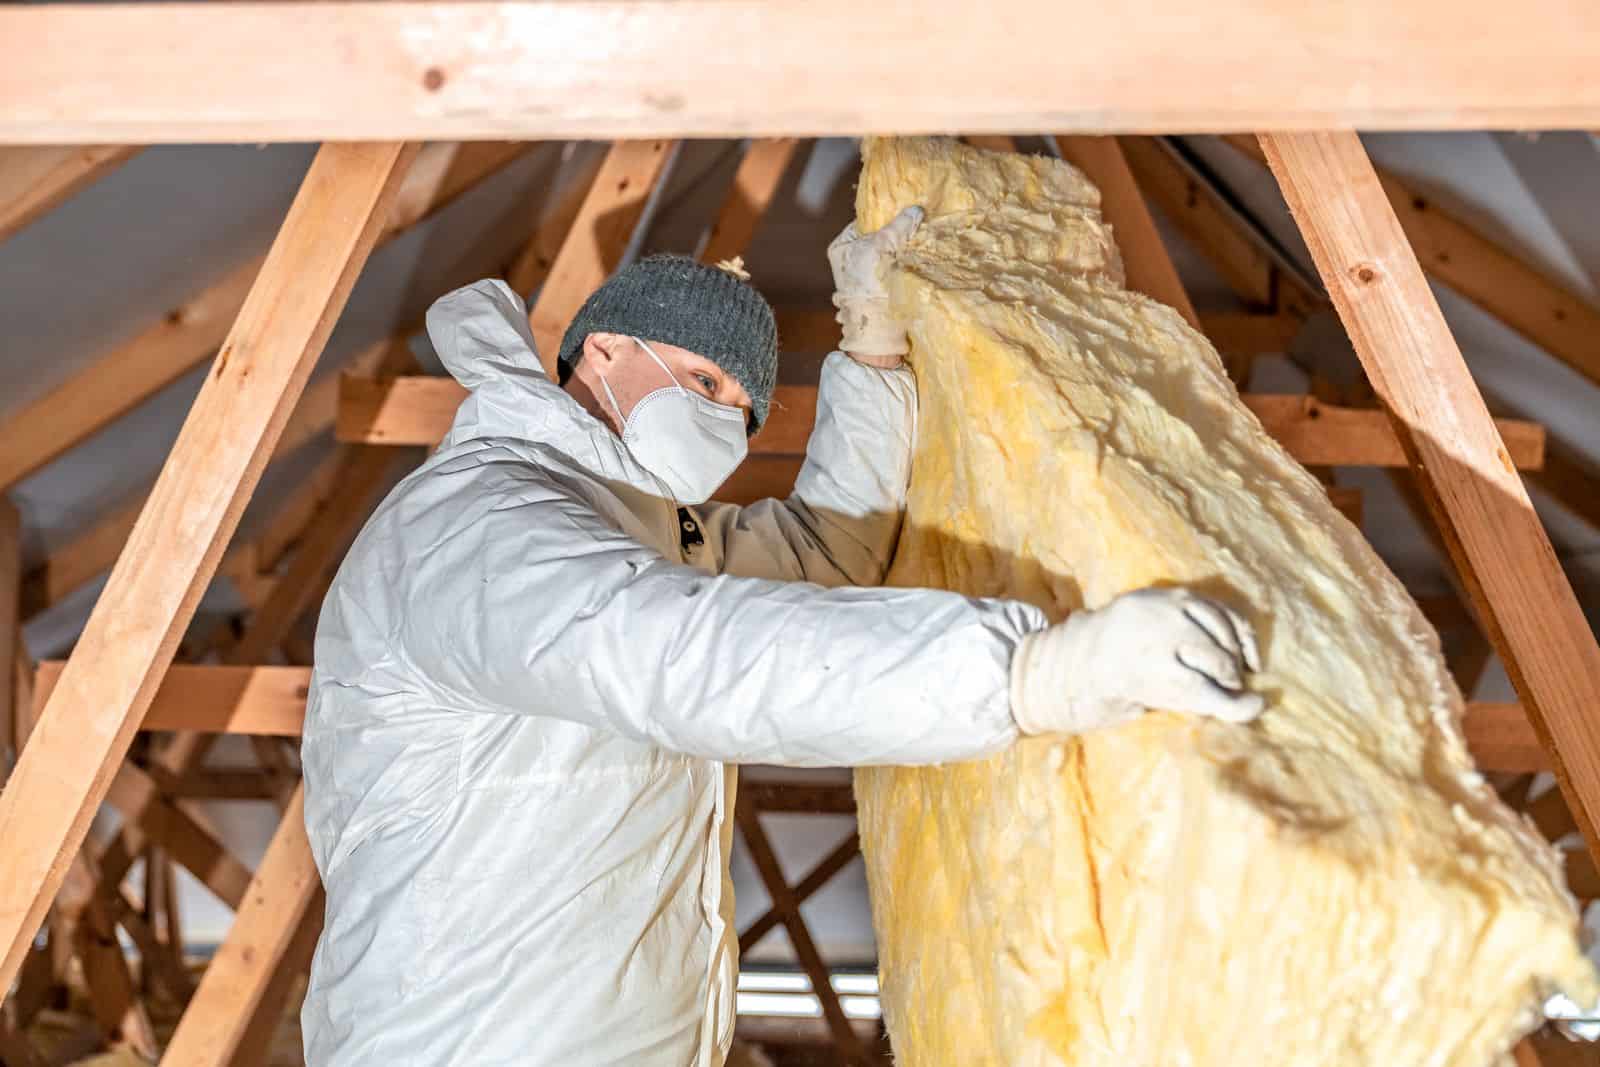
What Happens if Fiberglass Insulation Gets Wet?

Wet fiberglass insulation, over a period of time, will lose its insulating properties. The thin and wet glass fibers will expand the material, making it less capable of trapping heat. The moisture will break the fibers down and affect the insulation’s durability. If you notice moisture on your ceilings or walls, you must get your insulation inspected immediately. You may have to remove the drywall and dry your insulation before repairing the ceiling or wall. 

What Happens if Cellulose Insulation Gets Wet?

Cellulose loose-fill insulation is commonly used in the attic. When it gets wet, it can lose its effectiveness. Once cellulose absorbs water, it gets heavier, making it difficult to provide the required insulation. The combination of warm air and moisture in the cellulose insulation can lead to mildew and mold growth. In some cases, the wet insulation may also begin to rot, leading to structural damage. If your cellulose insulation is getting moist, immediately act on it. Dry the area and replace the insulation if damaged. 

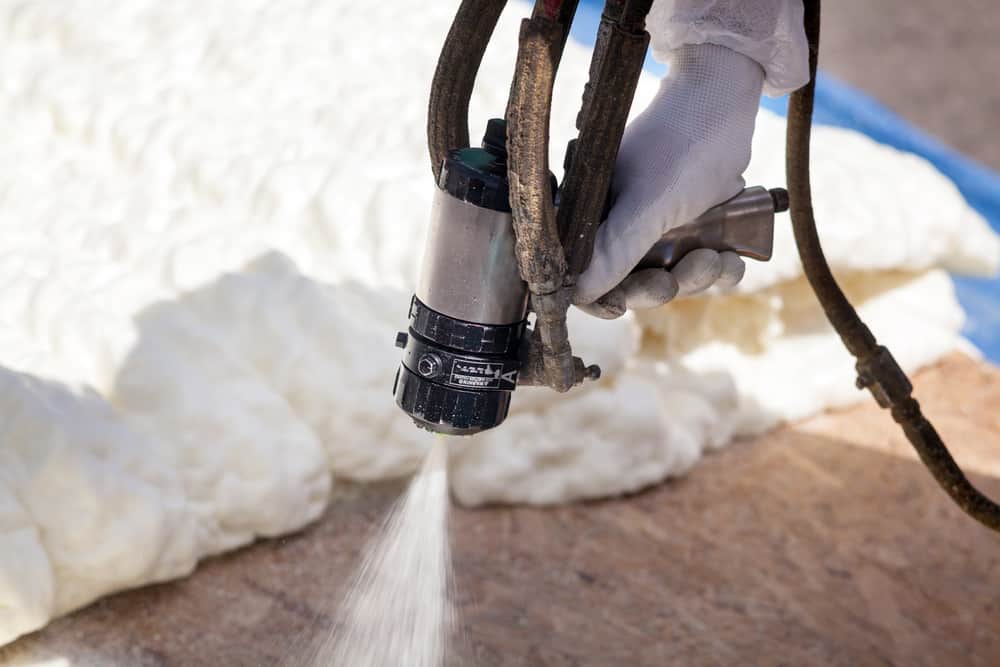
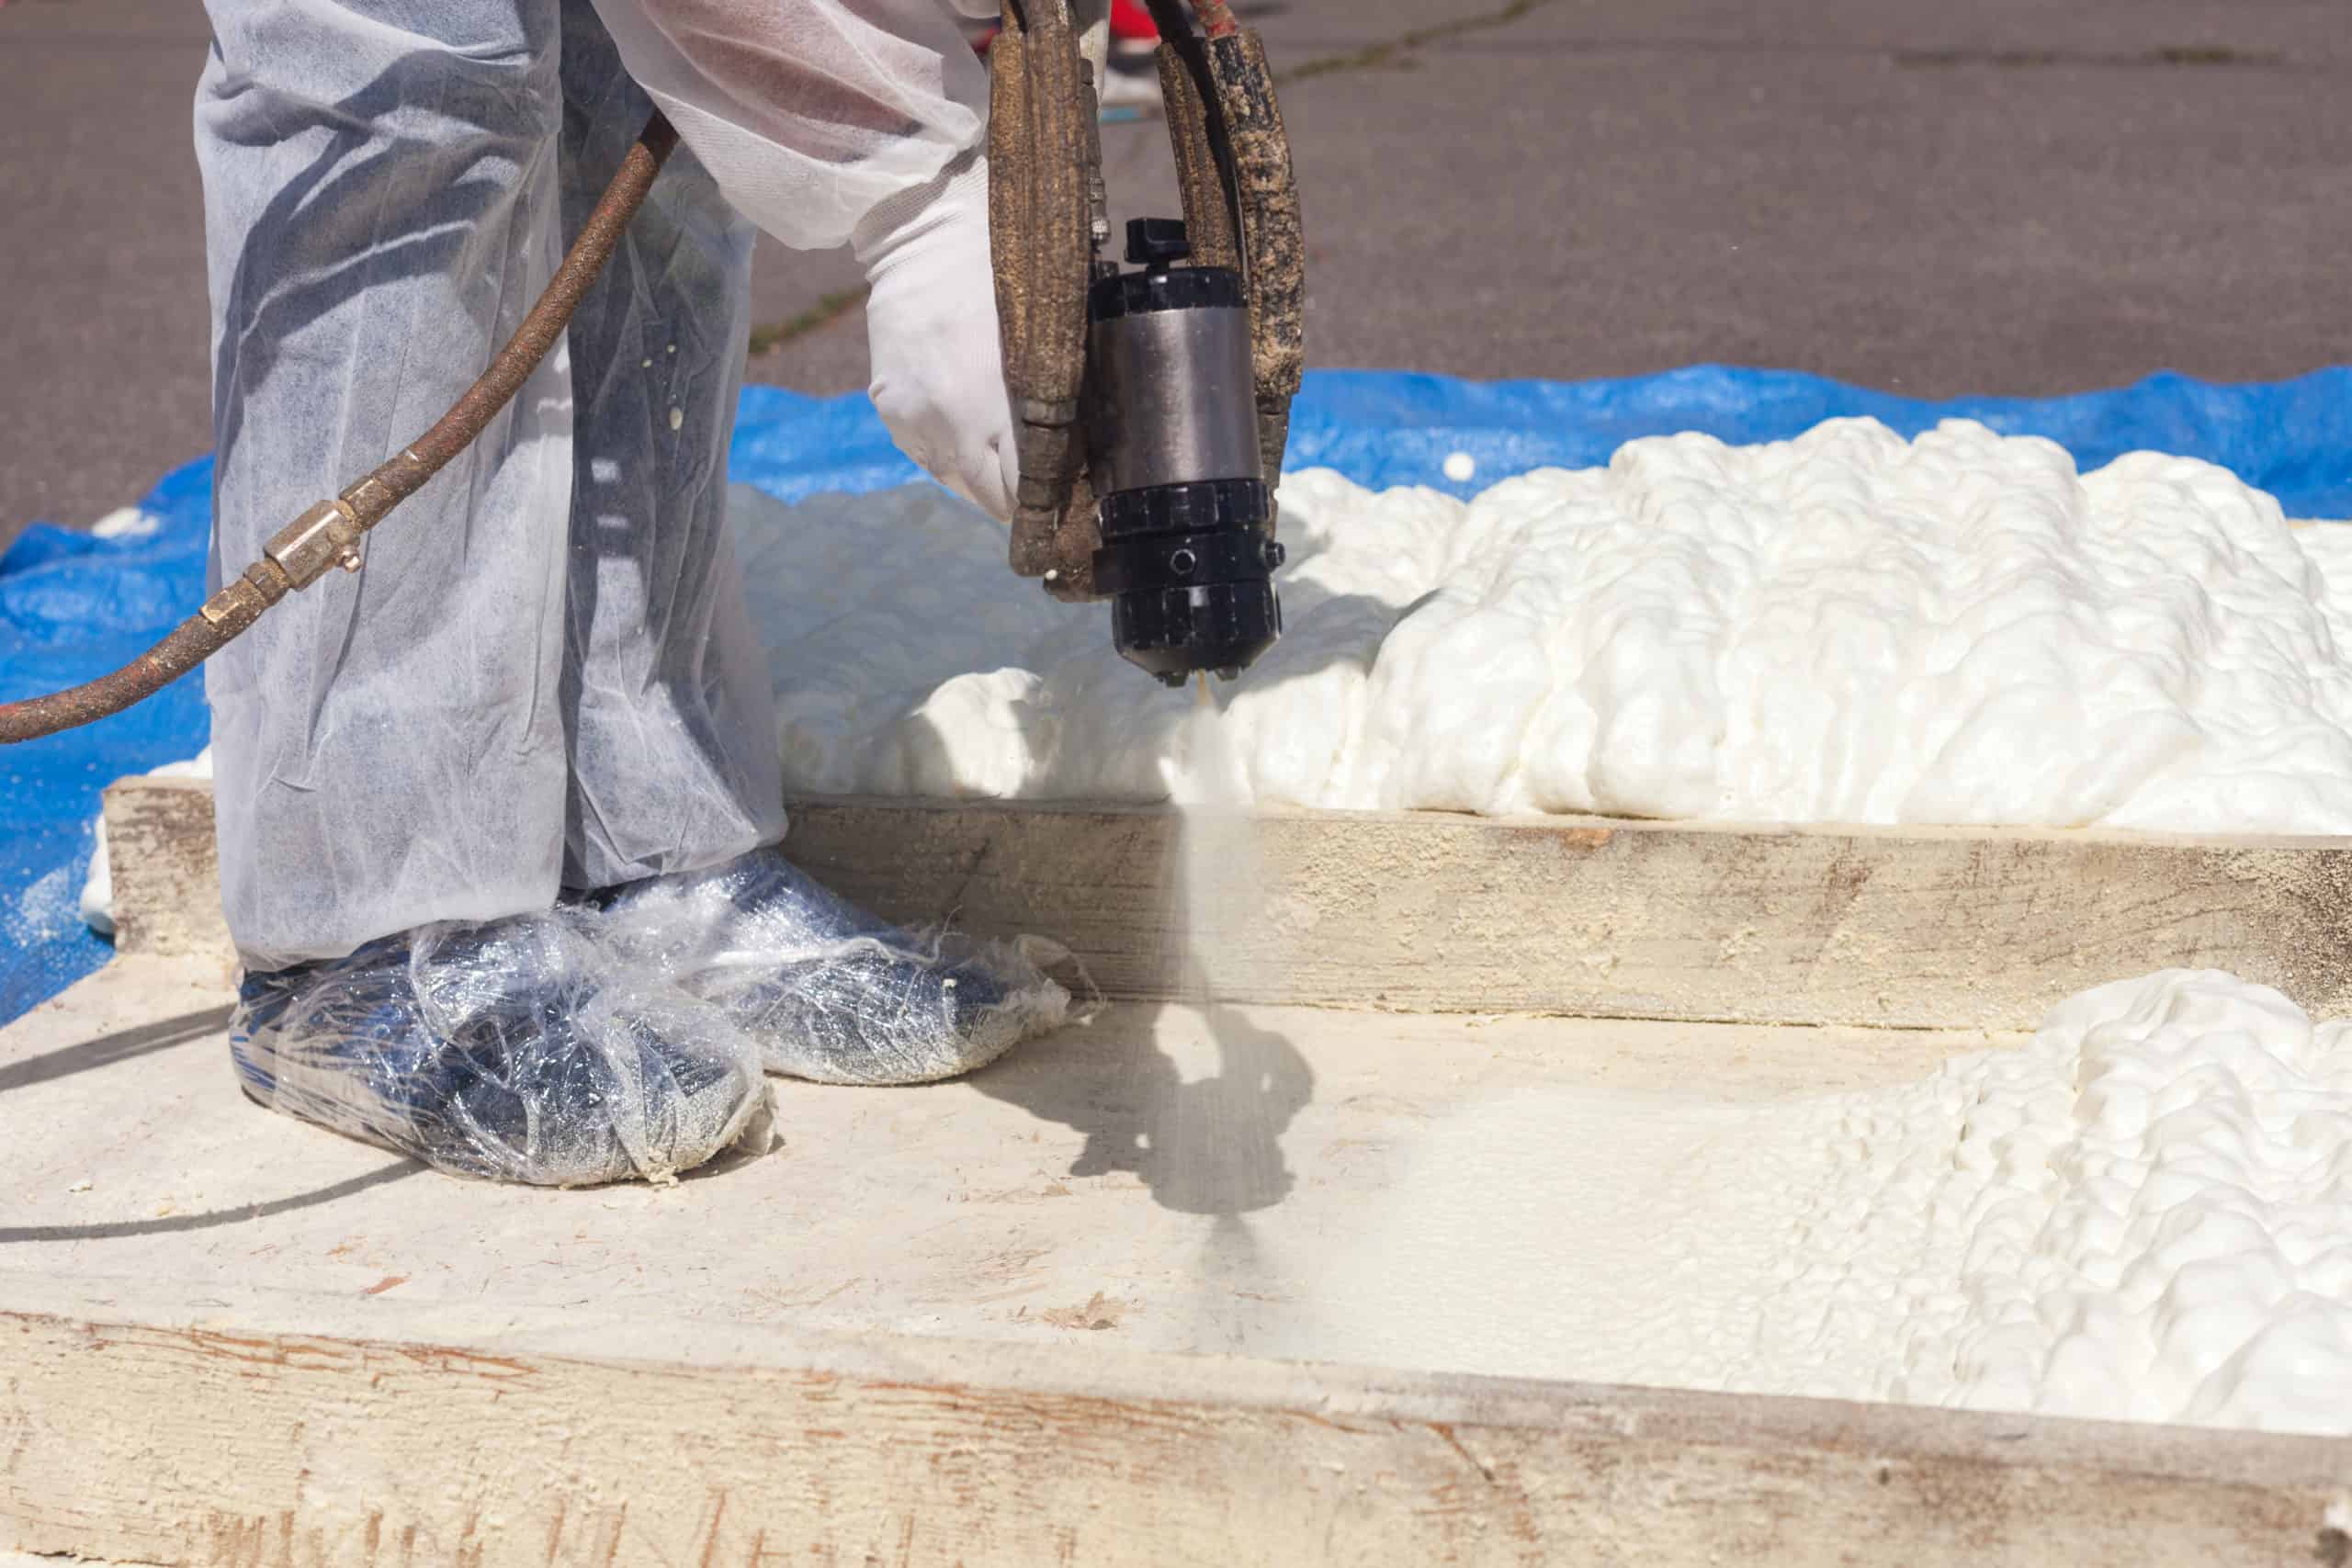
What Happens if Sprayfoam Insulation Gets Wet?

Spray foam insulation is usually water-resistant and creates a moisture barrier between the walls and the foam. It will not absorb too much moisture and won’t promote mold or mildew growth. However, there are a few things you should be careful about if this insulation gets wet. First, ensure you dry it out as soon as possible. If water sits on the foam’s surface, it can degrade the material over time. Spray foam insulation is heavy when it is wet. Hence, you must be careful while removing it as it can damage your home’s structure.

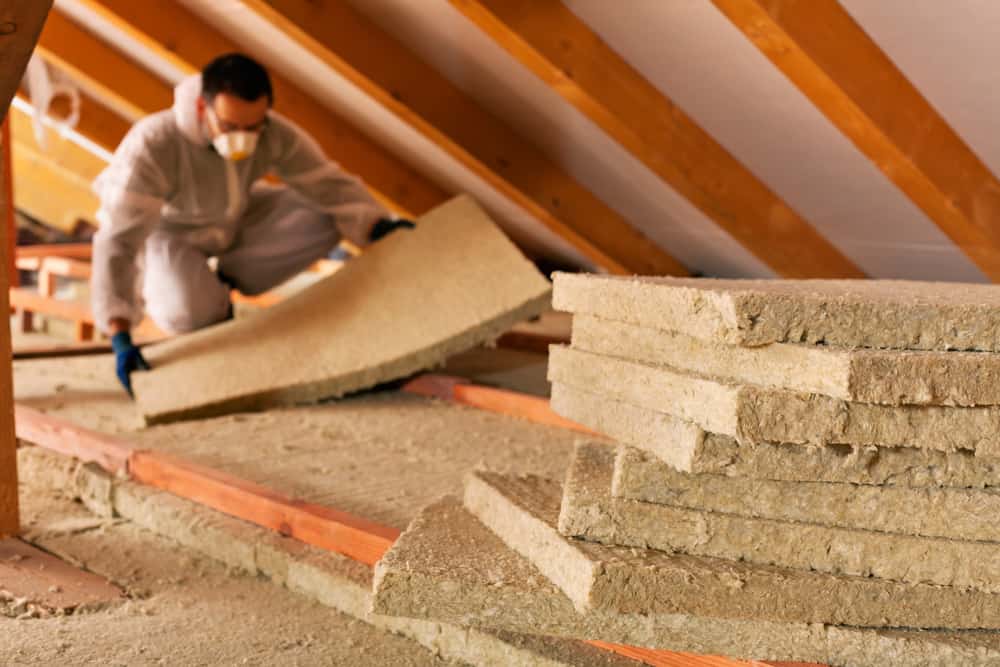
What Happens if Rockwool Insulation Gets Wet?

Though rock wool insulation is not explicitly designed to be moisture-resistant, it can perform decently well in moist environments. This is because it is made from slag or stone, which is naturally water-resistant. In addition, rock wool is treated with a water-repellant adhesive or coating to help it resist moisture. This insulation may also allow vapor to pass through and doesn’t wick water as it is not made of organic material. As a result, it may not promote mold growth as well. If there are leaks around the insulation, it will still get wet. However, it will regain its previous performance once it is fully dry.

Can You Dry Wet Insulation?

It is possible to dry out wet insulation. The amount of time it takes to dry wet insulation will depend on various factors, including the insulation type, the ventilation in the house, and the ambient humidity and temperature. Typically, it is best to replace the wet insulation with a new one to ensure effective performance. However, if you cannot replace the insulation immediately, you can do the following:

  • Remove any stagnant water from the area where the insulation is located. 
  • Dry out the area using dehumidifiers and fans. This will help remove any moisture from the air and help the insulation to dry out more quickly.
  • Blow warm air over the insulation using a fan heater.
  • Once the insulation has dried out completely, check it carefully for signs of damage. If it is deteriorated or damaged, you must replace it with a new one.

Your insulation may require maintenance and repairs from time to time. However, if it gets damaged by water and needs to be replaced, it is best to contact professionals to do the job for you.

https://fdinsulation.com/attic-insulation/spray-foam/ offers attic insulation and air sealing services. We can help make your home comfortable and help you save money on your energy bills. Our services include attic insulation, spray foam insulation, crawl space insulation, and insulation removal and replacement. Contact us for a free estimate of our services or learn more about how we can help you with your home insulation.

air_sealing_install_03-scaled.jpg

The Do’s and Don’ts of Using Expanding Foam Insulation Around the House

Spray foam insulation installation is one of the worthwhile costs most homeowners undertake. The installation helps improve their properties energy efficiency, reduces sound transfer, deters rodents, and protects against common moisture problems.

Spray foams can be a DIYer’s best buddy, but this is only true when the DIYer uses the product appropriately. Manufacturers also encourage the use of spray foams, and this is evident in the proliferation of packaged spray foams contained in pressurized cans with a straw attached. The attached straw makes it easy to apply the expanding spray foam into gaps, holes, and crevices.

While there are different types of spray foams on the market, homeowners and DIYers should stay clear of Icynene. Icynene is a spray foam meant for professional installation. This type of spray foam is perfect for whole-house insulations and often requires specialized equipment.

Buying the Icynene may be a waste of your money and time, especially as they have rapid expansion properties that require professional training for a calculated outcome. On the other hand, Great Stuff is a good option for DIYers looking to seal cracks and address holes around the house.

While you now know the products that may likely work great around the house, it is equally important to know the dos and don’ts of spray foam insulation. Find out everything you need to know below.

Do: Check the Expiration Date on the Product Before Use

Expiration dates are not only valid for food items. We recommend checking the can of spray foam insulation for its expiry date before purchasing.

Buying an expired product can put you at risk, especially as you risk ineffective insulation or exposure to toxic chemicals. While most stores will clean their shelves to remove expired products, you should also confirm that they haven’t skipped some.

If you already have a spray foam insulation can at home, ensure it hasn’t expired before use. If it has expired, dispose of the can into your household waste.

Don’t: Avoid Using Spray Foams Around Outlets and Recessed Can Lights

Homeowners tend to go overboard, especially on their mission to make their homes more energy efficient. The zeal to make your home draft-free shouldn’t overtake important safety and health considerations.

Avoid using spray foam insulations around electrical outlets or recessed can lights. This is because the spray foam can quickly spread around the wires and enter the outlet box. This can make it challenging to address common electrical or wiring issues in the future.

You could set yourself up for huge electrical costs if you apply expanding foam around your electrical outlets. If you must seal holes and cracks around outlets, we recommend using a small fiberglass batt insulation around those areas for easy access.

Do: Use Spray Foams to Silence Noisy Water Pipes

Noisy water pipes can affect the quality of your life and sleep. Your expanding spray foam can come in handy to silence the rattling plumbing work when applied correctly.

Using the long straw attached to your spray foam insulation can access the plumbing area causing the nose and spray some expanding foam around the affected pipe. Doing this will silence the pipe by blocking the sound and locking it in. This can also be a great solution for a water hammer. A water hammer is a problem that occurs when the valve on the pressurized water line closes due to built-up pipe pressure.

Don’ts: Avoid Applying Spray Foams Around Windows

Windows and window frames are common culprits for raft air and heat exchange. In a bid to make their homes more energy efficient, most homeowners may be pushed to apply spray foam insulations around the frames and windows.

This is often a bad idea, especially as the spray foam may solidify and make it harder to open your windows. If applied when the windows are open, you may find it hard to close the window.

If you must apply spray foam insulation around windows, we recommend using low-expansion foams instead of high-expansion foams. Low-expansion foams can expand up to 30 times, while high-expansion foams can expand up to 300 times the liquid size.

For the window area, apply the low-expansion spray foam insulation cautiously along the affected area. This can significantly block heat exchange while also keeping your window functional.

Do: Have a Spray Foam Solvent Close By

Spray foam insulation starts as a pressurized liquid, after which they expand and solidify upon application and exposure. Homeowners often use a saw or other sharp objects to remove excess spray foams from application surfaces. However, they can sometimes drip and stain other unwanted areas during application.

The appropriate cleaning solvent can significantly improve your application process and prevent a messy outlook.

Unsure of which solvent to purchase? Ask questions at your local convenience store and the staff are likely to recommend what works for them or other customers like you.

Don’t: Avoid Using Spray Foam Insulation Around an Open Flame or Spark

Spray foams are designed to impede the spread of fires after they’ve been applied. However, the pressurized and liquefied form contains highly explosive components that should not be exposed to spark or fire.

We recommend that users pay attention to the application surface to avoid the risk of explosion. You should also avoid using the product in closed spaces like crawl spaces and under the cabinet. If you must, ensure that those areas are well-aerated and well-lit to improve your overall safety and reduce gas accumulation.

Another safety tip is to avoid smoking during spray foam insulation application. If using pilot lights or candles, ensure they are turned off before the insulation spray foam is applied. Also, give enough time for the spray foam gas to dissipate before lighting a match or starting a fire of any kind.

Do: Use Personal Protective Equipment When Applying Spray Foam

Safety is an important consideration when applying spray foam, especially in tight spaces. You should have appropriate personal protective equipment and gear, including eye goggles, face or nose masks, respirators to prevent gas inhalation and respiratory problems, and more.

We also recommend wearing gloves and the appropriate protective clothing to protect your skin from irritation when in contact with the spray foam in its liquid form. Other safety considerations include long sleeve clothing and pants, disposable gloves, appropriate shoes, and a cleaning solvent at arm’s length.

Following the above guide can significantly improve your spray foam insulation experience and help reduce draft air in your indoor space. If unsure, contact a Houston spray foam professional contractor now!

Name, Address and Phone

First Defense Insulation 

12 Greenway Plaza Suite 1147 Houston Texas 77046

713-808-9853


ductwork in vented attic houston, tx

Ductwork in the Attic- What Are We Thinking?

Poor Design 

Attics are the extreme opposite temperature of the air that ducts are trying to move to the home. Ducts are very poorly insulated with fiberglass insulation with the latest offering of only R-8.

Summer Issues

During summer months, Texas attics can reach between 125°F- 140°F. Demand on AC systems are severely increased. They have to run longer to make homes comfortable, which also cost more money! Ducts should be carrying nice cool 55° air to distribute to your home. Many times, ducts are placed in the attic and strapped next to the underside of the roof deck- the HOTTEST part of a home in summer. How do you expect 55° air to maintain temperature running through the ducts? Well, it doesn’t! Running cold air through an oven before distributing to the home is not energy efficient and cost you money.

Winter Issues

In winter, cold attics cool ducts and the air in them. In reverse of the summer months, the duct lines in winter are now re-chilling lines. Instead of 120°F air in the ducts, it may now only be 90°F- making homes more uncomfortable and more expensive to heat.

Duct Leakage

As you can imagine, ducts in our homes are very important. Ducts that are poorly sealed and insulated do not do us any favors reducing our energy bills. Ducts that have gaps, holes, or are torn leak air into the attic when the air handler is off. When turned on, the air is now a powered air leak! Air leaked into a vented attic is lost to the outside of the home from ventilation. Heating and cooling the home now becomes even more costly.

Fix The Problem

Air sealing stops leaks and keeps air inside the ducts where it belongs! First Defense Insulation Duct Encapsulation Services adds superior R-value protection to ducts keeping the adverse attic temperature from penetrating the air inside. The best solution is placing insulation at the roof deck to get the ductwork inside the homes thermal boundary. 

DIY Attic Insulation

DIY Attic Insulation Pitfalls

Insulating your attic can be a great way to increase energy efficiency and reduce your energy bills. Although it is best done by a professional, if you’re equipped with the right tools and knowledge, you can turn your attic insulation Houston TXproject into a DIY project. However, as with any DIY project, certain pitfalls can lead to costly repairs and wasted time if the DIY attic insulation needs to be corrected. 

In this blog post, we will discuss the potential pitfalls of DIY attic insulation and how to avoid them. We’ll also enlighten you about the numerous benefits of attic insulation. Read on to learn how to ensure your attic insulation project is a success. Let’s get started.

What Is Attic Insulation?

Attic insulation is a layer of material that is installed in the attic area of your home in order to create a barrier between the home and the outside environment. This barrier helps to keep the air inside your home at a comfortable temperature, as well as keep moisture from entering the attic and causing damage. Attic insulation is typically made from materials such as fiberglass, cellulose, or foam and can be installed either as a loose fill or as a batt or blanket.

Benefits Of Insulating Your Attic

Now that you know what attic insulation is, let’s take a look at some of the benefits of installing insulation in your attic:

Improved Energy Efficiency

Installing attic insulation can reduce the amount of energy used to heat and cool your home, which in turn can help you save money on your energy bills.

Enhanced Comfort

By keeping the air inside your home at a more comfortable temperature, attic insulation can help to reduce drafts and provide an overall sense of warmth and comfort.

Increased Durability

Since attic insulation helps to keep moisture out of the attic area, it can help to protect your home from potential damage due to extreme temperatures and moisture.

Improved Indoor Air Quality

By creating a barrier between the home and the outside environment, attic insulation can also help to reduce the levels of pollutants and allergens in the air inside your home.

Soundproofing

Installing attic insulation can also reduce the amount of noise that enters your home from outside.

Common DIY Attic Insulation Pitfalls

The key to enjoying the benefits of insulating your attic is to ensure that you avoid errors when insulating, especially if you’re taking up the project by yourself. In light of this, here are some common DIY attic insulation pitfalls and how you can avoid them during your DIY attic insulation project

Not Using the Right Insulation

The type of insulation you use in your attic is important. If you use the right type for your climate and needs, you could avoid ending up with a huge energy bill. Make sure you research the type of insulation that’s best for your area and read up on the R-value ratings and other technical details. 

Failure to Properly Seal the Vents and Gaps

Heat and air can escape through vents and gaps in your attic, increasing energy bills. To prevent this, make sure all vents and gaps are properly sealed with the insulation material. This can be done with caulk, spray foam, expanding foam, or other types of sealant.

Failure To Insulate The Attic Floor

Attics are often used for storage, but if the floor isn’t properly insulated, it can lead to heat and air escaping. Make sure you check the floor for any gaps and cracks and then fill them in with insulation

Not Checking for Moisture

Moisture is an enemy of insulation and can lead to mold and mildew. Before insulating your attic, make sure to check for any signs of moisture and repair any leaks in your roof

Not Installing Enough Insulation

Most attics require at least 12 inches of insulation to achieve the desired R-value. Installing enough insulation can lead to a comfortable home and wasted energy.

Be sure to understand these common problems and follow the tips for avoiding common DIY attic insulation pitfalls. However, if you still need to figure it out, it’s best to hire a professional to inspect your attic and ensure it’s properly insulated.

Benefits Of Hiring Professionals To Install Your Attic Insulation

They Have The Right Tools And Experience

Professional insulation contractors have all the necessary tools and know-how to do the job right. They have the expertise to ensure that the insulation is installed to the highest standards, and they can troubleshoot any problems that arise during the installation process.

Early Detection Of Any Potential Issues

A leaky roof, damaged HVAC system, and other issues need to be fixed before proceeding with the attic insulation. If these problems are left unattended, it’ll cause quick damage to your insulation. Thankfully, professionals understand these, and they know where to look to detect problems that can affect the effectiveness of your attic insulation.

They Can Help You Choose The Best Materials

Insulation materials are not created equally, and a professional can help you choose the best materials for your home. They’ll inspect your home and then choose the insulation materials that will keep your attic well insulated.

Quick Attic Insulation

With all the necessary tools and knowledge at the fingertips of the expert insulation contractor, you can be sure that your attic insulation will be done quickly and efficiently. This can save you time and money, and you’ll be able to enjoy the benefits of your insulation sooner.

Correct Insulation

Professionals will ensure that the attic insulation is installed correctly and properly sealed and ventilated. This helps ensure that your home’s energy is efficient and that the insulation is doing its job.

Warranty Protection

Most professional insulation installers will offer a warranty on their work. This can provide you with peace of mind that if anything goes wrong within the warranty period, it’ll be rectified by the installer without having to pay any extra fee.

By hiring professionals to install your attic insulation, you can rest assured that all the pitfalls peculiar to DIY attic insulation will be avoided. You can learn more about attic insulation here; https://fdinsulation.com/attic-insulation/spray-foam/. We also offer spray foam insulation financing opportunities, to make your investment less stressful.


Name, Address, and Phone

First Defense Insulation, 

12 Greenway Plaza Suite 1147 Houston, Texas 77046, 

713-808-9853


https://www.facebook.com/FirstDefenseInsulation

https://www.instagram.com/firstdefenseinsulation/?hl=en

diagram of the home after installation of spray foam in Houston

Residential Insulation: Why Choose Spray Foam

For homeowners considering residential insulation upgrades, spray foam provides an outstanding option for superior energy efficiency and comfort. As a company, we offer insulation financing to make your life easier. Not only does it act as a complete air barrier, sealing everything from small cracks to larger spaces in walls and floors, but spray foam has one of the highest insulation R-values on the market. In this article, the attic insulation contractor in Houston will explain why you should choose spray foam for your next residential insulation project. Let’s start by first understanding what spray foam insulation is.

What Is Spray Foam Insulation?

Spray foam insulation is a thermal insulation polyurethane foam (SPF) product spray-applied in liquid form into wall cavities, attics, and other parts of a home. As the foam expands, it forms an airtight seal that helps to keep heated and cooled air inside the home while preventing drafts, heat loss, and air infiltration. A spray foam insulation’s high R-value makes it one of the most efficient and effective insulations. The R-value measures the insulation’s capacity to withstand heat flow, and the higher the R-value, the greater its insulating power. With an R-value of up to 6.5 per inch, spray foam is much higher than traditional insulation materials like fiberglass and cellulose.

Types Of Spray Foam Insulation

Spray foam insulation comes in two types – open cell and closed cell. Let’s look at them in detail.

Open-cell foam

Open-cell spray foam is a lightweight, flexible insulation material filled with air, giving it a spongy texture. It’s typically used in residential projects and has an R-value of 3.5 per inch.

Closed-cell foam

Closed-cell foam has an R-value of 6.5-7 per inch and is made up of tightly packed cells that are highly resistant to air leakage and water vapor penetration. It’s much more rigid than open-cell foam, so you should go for it if you’re looking for extra air sealing and insulation.

Benefits of Spray Foam Insulation

Now that you know what spray foam insulation is, let’s look at its benefits.

Its Moisture-Resistant

Pipe fittings and vents are vulnerable areas for moisture accumulation due to the open spots that may be present around them. Thus allowing water to seep in. Fortunately, spray foam insulation can form an effective barrier against moisture buildup. Due to its ability to penetrate tiny cracks and crevices, spray foam is thus highly effective. Besides, it remains functional even when wet, unlike other insulating materials that may need replacing when they get wet.

Improve Building Strength and Durability

As an inert material that firmly adheres to the roofing structure of a property, spray foam insulation will help to strengthen your property by helping to keep the roofing components together. This is quite helpful if you live in an area prone to strong winds that can lead to the uplift of the roofs. Spray foam insulation can also enhance the slope of your roofing structure, thus improving water drainage and reducing the likelihood of water damage.

It’s Energy Efficient

A home’s running costs can be significantly impacted by heating and cooling expenses. By choosing spray foam insulation, you can help reduce these costs as it provides a superior air barrier that helps to retain heat in winter and cold air in summer. For instance, you can expect energy savings of about 50% if you install closed-cell foam insulation in your attic.

Easy To Install

The ease of applying spray foam insulation makes it appealing. You only need a specially designed gun attached to a hose connected to a foam-containing press container. However, it’s prudent to use a professional installer’s services to ensure the process is done correctly.

Long Life Span

Spray foam insulation is composed of biologically inert materials. This quality makes it durable and resistant to biological growth like mold, which can compromise its integrity. This makes it an excellent option for long-term air sealing and insulation. With minimal maintenance, spray foam insulation can last 80 to 100 years, thus helping you save money on energy bills year after year.

Improves indoor comfort

By creating an airtight seal around your home, spray foam insulation can help to eliminate drafts and cold spots. Thus creating a comfortable living space that doesn’t have the challenges of fluctuating temperatures. In addition, limiting drafts of air also improves the air quality in your home. This can be beneficial to those suffering from allergies and respiratory problems.

Improve sound resistance

Imagine the noise pollution of living along a busy street or having neighbors who like their music too loud. Fortunately, spray foam insulation can help you create an effective barrier against external noise. The foam’s sound-absorbing properties can help to reduce the overall noise levels. So spray foam insulation is an excellent option if you want to enjoy more privacy or peace and quiet in your home.

It’s good for the environment

Due to its longevity, homes with spray foam insulation will require less use of consumable insulation materials over time. Thus making it ideal for reducing your carbon footprint. Moreover, its ability to prevent air leakage also helps reduce the energy needed to heat or cool a home. As a result, fossil fuel-based energy emissions can be reduced.

An Investment For Your Home or Building</h3>

Depending on where you stay, installing spray foam insulation may qualify you for rebates and tax incentives. And the reduction in utility bills over the long term will help offset the upfront costs. Besides, a well-insulated home also attracts a better resale value. Investing in spray foam insulation makes your home more durable and energy efficient. It also offers soundproofing capabilities and improved indoor comfort. Additionally, its environmentally friendly properties make it a great option for those looking to reduce their carbon footprint. If you’d like to upgrade your Houston spray foam insulation give us a call now! You can enhance your home’s comfort by working with us.

Name, Address and Phone

First Defense Insulation,  12 Greenway Plaza Suite 1147 Houston Texas 77046,

Does Spray Foam Insulation Burn Easily?

One of the questions people ask when choosing spray foam insulation Houston, TX, is whether spray foam insulation is flammable. While it may not look like a significant question, most homeowners want to know if spray foam insulation is flammable, as fire safety is vital in any home. The right insulation can make your house feel safer and more energy efficient.
More people are turning to spray foam as a home insulation option, and it’s hard not to see why. First, spray foam is non-toxic. It is also an effective insulation solution. So, let’s find out about fire safety.

Is Spray Foam Flammable?

Yes, spray foam is flammable; However, it only burns and ignites if exposed to an adequate heat source. Spray Foam usually self-extinguishes when the heat source is removed.
Spray Foam manufactures send their products for testing before their products are available to the marketplace. After testing, a Code Compliance Research Report (CCRR) is provided. This report shows the foams Flame Spread Index and Smoke Development. Building codes dictate how spray foam should be protected by an ignition barrier or thermal barrier. Barriers commonly used include drywall or tested coatings that go over the foam.
Depending how the end user configuration of the space is completed will dictate what path your installer will need to take to ensure code compliance is achieved. Considering spray foam in Houston, Tx? Our team of experts understand code compliance and can guide you in ensuring you are covered by the correct products.

Is Spray Foam an Excellent Insulation Option for your Home?

Despite being flammable, spray foam is still an excellent insulation option for your home. Here’s why spray foam is an excellent solution:

Roofing and Exterior Applications

One of the primary reasons spray foam is the go-to insulation is that it is effective in sealing roofs and other exterior areas in the home. Spray foam creates a powerful bond with the roof and helps strengthen the resistance to pressure and wind. It also reduces sound as it creates a barrier against loud noises.

Attic Applications

Spray foam expands. This expansion feature enables the insulation to fill up all the holes and cracks in crawlspaces and attics. By creating an airtight seal, the insulation makes your attic less penetrable to air infiltration. This insulation also gives your attic a moisture barrier by keeping water from seeping through crevices, holes, and cracks.

Interior Cavity Fills

Spray foam insulation provides better protection against mold and mildew. The polymer contained within the spray foam material creates a barrier from moisture, which ensures that there is no food source for bacteria or mold.
The walls of any building are its main structural component, as they help it withstand any amount of force, like strong winds. The spray foam insulation fills the wall’s interior cavity and efficiently provides additional strength and support to the building.
While every type of insulation is flammable, it still doesn’t impact spray foam’s benefits. Therefore, ensure that you don’t expose your spray foam to any external heat source and keep your family and loved ones safe. But if you are looking for further information on how spray insulation works, you can read about how insulation works.

First Defense Insulation
12 Greenway Plaza Suite 1147 Houston Texas 77046,
713-808-9853

Find us on Social Media
https://www.facebook.com/FirstDefenseInsulation
https://www.instagram.com/firstdefenseinsulation/?hl=en


Four Essential Spray Foam Safety Tips

When it comes to applying spray foam insulation, getting an effective result should not be the only thing you aim for. You must also take safety seriously. Trained spray foam insulation contractor Houston understands the dangers of misusing spray foam. This is why they make sure to educate people who plan on going the DIY way.

If you are considering DIY spray foam insulation, here are some essential safety tips to follow.

Use Respirator and Goggles

The first step to ensuring safety while installing your spray foam is using proper Personal Protective Equipment (PPE). The recommended respirator is a full face fresh air mask.

Protect Your Body

Asides from your eyes and nose, other parts of your body also need protection during spray foam installation. This is because spray foams are aerosols designed to stick and expand on surfaces. Therefore, your skin should be well protected before carrying out the installation process. You can do this by wearing a disposable overall that leaves no part of your skin exposed. It should come with a hood to protect the other parts of your face that are not protected by the goggles and respirator. It is also necessary to use disposable, hand and wrist covering gloves to carry out this task. Taping your gloves to your sleeves is a great way to ensure that they don’t slip off while working.

Prepare The Workspace

Before starting work, you must ensure that everyone not in protective gear has vacated the building. For safe and effective spray foam insulation, you also have to consider the safety of others. You must also ensure that the surfaces that you are applying the spray foam on are dried. Spraying a surface with a moisture rating of over 18% will lead to improper adhesion. To effectively measure the surfaces’ dryness level, you may need a moisture meter.

Always Have A Spray Plan

For an effective result, you will need a spray plan. This plan should include how the spray will be applied, the locations that it will be applied on, and when the building can be reoccupied again. You should ensure that your spray tanks are at the right temperature— 75°F-85°F. You should also check if the spray contents are coming out evenly by first pointing the gun into an empty bag.

Generally, after installing your spray foam, unprotected people will have to wait for up to 24 hours before re-entering the premises again for their safety.

To know more about spray foam insulations and others, make sure to visit https://fdinsulation.com/attic-insulation/spray-foam/

First Defense Insulation
11715 Anderson Road
Willis Texas 77318
713-808-9853

Social Accounts

https://www.facebook.com/FirstDefenseInsulation

https://www.instagram.com/firstdefenseinsulation/

Common Attic Insulation Problems And How to Solve Them

Common Attic Insulation Problems And How to Solve Them

Attic Insulation is very vital for lowering your home’s energy bill and keeping you comfortable all year round. So, if it’s lacking, you should consider contacting a company offering Attic insulation in Houston, TX to help you insulate your home. However, if you notice your energy bills are still on the rise despite having insulation, there are likely to be some faults with your insulation. 

Your home’s Insulation may develop some issues over time due to age, environment, or lack of proper maintenance and become less effective. Here, we’ll explore common faults homeowners experience with their insulation and how to fix them. Quality should always be primary especially if you want to benefit from grants and insulation financing opportunities.

Common Attic Insulation Problems and How to Solve Them

Missing or Inadequate Attic Insulation

Not installing your insulation properly can increase the humidity in your attic, enhance mold growth, allow pests to enter your attic, and so on. It can also cause your home to be uncomfortable during cold and hot seasons since hot or cold air can easily seep into your home. In addition, your HVAC will have to work harder to regulate your home’s temperature, which will significantly increase your energy bill. Some areas where insulation may be inadequate include attic entrances, vents, windows, skylights, etc. 

  • Solution 

To ensure that insulation is not lacking or inadequate in any part of your attic, have a local insulation contractor examine your home. Experienced contractors will know the weak areas in your attic and ensure that they are properly insulated for maximum effectiveness. 

Uneven Attic Insulation

When installing your attic insulation, you should make sure that the material is properly laid in every area. If you’re using blown-in insulation, you should pay attention to how it is laid. That is because, despite blown-in insulation being easy to install, they are rarely distributed evenly across the attic. This can reduce its effectiveness and also increase your energy bill. 

  • Solution

Although some homeowners can try installing their insulation themselves, there are higher chances that it won’t be installed properly. The best way to avoid unevenly layered insulation is to hire an insulation contractor to do the installation.

When you work with an insulation contractor, you can be assured that the insulation will be distributed evenly and work effectively to maintain your home’s temperature. 

Blocked Attic Ventilation

If you’re using the traditional insulation type, your attic needs to be well-ventilated. 

If the vents in the attic are blocked, there will be inadequate airflow which may lead to mold or mildew growth. This is extremely hazardous as mold spores can cause several health issues when inhaled. 

  • Solution

When installing your insulation, make sure they are not obstructing the air vents in the attic. If they already are, you can have an insulation contractor rework your insulation. 

Collapsed Insulation

Attics make for good storage spaces. However, the kind of items you store in your attic can affect its effectiveness. For instance, stacking heavy boxes or bulky items can compact your insulation or cause it to collapse completely. When your attic insulation gets compacted or collapses, it reduces its  R-value. That is, it becomes less efficient in maintaining your home’s temperature, which makes your home less energy efficient. Alternatively, with a high R-value, your insulation will be able to maintain your home’s temperature throughout the different seasons of the year. 

  • Solution 

The best way to prevent your insulation from collapsing is to avoid storing heavy items on top of the insulation. You can invest in other attic storage options that won’t impact your insulation over time. You can also consider storing heavy items on solid flooring rather than atop your insulation. 

Pest Infestations

Your attic can become a perfect space for pests to nest, especially if your attic is not finished properly or the insulation is inadequate. Common pests that you can find living in your attic are Birds, Rats, Squirrels, Raccoons, Spiders, Mice, etc. Pests such as rats, squirrels, and raccoons can be detected easily as they can create sounds that can be heard from outside the attic. Other pests, such as insects, are not easily noticed and are more challenging to deal with. 

  • Solution 

Pest infestation in your attic is mostly due to gaps or holes in your insulation. To solve the problem, first, contact a local pest extermination company to get rid of the infestation. Then find the areas where insulation is missing, and block them off with replacement insulation barriers or spray foams to prevent pests from entering the attic or consider changing the insulation entirely. 

Ice Damming

People that live in colder climates are more likely to experience ice damming. Although ice damming doesn’t happen in your attic, they can be a sign of faulty attic insulation. Ice damming happens when the snow melts on your roof and re-freezes at the edges of the roof. Asides from creating hazardous icicles on your roof, ice dams can also cause extensive damage to the roof itself. 

  • Solution 

Ice damming often occurs when there is inadequate attic insulation. Attics can get too cold during the winter if it is not properly insulated. This contributes to frozen sheets and icicles forming on your roof. To get rid of the ice dams, you can contact professionals that provide ice dam steaming to remove the frozen sheets for you. Once the winter is over and the weather becomes more favorable, you can look into improving your attic’s insulation. 

When the temperature in your home becomes uncomfortable for you and your family, and your energy bills begin to skyrocket, it’s a sign that there’s a problem with your attic insulation. Look no further; take the next step by getting an insulator contractor to solve your insulation problems. When you work with insulation experts, you can trust your insulation to serve you well in the coming years. 

Suppose you don’t know where to turn to for help with your attic insulation; you can visit https://fdinsulation.com/. 


Name, Address, and Phone

First Defense Insulation, 

12 Greenway Plaza Suite 1147, 

Houston, Texas 77046, 

713-808-9853


Follow Us On Social Media

https://www.facebook.com/FirstDefenseInsulation

https://www.instagram.com/firstdefenseinsulation/?hl=en

Spray foam insulation

Common Terms And Concepts Behind Spray Foam Insulation

Not many people understand what spray foam is. Spray foam insulation Houston is an alternative to traditional building insulation, such as fiberglass. The term spray foam can also refer to plastic foam materials used in the building and construction industry to provide heat insulation and minimize air infiltration.

R-value Meaning

This refers to the degree to which a substance can resist heat flow. The higher this value is, the higher the ability of the material to resist heat. Implications with a high r-value are better insulation. For instance, the paper has a lower heat resistance than a styrofoam cooler. Insulation works like a flask and is measured in inches. The higher the insulation capacity, the more efficient the insulation. Spray foam has a high R-value.

Meaning of Board Feet

A board fit simply means one foot by one foot by one-inch thickness. It is used to calculate the r-value in spray foam projects.

Spray Foams Types

There are two main Spray Foam types used in residential and commercial applications. Although they are alike, each has its own uses.

Open-cell

Open-cell foam has a lower R-value per inch. It has an average R-value of 3.7 per inch. This foam is ideal for homes, commercial buildings, and soundproofing.

Closed-cell

Closed-cell foam is denser, often referred to as 2 pound, and achieves a R-value of 6.6 per inch. Closed-cell is a class II vapor retarder and does well in crawl spaces and conditioned wine rooms.

Foam Expansion

Spray foam has the highest expansion abilities. This makes it ideal for insulation since it can fill every space and crevice to provide the best insulation services and the best sealing ability than other materials. Spray Foam can expand up to 100 times its original liquid volume.

Estimating Spray Foam Costs in Insulation

To effectively estimate the cost associated with your project- First Defense Insulation staff can meet you on site. We also can work with scaled plans and return a cost proposal.

For all your Spray Foam needs

Are you building a new home, a commercial building, or you already own a home, but are looking to make your energy efficiency better? First Defense Insulation will take care of you with a wide variety of great services. We have a great team of professionals that take pride in offering insulation services to our customers so that they enjoy the amazing benefits of having a home with reduced heating and cooling costs and a healthier indoor quality.

First Defense Insulation

7730 Pinemont Dr, Ste 100

Houston, Tx 77040

Social Acounts

https://www.facebook.com/FirstDefenseInsulation

https://www.instagram.com/firstdefenseinsulation/?hl=en

How to Remove Insulation from Your Attic?

Hey there! If you’re thinking about removing old attic insulation, you’ve made a smart decision. Whether it’s getting dusty, less effective, or you’ve had a critter invasion, replacing old insulation can seriously ramp up your home’s comfort and energy efficiency. We’ve been down this road ourselves and can tell you, fresh insulation makes a huge difference in how your home feels and how your energy bills look.

Insulation Removal and Replacement

Assessing Your Current Insulation

First things first, you’ve got to know what you’re dealing with up there. Pop your head into the attic and take a good look. Is it batt insulation, those fluffy pink rolls? Or is it blown-in cellulose that looks like a sea of gray confetti? The condition matters too—is it soggy, compressed, or does it crumble in your hands? This will tell you if you need to just top it off with new stuff or strip it all out and start fresh. We’ve found that understanding what’s up there is half the battle.

Planning for Removal and Replacement

Now, let’s talk shop about getting this job done safely and effectively. Safety first, always. Gear up with gloves, a good mask, and some goggles. You don’t want to be breathing in those fibers or getting them in your eyes. And let’s not forget about setting up proper lighting; you need to see what you’re doing.

Choosing the right insulation to replace the old stuff is crucial. You want something that suits your climate and energy needs. We’ve been at this for over 35 years at First Defense Insulation, and we always recommend going with materials that are durable and have the best energy efficiency ratings. Getting this right means lower bills and a cozier home, and who doesn’t want that?

Best Way to Remove Attic Insulation

Evaluating Different Methods

When it comes to pulling out old attic insulation, the approach varies based on what kind you’ve got up there. For batt insulation—those rolls or sheets of fluffy material—it’s generally about rolling them up carefully and bagging them. But if you’ve got blown-in insulation, you’re looking at a different game; this type requires a vacuum system to suck all that loose material out efficiently. Each method has its perks, but the key is choosing one that works best for your specific insulation type and your ability to handle the equipment.

Step-by-Step Removal Process

Alright, let’s get down to brass tacks. Here’s how we do it effectively and safely, based on our years in the business:

  1. Gear Up: Safety can’t be overstated. Get into some coveralls, gloves, a good mask, and safety goggles.
  2. Clear the Space: Before you start, make sure the attic is clear of any stored items or debris that could get in the way.
  3. Removal Techniques:
    • For Batt Insulation: Start at the farthest corner of the attic. Roll up the batts slowly and place them into large trash bags. Avoid tearing the material as it may release more particles into the air.
    • For Blown-In Insulation: Set up the insulation vacuum outside your home with the hose reaching into the attic. Begin at the far corner, methodically moving the hose around to ensure all material is vacuumed up.
  4. Double-Check Your Work: Once you think you’ve got it all, take another look around. It’s easy to miss spots, especially in those nooks and crannies.

By following these steps, you can ensure that the old insulation is removed effectively, setting the stage for a fresh and efficient upgrade. And remember, if it feels like a bigger job than anticipated, calling in professionals is never a bad idea. We at First Defense Insulation are just a call away and ready to help out.

Using a Vacuum to Remove Attic Insulation

Benefits of Using a Vacuum

For those dealing with blown-in insulation, the thought of manually bagging all that loose material might sound like a nightmare. That’s where using a vacuum comes in as a game changer. It’s not just about ease—though it certainly adds a lot of convenience—it’s about effectiveness. A vacuum can quickly and cleanly remove large volumes of insulation without spreading it all over your attic or into your living space. Plus, it minimizes the amount of airborne particles, which is a big win for your lungs and overall cleanliness.

How to Set Up and Use an Insulation Removal Vacuum

Now, let’s get you set up with using an insulation vacuum. Here’s the step-by-step process we recommend, based on our extensive experience:

  1. Choose the Right Vacuum: Not all vacuums are up for this job. You’ll need a specialized insulation removal vacuum. These can often be rented from home improvement stores or insulation suppliers.
  2. Prepare the Area: Before you start, make sure the path to your attic entrance is clear. You’ll be moving a large hose through here, so you want as little obstruction as possible.
  3. Set Up the Vacuum: Place the vacuum machine outside your home to avoid filling your living spaces with dust. Extend the vacuum hose to your attic. This might require some maneuvering, but it’s worth it to keep the mess outside.
  4. Start Vacuuming: Begin at the farthest point from the attic entrance. Systematically move the hose around, ensuring you cover every area. The suction power should capture most of the insulation quite efficiently.
  5. Safety Tips:
    • Always wear protective gear: a mask, goggles, and gloves.
    • Make sure the vacuum is properly grounded to prevent any electrical hazards.
    • Keep the vacuum’s filter clean to maintain optimal suction and efficiency.
  6. Post-Vacuum Cleanup: Once all the insulation is removed, go over the area with a shop vac equipped with a fine dust filter to pick up any residual particles.

Using a vacuum for insulation removal not only makes the job faster but also significantly cleaner and safer. If you’re unsure about handling this equipment on your own, don’t hesitate to reach out to us at First Defense Insulation. We’re here to help ensure your attic is properly prepped for whatever upgrade you’re planning next.

Removing Attic Insulation by Hand

When to Choose This Method

Sometimes the old-school method of hand removal is your best or only option, especially in certain scenarios. If you’re dealing with smaller attic spaces where a vacuum hose can’t reach, or perhaps you’ve only got a small amount of insulation that needs clearing out, manual removal makes sense. It’s also a viable method when you need to be extra careful not to damage any underlying structures or wiring, which can sometimes be a risk with mechanical methods.

Tips for Effective Manual Removal

Here’s a straightforward, step-by-step guide to removing attic insulation by hand, based on our firsthand experiences:

  1. Suit Up for Safety: Before you even step foot in the attic, make sure you’re dressed for the job. Long sleeves, gloves, a dust mask, and safety goggles are essential to protect you from irritants.
  2. Prepare Your Workspace: Lighting is crucial. Ensure you have enough light to see clearly, reducing the risk of stepping on anything you shouldn’t. Lay down some boards to walk on if the joists are exposed—it’s safer for you and your ceiling.
  3. Start Removing Insulation:
    • Batts: Carefully roll up fiberglass or rock wool batts and place them into large contractor bags. Try to disturb the material as little as possible to avoid kicking up dust.
    • Loose Fill: Use a dustpan or a small hand shovel to scoop up cellulose or loose-fill fiberglass. Transfer it into trash bags, compressing it gently to avoid airborne fibers.
  4. Be Thorough: Make sure to check all nooks and crannies. Insulation can hide in the oddest places, and leaving old material behind can negate some of the benefits of replacing it.
  5. Clean Up: After all the insulation is removed, vacuum the entire area with a shop vac fitted with a HEPA filter to capture any lingering dust and particles.
  6. Inspect and Repair: Now’s a good chance to inspect the attic for any signs of damage or leaks and make any necessary repairs. This will ensure that your new insulation will perform at its best.

Removing insulation by hand is labor-intensive but completely doable with the right preparation and safety measures. 

Attic Insulation Cleanup

Cleaning After Removal

Once the old insulation is out, it’s crucial to clean up thoroughly to make sure no residues or fibers are left behind. This cleanup is key to prepping your attic for new insulation, and it ensures that your space is safe and dust-free.

  1. Sweep Up: Start with a broom to sweep up any large debris and pile up smaller insulation remnants.
  2. Vacuum: Use a heavy-duty shop vac with a HEPA filter to vacuum the entire attic floor, especially in the corners and under eaves where particles accumulate.
  3. Wipe Down: For any surfaces where vacuuming isn’t effective, use damp rags to wipe down and capture finer dust. This includes walls and rafters.
  4. Air Out: If possible, ventilate your attic for several hours to help clear any airborne dust and fibers. Use fans to help circulate fresh air through the space.
  5. Final Inspection: Do a thorough walkthrough to ensure no areas are missed. Sometimes a second round of vacuuming is needed after the dust has settled.

Preparing for New Insulation

Getting your attic ready for new insulation is just as important as the cleanup. Here’s how to ensure your space is prepped properly:

  1. Repair Any Damage: Check for and repair any damages like leaks, holes, or structural issues. These fixes will support the effectiveness of your new insulation.
  2. Seal Air Leaks: Use caulk or foam spray to seal any air leaks around pipes, ducts, or wiring that penetrate the attic floor. This step prevents heat transfer and increases efficiency.
  3. Install Vent Baffles: If needed, install rafter vent baffles. These ensure that the airflow from your soffit vents isn’t blocked by the new insulation.

Cost Considerations: While preparing for new insulation, keep in mind that the investment can vary based on the materials chosen and the specific needs of your home. Typically, the cost will reflect the long-term energy savings and increased comfort of your home, making it a worthwhile investment. It’s smart to consult with insulation professionals to understand the potential costs and benefits for your specific situation.

Final words:

Tackling the removal of old attic insulation is a significant step toward improving your home’s energy efficiency and overall comfort. We’ve walked through various methods and steps, from assessing the type of insulation you have to the thorough cleanup required after removal. Remember, each method, whether it’s using a vacuum for blown-in types or manually removing batts, aims to make your home more energy-efficient and comfortable.

Safety is paramount in this process. Always gear up appropriately, use the right tools, and don’t rush through the steps. Insulation removal can be dusty and strenuous, and it’s crucial to keep your workspace clean and safe.

If you’re ever in doubt or if the job feels too big to handle alone, consider reaching out to professionals. We at First Defense Insulation are ready to help. Removing old insulation and replacing it with new, efficient materials can be a game-changer for your energy bills and overall home comfort.

First Defense Insulation,

12 Greenway Plaza Suite 1147 Houston Texas 77046,

713-808-9853

Follow Us On Social Media
https://www.facebook.com/FirstDefenseInsulation
https://www.instagram.com/firstdefenseinsulation/?hl=en