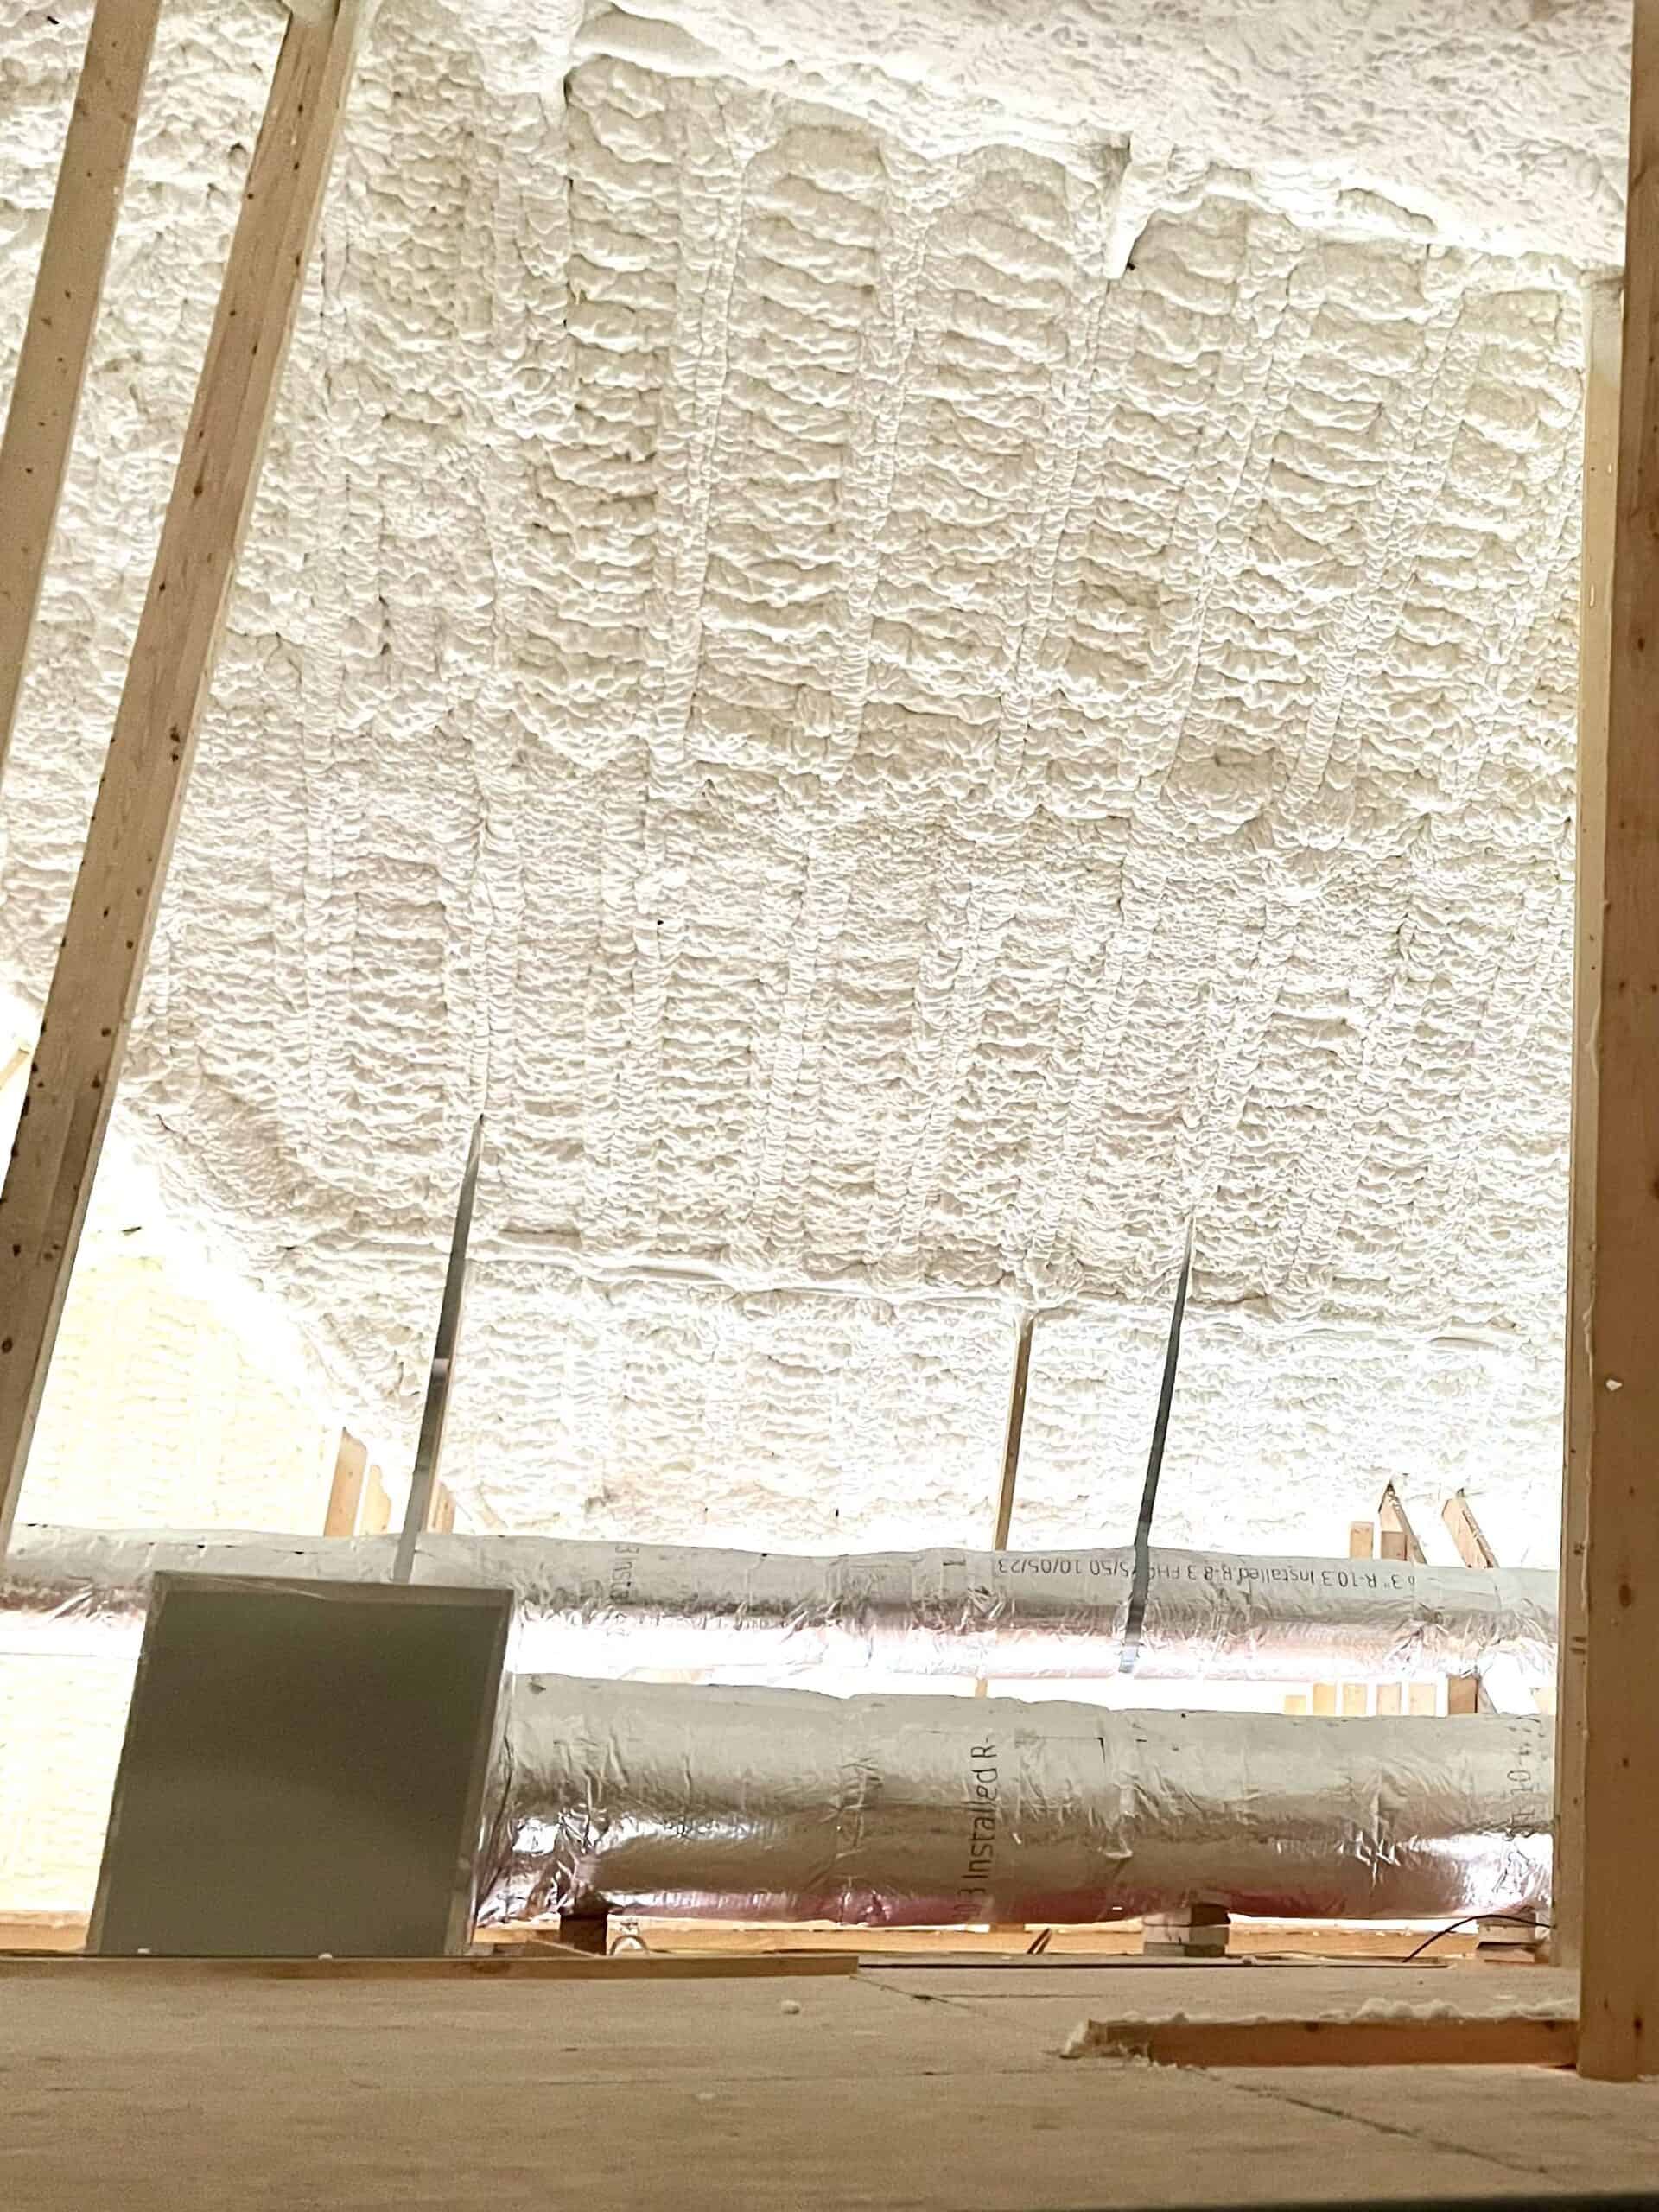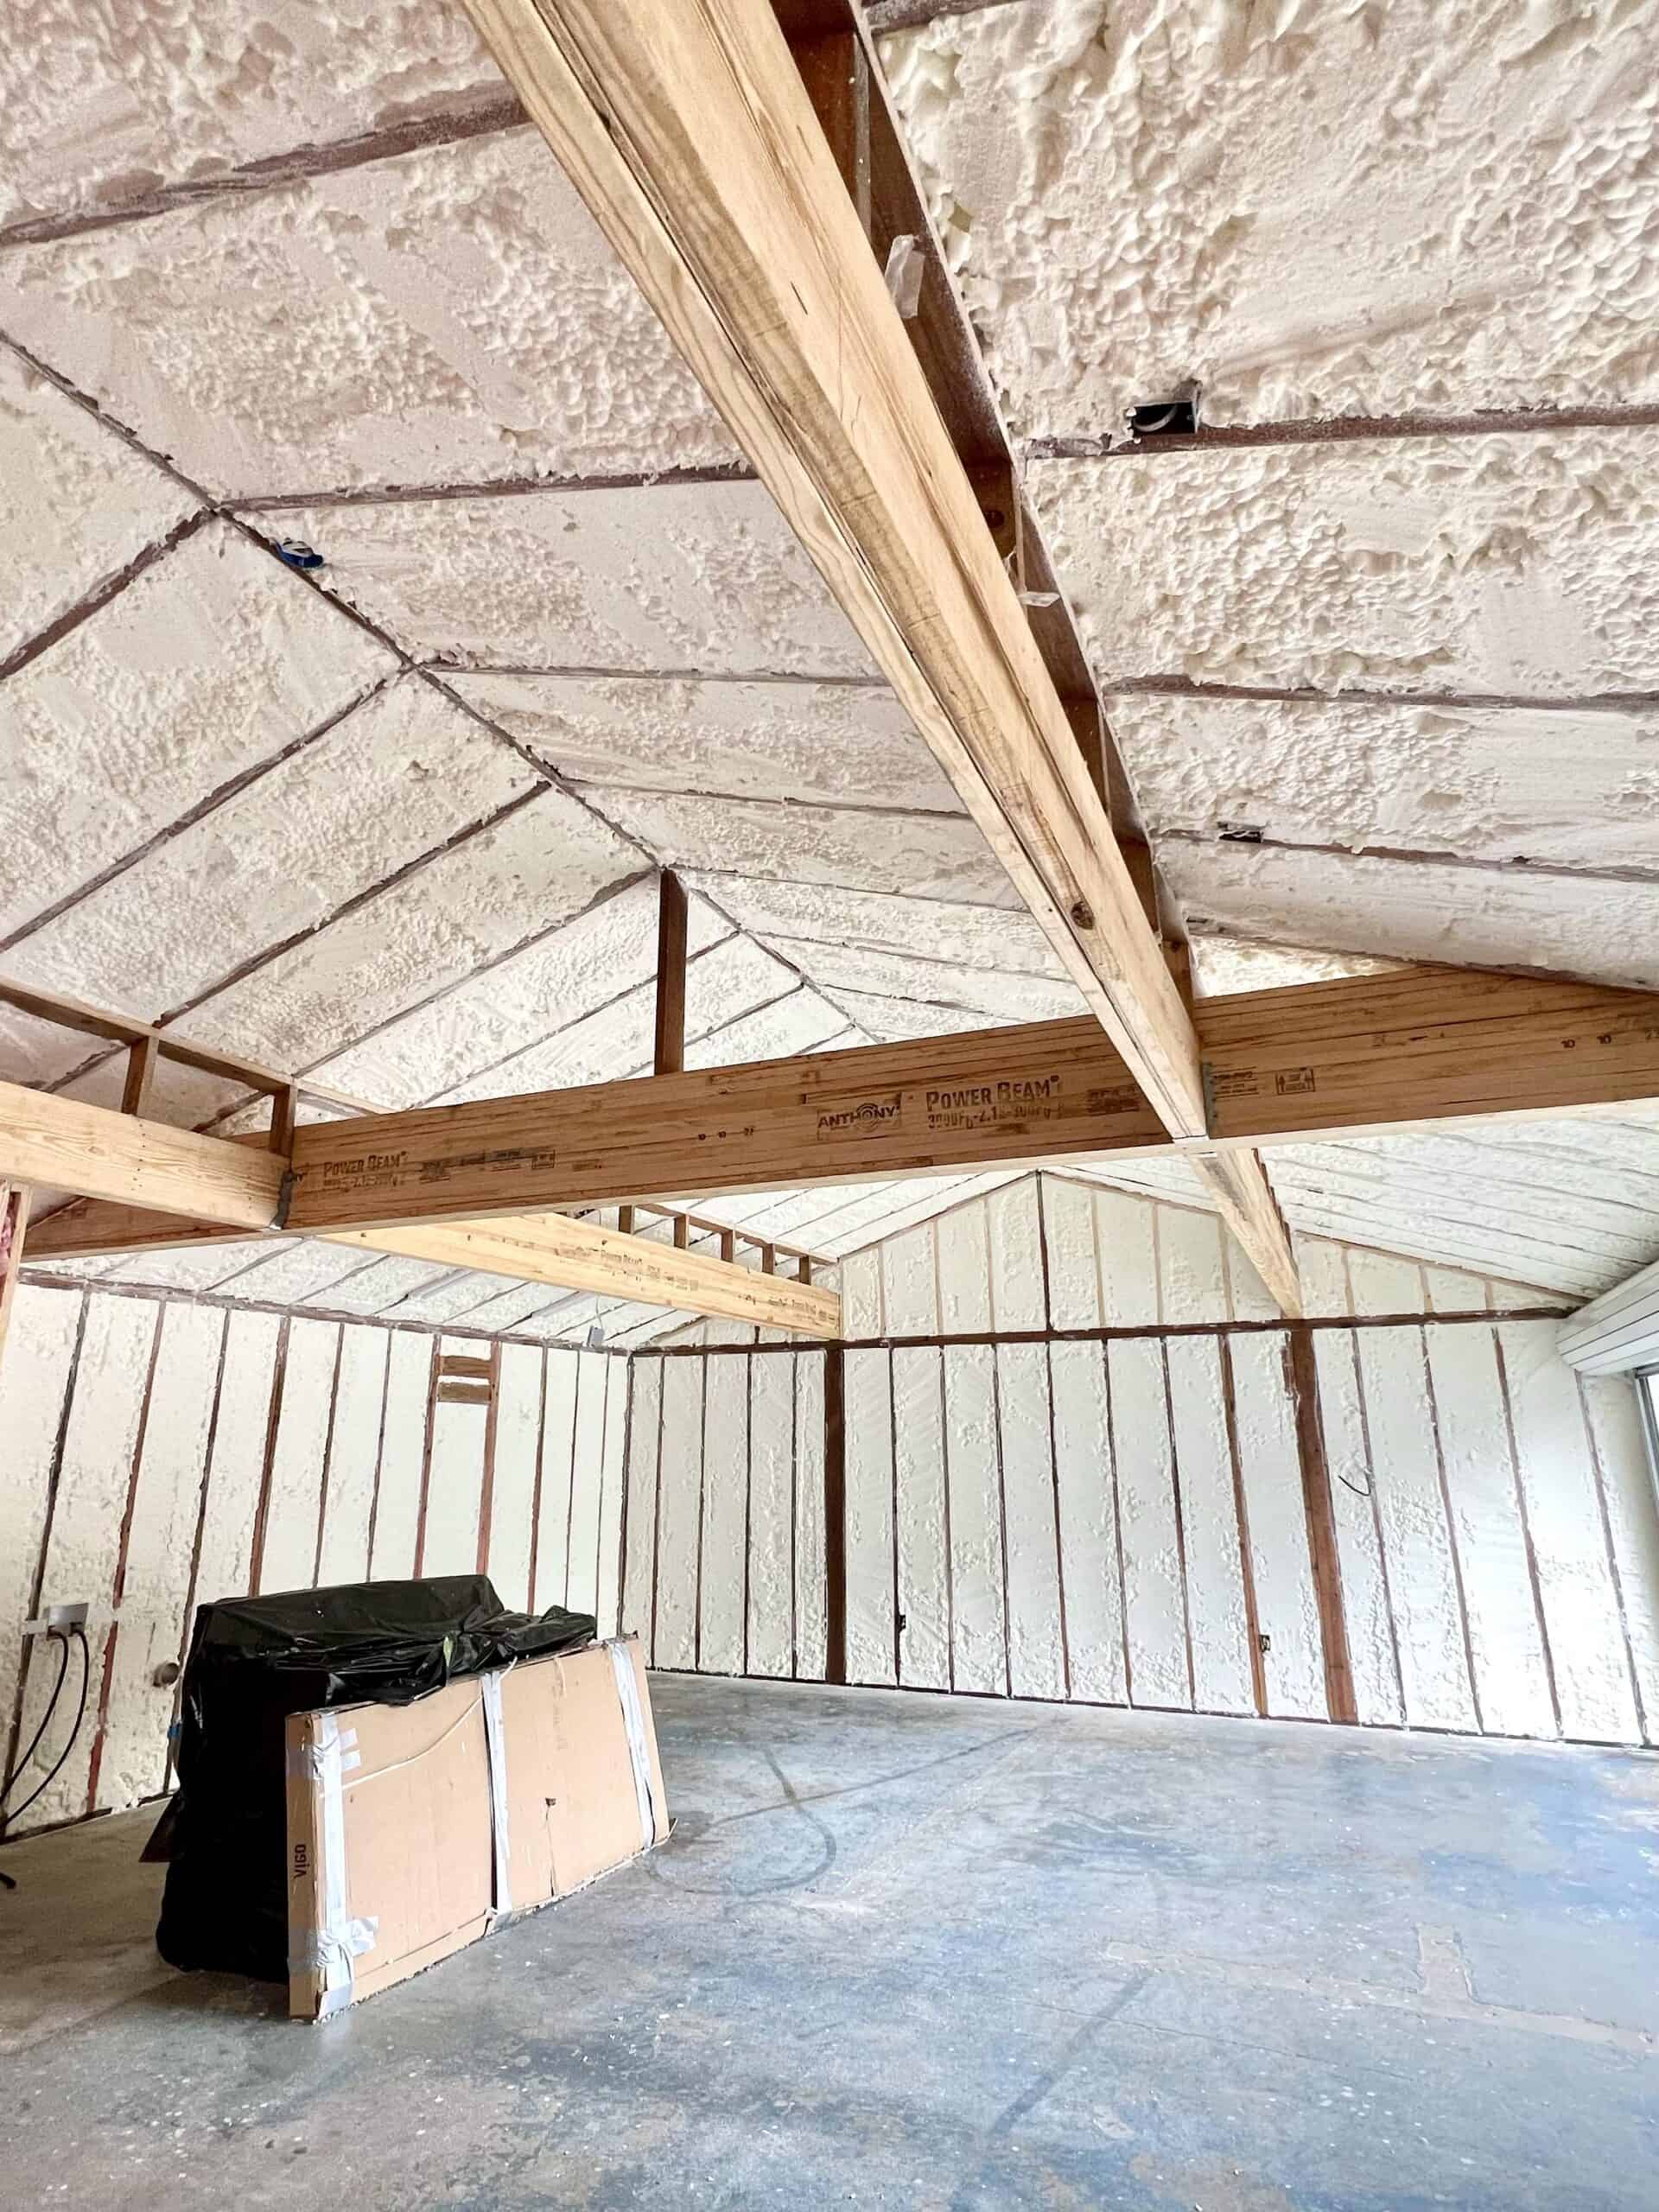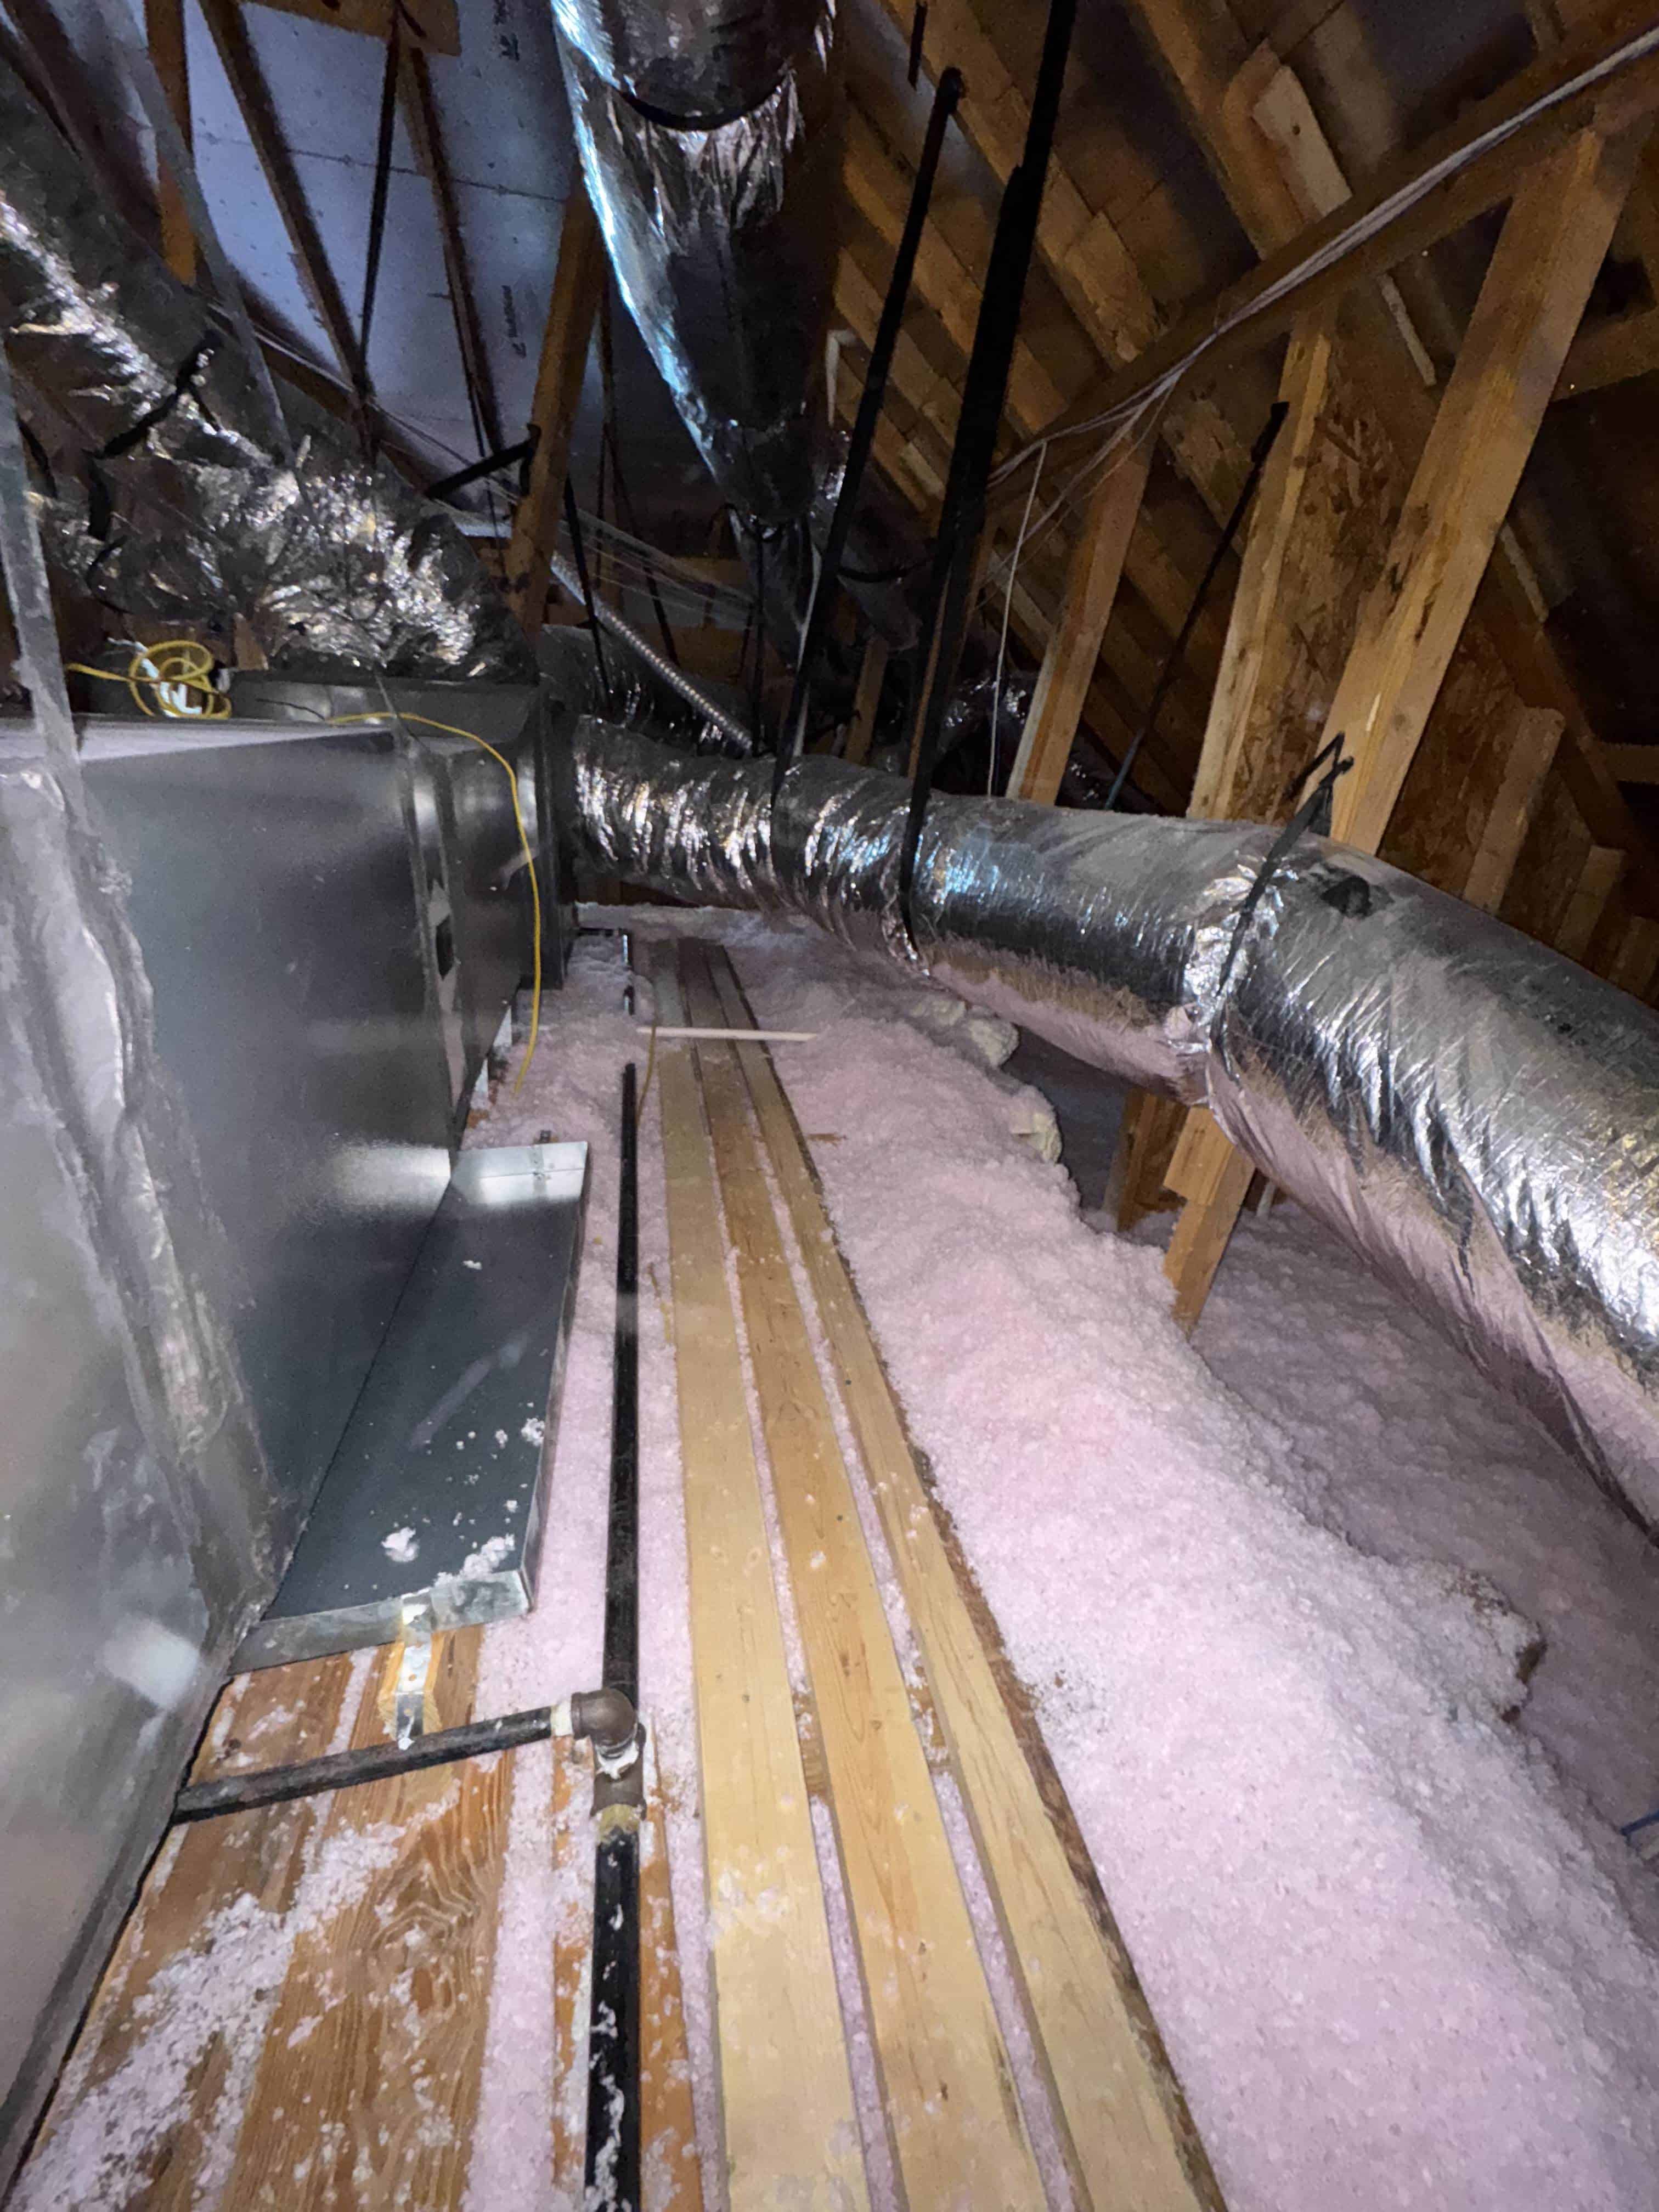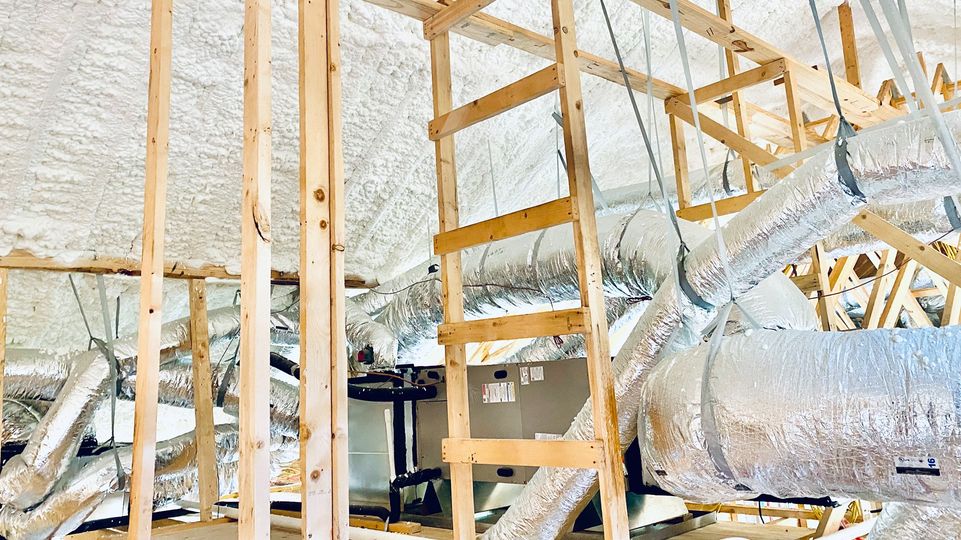
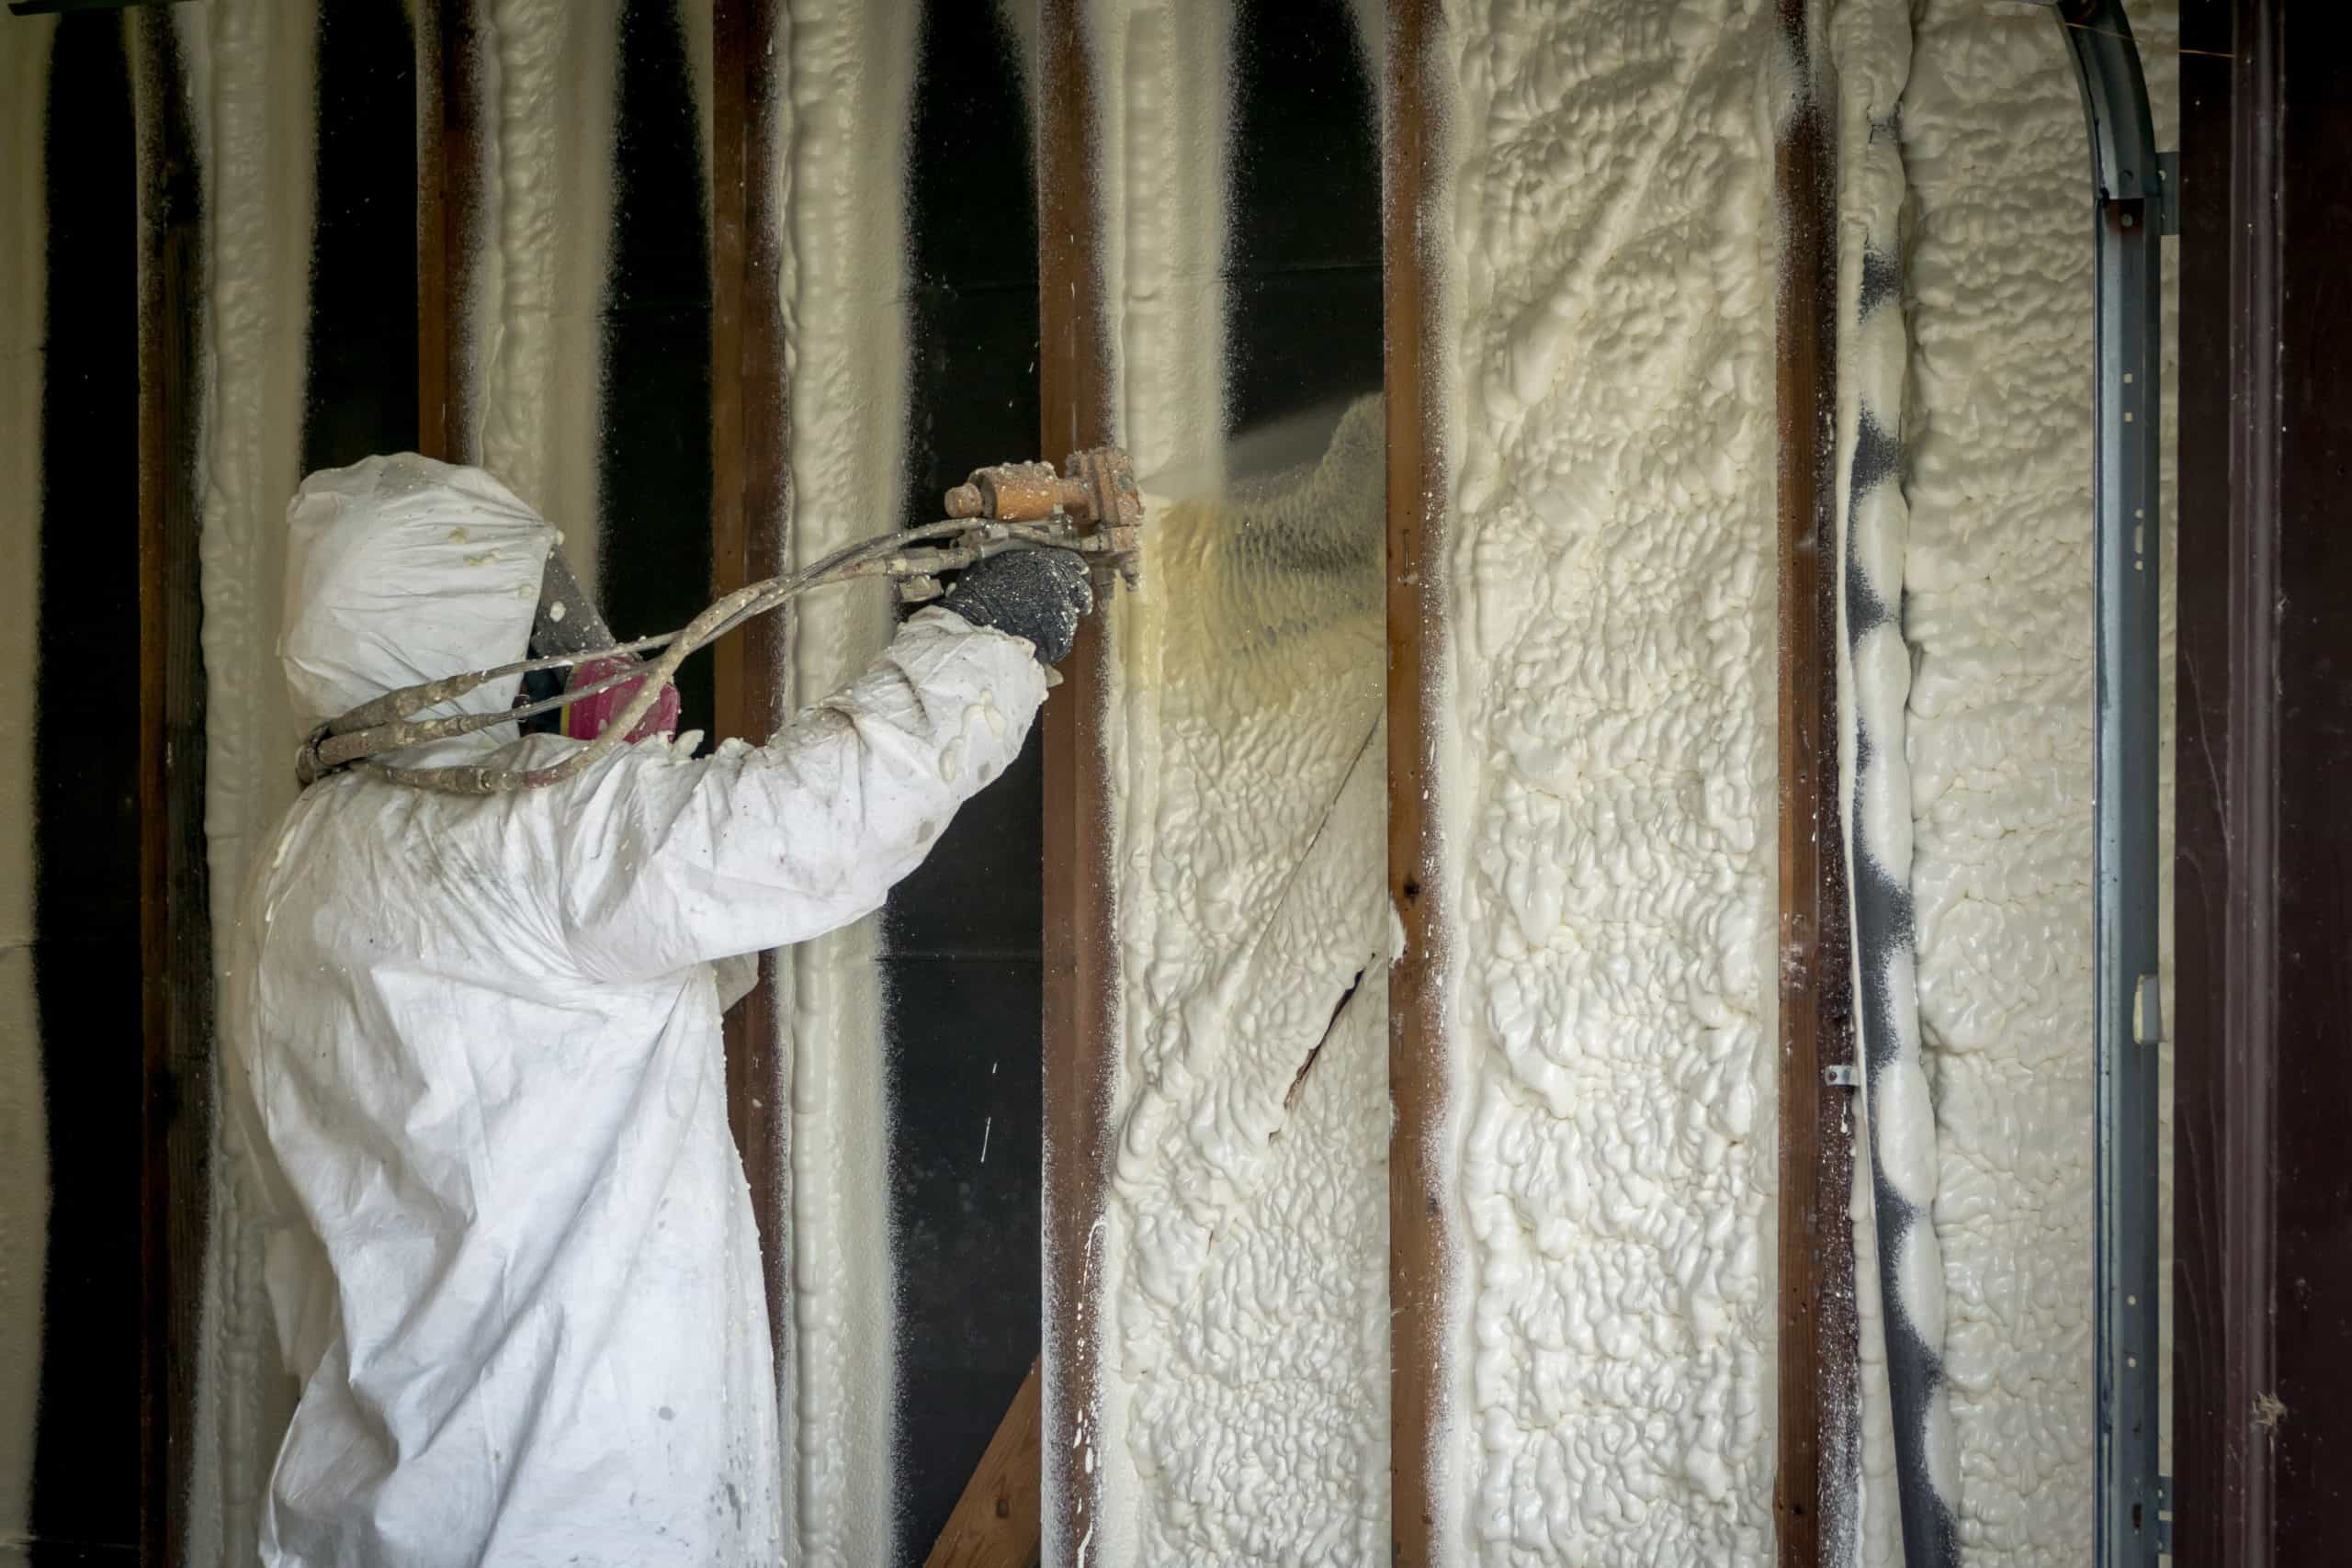
Worker in protective gear and respirator removing spray foam insulation from an attic roof deck

How to Remove Spray Foam Insulation (and When It Has to Come Out)

Updated November 6, 2026. First Defense Insulation, 12 Greenway Plaza Suite 1147, Houston, TX 77046.

Direct Answer

To remove spray foam insulation, cut it out and scrape it off the wood by hand inside a closed-off, ventilated attic, with workers in protective gear. EPA lists grinding, sanding and sawing as heat-generating work that may release isocyanates from the foam [4]. Open cell comes out in sections; closed cell takes heavy scraping.

TL;DR

  • Spray foam only has to come out for a specific problem: a wet or rotted roof deck, foam applied wrong, renovation access, or water, fire or pest damage.
  • No grinding, sanding or heat. EPA says that kind of work may release isocyanates and amines from the foam [4].
  • Solvents don’t remove cured foam, so it comes off by cutting and scraping [7].
  • Open cell is about a quarter the density of closed cell, and closed cell holds on like adhesive, so it takes more labor [9][12].
  • National removal pricing runs $3.15 to $7.50 per square foot, before anything goes back in [13].
  • With foam off the deck, the attic is either vented again or re-foamed, and Houston’s code target for attic ceilings is R-49 [18].

One liner: Find the cause, take the foam off cold and contained, then rebuild the attic to code.

Key Numbers

Stat What it measures Source
$3.15 to $7.50 per sq ft National spray foam removal cost HomeAdvisor, 2026 [13]
$3,200 to $10,800 National cost to remove and replace insulation HomeAdvisor, 2026 [13]
$35 to $85 per hour Insulation removal labor HomeAdvisor, 2026 [13]
Below 18% Roof deck moisture before spray foam goes on U.S. DOE Building America, 2013 [1]
About 0.5 vs 2 lb per cu ft Open cell vs closed cell density U.S. EPA [9]
About 10x Closed cell compressive strength vs open cell DOE Building America, 2009 [12]
1/150, or 1/300 Attic net free vent area under the 2021 IRC ARMA, 2022 [15]
R-49 Houston minimum ceiling insulation, climate zone 2 City of Houston, 2025 [18]
January 2, 2024 Houston 2021 residential and energy codes took effect International Code Council, 2023 [17]


When Spray Foam Insulation Removal Is Needed

In short: Spray foam insulation removal is needed when foam hides a wet or damaged roof deck, was applied wrong, or blocks repair work. EPA says correctly applied, cured foam is usually considered relatively inert [4], so removal is about fixing a specific problem.

It often starts with a ceiling stain after a summer storm. You climb into the attic, and the roof deck above the stain is buried under foam, so you can’t see where the water got in or how far it spread.

That’s the most common reason foam has to come out. U.S. Department of Energy Building America guidance says roof sheathing and framing should be dry below 18% moisture before spray foam goes on, under a leak-free roof [1]. When either condition fails, the wood behind the foam has to be opened up, checked and repaired.

The main cases look like this:

  • A roof leak or decking repair. Wet or rotted sheathing has to be exposed before it can be checked and replaced.
  • A damp roof deck. In an Oak Ridge National Laboratory study of sealed attics in hot, humid Charleston, South Carolina, researchers removed foam and found moisture where the rafters meet the sheathing [2].
  • Foam that was applied wrong. EPA says improperly applied foam can be the source of a lingering odor [4].
  • Renovation. New wiring, plumbing or framing behind the foam. EPA advises finding out whether spray foam is present before you renovate [4].
  • Water, mold, rodent, fire or smoke damage, the same reasons any insulation removal job starts [5].

Not every problem means tearing foam out. Building Science Corporation’s Joseph Lstiburek has reported humid unvented attics with open cell foam in hot, humid climates, and his fix is to dry the attic air with dehumidified air or an air change [3]. He says he has no problem with open cell foam itself. That’s why the first step is an inspection, not a scraper.

Why Heat and Grinding Are the Wrong Way to Remove Spray Foam

In short: EPA lists drilling, grinding, sawing and sanding as heat-generating processes that may release isocyanates and amines from spray foam, and says workers shouldn’t heat or grind it [4]. Cured foam comes off by contained cutting and scraping, with workers in protective gear.

Plenty of DIY guides treat removal as a tool choice: a grinder, a heat gun or a can of solvent. EPA says heat-generating work on or near spray foam may release airborne chemicals, including isocyanates (the reactive ingredient in spray foam) and amines, and that plumbers and electricians shouldn’t heat or grind it [4]. There’s also no rulebook to fall back on. EPA isn’t aware of a standard accepted removal practice, and CPSC warns that disturbing foam the wrong way can create dust or hazardous materials, especially with processes that heat it [4][6].

Here’s how the common methods compare:

Method What the source says How a careful crew handles it
Grinding or sanding On EPA’s list of heat-generating processes that may release isocyanates and amines [4] Not used to clear foam
Heat gun, heated blade, torch or other hot work EPA says hot work on or near foam may lead to isocyanate exposure [4] Never used
Power sawing or drilling Also on EPA’s heat-generating list [4] Kept limited, with workers in PPE [8]
Solvent on cured foam DuPont, maker of Great Stuff foam, says dried foam can’t be removed with any solvents or cleansers [7] Skipped; solvents only work on uncured foam [7]
Hand cutting and scraping DuPont says cured foam must be removed mechanically [7]; EPA calls for PPE during any cutting and scraping [8] The main method, inside an isolated, ventilated work area [8]


If odor is why you want the foam gone, find the source first. EPA says chemicals from improperly applied foam may have spread to other surfaces, so removal may not fix the smell, and it suggests an indoor air quality (IAQ) consultant to diagnose it [4].

Before any crew starts, ask the question on CPSC’s consumer checklist: how will you isolate and ventilate the work area? [6] At First Defense, every job starts with a free evaluation. Then the crew protects your home, removes and bags the material, and loads it into an on-site dumpster for disposal [5].

How Open Cell Spray Foam Is Removed

In short: Open cell foam is cut out of the rafter bays in sections, scraped off the roof deck, bagged and vacuumed up. At about half a pound per cubic foot, it’s a quarter the density of 2-pound closed cell foam [9], so it comes out faster.

Cutting open cell foam is closer to trimming upholstery foam than chipping plaster. It’s soft and light, and most of it pulls away from the wood once a bay is cut free. First Defense rates its open cell and closed cell spray foam insulation at R-3.8 and R-7 per inch [10], and the open cell’s lighter, airier structure is what makes it the easier of the two to take out. Here’s how to remove spray foam insulation of this type the careful way:

  1. Evaluate first. Find out why the foam is coming out and whether the roof deck is wet or damaged.
  2. Isolate and ventilate the attic. Seal the work zone off from the living space and move air out of it, with workers in protective gear [8].
  3. Cut the foam out in sections. Work bay by bay, cutting along each rafter and across the bay with a long serrated insulation knife or hand saw.
  4. Scrape the residue. Cured foam has to come off mechanically, so the thin layer left on the deck and rafters gets scraped with a putty knife or flat scraper [7].
  5. Bag as you go. Full bags go straight to an on-site dumpster [5].
  6. Clean up. A HEPA-filtered vacuum, damp rags and fans, the same cleanup used after any attic insulation removal [11].
  7. Check the wood. Repair any damage and let the deck dry before anything goes back. DOE’s benchmark before new foam goes on is sheathing below 18% moisture [1].

Removing Closed Cell Spray Foam From a Roof Deck

In short: Removing closed cell spray foam takes more labor because the foam is rigid and bonds hard to the wood. DOE Building America guidance puts 2-pound closed cell at about four times the density of open cell and ten times its strength in compression [12].

Closed cell holds on like construction adhesive, and that’s close to literal: modular home factories use it as a structural adhesive to glue drywall to studs and joists [12]. On a roof deck, it doesn’t come out of a bay in one piece the way open cell does. Crews cut it back close to the wood in passes, then scrape what’s left off the sheathing and rafters by hand [7].

Detail Open cell Closed cell
Density About 0.5 lb per cubic foot [9] About 2 lb per cubic foot [9]
Strength Compresses under hand pressure [12] About 10 times stronger in compression, 7 times in tension [12]
R-value per inch at First Defense 3.8 [10] 7 [10]
Vapor About 10 perms at 5 inches [12] Under 1 perm at 2 inches, a vapor retarder [12]
How it comes off Cut out in sections, light scraping Cut back in passes, heavy scraping
Labor Lower Higher


When the sheathing under closed cell foam is rotted, scraping it clean makes little sense. The damaged boards get replaced, often in step with the roofer, and the foam bonded to them goes out with the old decking. Sound boards around the patch stay in place, and the foam on them gets cut back to a clean edge so the new section can be insulated to match.

Spray Foam Removal Cost

In short: National spray foam insulation removal cost data puts the job at $3.15 to $7.50 per square foot, the highest of the insulation types HomeAdvisor lists [13]. Closed cell, a large roof deck and repairs underneath push a job toward the top of that range.

Spray foam is the priciest insulation to take out. HomeAdvisor’s national figures put its removal at $3.15 to $7.50 per square foot, against $0.65 to $2 for batts and $1.65 to $3.80 for blown-in, which can be vacuumed up [13]. Pros charge about $35 to $85 an hour, and disposal is usually part of the price [13].

Here’s a quick number. Foam on a roof deck covers the sloped underside of the roof, not the attic floor. A 1,500 sq ft attic under a 6/12 roof has about 1,680 sq ft of deck, so full removal at the national rates comes to roughly $5,300 to $12,600. That’s a national range, not a Houston quote.

Cost driver What raises the price
Foam type Closed cell, which bonds harder and takes more scraping
Area and pitch A bigger attic or a steeper roof means more deck to clear
Thickness More inches of foam to cut through
Access Low headroom, ductwork and tight eaves
Deck repair Wet or rotted sheathing found under the foam
What goes back in New insulation and venting, priced as separate work


Removal is only half the bill. Nationally, removing and replacing insulation runs $3,200 to $10,800 [13]. First Defense gives free estimates after an on-site look, and financing through EnerBank USA and Foundation Finance Company can spread the cost into monthly payments [14].

What Goes Back In After Spray Foam Removal

In short: Once spray foam comes off the roof deck, the attic is either turned back into a vented attic with insulation on the floor, or re-foamed as an unvented attic. In Houston, the code’s prescriptive ceiling target for climate zone 2 is R-49 [18].

Foam on the underside of the roof is what made the attic unvented. Take it off, and the attic needs a new plan before anything goes back. The residential code covers unvented attics in Section R806.5, which calls for air-impermeable insulation, such as spray foam, in direct contact with the underside of the roof deck [16]. Anything else means venting the attic again. The 2021 code minimum is 1 square foot of net free vent area for every 150 square feet of attic floor, or 1 per 300 under the code’s exception, with intake and exhaust balanced [15].

Detail Back to a vented attic Re-foam the roof deck
Where insulation goes Attic floor Underside of the roof deck [16]
Venting Soffit intake plus high exhaust [15] Vents closed off
Code section IRC R806 roof ventilation [15] IRC R806.5 unvented attics [16]
Typical materials Blown-in or batt insulation, with air sealing first [11] Open or closed cell spray foam
Extra work Rafter vent baffles so insulation can’t block the soffits [11] An ignition barrier in the attic, or a thermal barrier where foam faces living space [10]


Here’s a quick number for the vented path. A 1,500 sq ft attic at the 1-in-300 ratio needs 5 square feet, or 720 square inches, of net free vent area, split between low intake and high exhaust.

Houston adopted the 2021 residential and energy codes, effective January 2, 2024 [17], and the city’s compliance form lists a minimum ceiling R-value of 49 for climate zone 2 [18]. First Defense handles both paths: blown-in or batt insulation and radiant barriers for a vented attic, or new open or closed cell foam on a repaired deck.

Can You Remove Spray Foam Insulation Yourself?

In short: You can remove a small patch of open cell foam yourself with hand tools and protective gear. A full roof deck, any closed cell foam, a wet deck or an odor problem is a job for a crew.

If the job needs more than a utility knife and an afternoon, it needs a crew. Before you cut into a small open cell patch, run through this list:

  • Wear protective gear, which EPA calls for during any cutting and scraping of foam [8].
  • Close off the work area from the house and move air out of it [8].
  • Use hand tools only. No grinders, sanders or heat guns [4], and skip solvents, which don’t remove cured foam [7].
  • Watch for wiring buried in the foam.
  • Lay boards across the joists so you don’t step through the ceiling [11].
  • Bag the foam as it comes off [5].

Stop and call a pro if the foam is closed cell, covers the whole deck, sits on wet or soft wood, or you’re chasing a smell. EPA says removal may not fix an odor from improperly applied foam [4], so that job starts with a diagnosis. First Defense offers a free evaluation at (713) 808-9853.

Frequently Asked Questions

In short: quick answers on the best removal method, wood and roof decks, closed cell, odor and cost.

What is the best way to remove spray foam insulation?

Cut it out and scrape it off by hand inside a closed-off, ventilated work area, with workers in protective gear. Leave out grinders, sanders, heat and solvents [4][7]. Open cell comes out in sections. Closed cell takes more scraping.

How do you remove spray foam insulation from wood?

Here’s how to remove spray foam insulation from wood. Cut the foam back close to the rafters and sheathing, then scrape off the thin layer that’s left. Cured foam has to come off mechanically, because dried foam can’t be removed with any solvents or cleansers [7]. Once the wood is bare, check it for moisture and damage before anything new goes on it.

Can spray foam be removed from a roof deck without replacing the roof?

Yes. Crews remove roof deck foam from inside the attic, cutting and scraping it off the sheathing and rafters. Decking only gets replaced where the wood under the foam is rotted, and the foam bonded to those boards goes out with them. Sound sections of the deck stay in place.

Is closed cell spray foam removal harder than open cell?

Yes. DOE Building America guidance puts 2-pound closed cell at about four times the density of open cell and ten times its strength in compression, and it’s even used as a structural adhesive [12]. It bonds hard to the wood, so it takes more cutting passes and heavier scraping, which raises the labor cost.

Will removing spray foam get rid of the smell?

Not always. EPA says that when foam was applied improperly, chemicals may have spread to other surfaces, so removal may not resolve the odor [4]. EPA suggests an indoor air quality consultant to find the source. First Defense starts every removal with a free evaluation, so the cause gets checked before any foam comes out.

How much does spray foam insulation removal cost?

National figures put spray foam removal at $3.15 to $7.50 per square foot [13]. Closed cell, a large or steep roof deck and repairs underneath push the price up. The new insulation and venting that go back in are priced separately, so ask for both on one estimate.

Wondering whether your spray foam has to come out? Call First Defense Insulation at (713) 808-9853 for a free evaluation. We’ll check the roof deck, find what’s causing the problem, and price the removal and what goes back in on one estimate.

Definition Bank

Term Meaning
Spray polyurethane foam (SPF) Insulation sprayed as a liquid that expands and cures into foam; EPA lists open cell and closed cell types [9].
Open cell spray foam Low-density foam, about half a pound per cubic foot, soft enough to compress by hand [9][12].
Closed cell spray foam Medium-density foam, about 2 pounds per cubic foot, rigid and a vapor retarder [9][12].
Isocyanates The reactive ingredient in spray foam that EPA says heat-generating work may release into the air [4].
Heat-generating processes Drilling, welding, soldering, grinding, sawing or sanding on or near spray foam, as EPA lists them [4].
Roof deck The sheathing boards nailed to the rafters under the roofing, where attic spray foam is usually sprayed.
Unvented attic An attic sealed at the roof line, covered by IRC Section R806.5 [16].
Vented attic An attic with soffit intake and high exhaust vents and insulation on the attic floor [15].
Net free vent area The open area of a vent that air can pass through, which the attic vent ratios are based on [15].
Rafter vent baffle A channel at the eaves that keeps insulation from blocking soffit airflow [11].
Ignition barrier A covering used over foam in attics and other unoccupied spaces [10].
Thermal barrier A covering such as 1/2-inch gypsum board required between foam and living space [10].
Perm A unit of vapor permeance; closed cell is under 1 perm at 2 inches [12].
R-value A measure of resistance to heat flow; First Defense rates open cell at R-3.8 and closed cell at R-7 per inch [10].
Indoor air quality (IAQ) consultant An independent expert EPA suggests for diagnosing indoor air and odor problems [4].
Climate zone 2 The energy code climate zone Houston’s compliance form uses, with an R-49 ceiling minimum [18].


Entity Cards

First Defense Insulation

Property Value
Address 12 Greenway Plaza Suite 1147, Houston, TX 77046
Phone (Houston) (713) 808-9853
Hours Monday to Friday, 8 AM to 5 PM
Service area Houston, Katy, Cypress, Spring, Humble, Magnolia, The Woodlands, Conroe
Estimates Free evaluations and estimates
Financing EnerBank USA (Regions Bank); Foundation Finance Company


EPA spray foam guidance

Property Value
Heat-generating processes Drilling, welding, soldering, grinding, sawing, sanding
Workers Should not heat or grind spray foam
Removal practice No standard accepted removal practice known to EPA
Odor Removal may not resolve odor from improperly applied foam
Page date Last updated September 2, 2020


Open vs closed cell

Property Value
Density About 0.5 vs 2 lb per cubic foot
R-value per inch at First Defense 3.8 vs 7
Vapor About 10 perms at 5 in vs under 1 perm at 2 in
Strength Closed cell about 10 times stronger in compression


Houston energy code

Property Value
Codes 2021 IRC and 2021 IECC
Adopted October 25, 2023
Effective January 2, 2024
Ceiling R-value, climate zone 2 R-49


Sources

  1. U.S. Department of Energy, Building America Case Study: Application of Spray Foam Insulation Under Plywood and OSB Roof Sheathing, DOE/GO-102013-4255, November 2013. https://www.energy.gov/sites/prod/files/2013/11/f5/case_study_spray_foam_application.pdf
  2. Miller, Railkar, Shiao and Desjarlais, Oak Ridge National Laboratory and GAF, Sealed Attics Exposed to Two Years of Weathering in a Hot and Humid Climate, 2016. https://www.osti.gov/servlets/purl/1344250
  3. Joseph W. Lstiburek, Building Science Corporation, BSI-016: Ping Pong Water and The Chemical Engineer, October 2016. https://buildingscience.com/sites/default/files/document/bsi-016_ping_pong_water_0.pdf
  4. U.S. Environmental Protection Agency, Safer Choice, Potential Chemical Exposures From Spray Polyurethane Foam, last updated September 2, 2020. https://archive.epa.gov/epa/saferchoice/potential-chemical-exposures-spray-polyurethane-foam.html
  5. First Defense Insulation, Insulation Removal Houston, accessed October 30, 2026. https://fdinsulation.com/insulation-removal/
  6. U.S. Consumer Product Safety Commission staff, Spray Polyurethane Foam Insulation: Health and Safety Recommendations for Consumers. https://www.cpsc.gov/s3fs-public/Spray-Polyurethane-Foam-Insulation-Health-and-Safety-Recommendations-for-Consumers_0.pdf
  7. DuPont, Great Stuff Insulating Foam Sealant, Warnings and Precautions, 43-D100729-enNA-1219, 2019. https://www.buildsite.com/pdf/duponttyvek/Great-Stuff-Pro-Gaps-Cracks-Safety-Notes-2945834.pdf
  8. U.S. Environmental Protection Agency, Contractor Checklist: Guide to Safer Workplace Practices for Installing High-Pressure, Two-Component SPF Insulation, working draft January 22, 2015. https://archive.epa.gov/epa/sites/production/files/2015-08/documents/checklist_professional_spf_insulation_contractors.pdf
  9. U.S. Environmental Protection Agency, Information on the Various Types of Spray Polyurethane Foam Products. https://www.epa.gov/sites/production/files/2015-08/documents/spf_product_types.pdf
  10. First Defense Insulation, Spray Foam Insulation Houston, accessed October 30, 2026. https://fdinsulation.com/attic-insulation/spray-foam/
  11. First Defense Insulation, How to Remove Insulation from Your Attic?, updated January 22, 2025. https://fdinsulation.com/advantages-of-removing-old-attic-insulation/
  12. Steven Winter Associates for U.S. DOE Building America, Which Spray Foam Is Right For You?, last update April 3, 2009. https://www1.eere.energy.gov/buildings/publications/pdfs/building_america/spray_foam_guide.pdf
  13. HomeAdvisor, Attic Insulation Removal Costs, accessed October 30, 2026. https://homeadvisor.com/cost/insulation/remove-insulation
  14. First Defense Insulation, Financing, last modified April 12, 2024. https://fdinsulation.com/financing/
  15. Asphalt Roofing Manufacturers Association, The Attic Needs Ventilation, but How Much Exactly?, revised September 2022. https://www.asphaltroofing.org/the-attic-needs-ventilation-but-how-much-exactly/
  16. International Code Council, 2021 International Residential Code, Chapter 8, Section R806.5 Unvented Attic and Unvented Enclosed Rafter Assemblies. https://codes.iccsafe.org/content/IRC2021P3/chapter-8-roof-ceiling-construction#IRC2021P3_Pt03_Ch08_SecR806.5
  17. International Code Council, Houston’s City Council Approves Adoption of the 2021 International Codes, November 21, 2023. https://www.iccsafe.org/wp-content/uploads/Houstons-City-Council-approves-adoption-of-the-2021-International-Codes.pdf
  18. City of Houston Building Code Enforcement, Prescriptive Method: R-Value Computation, Form CE-1415, revised August 2025. https://www.houstonpermittingcenter.org/media/10631/download

howtopreventicedammingonyourroof

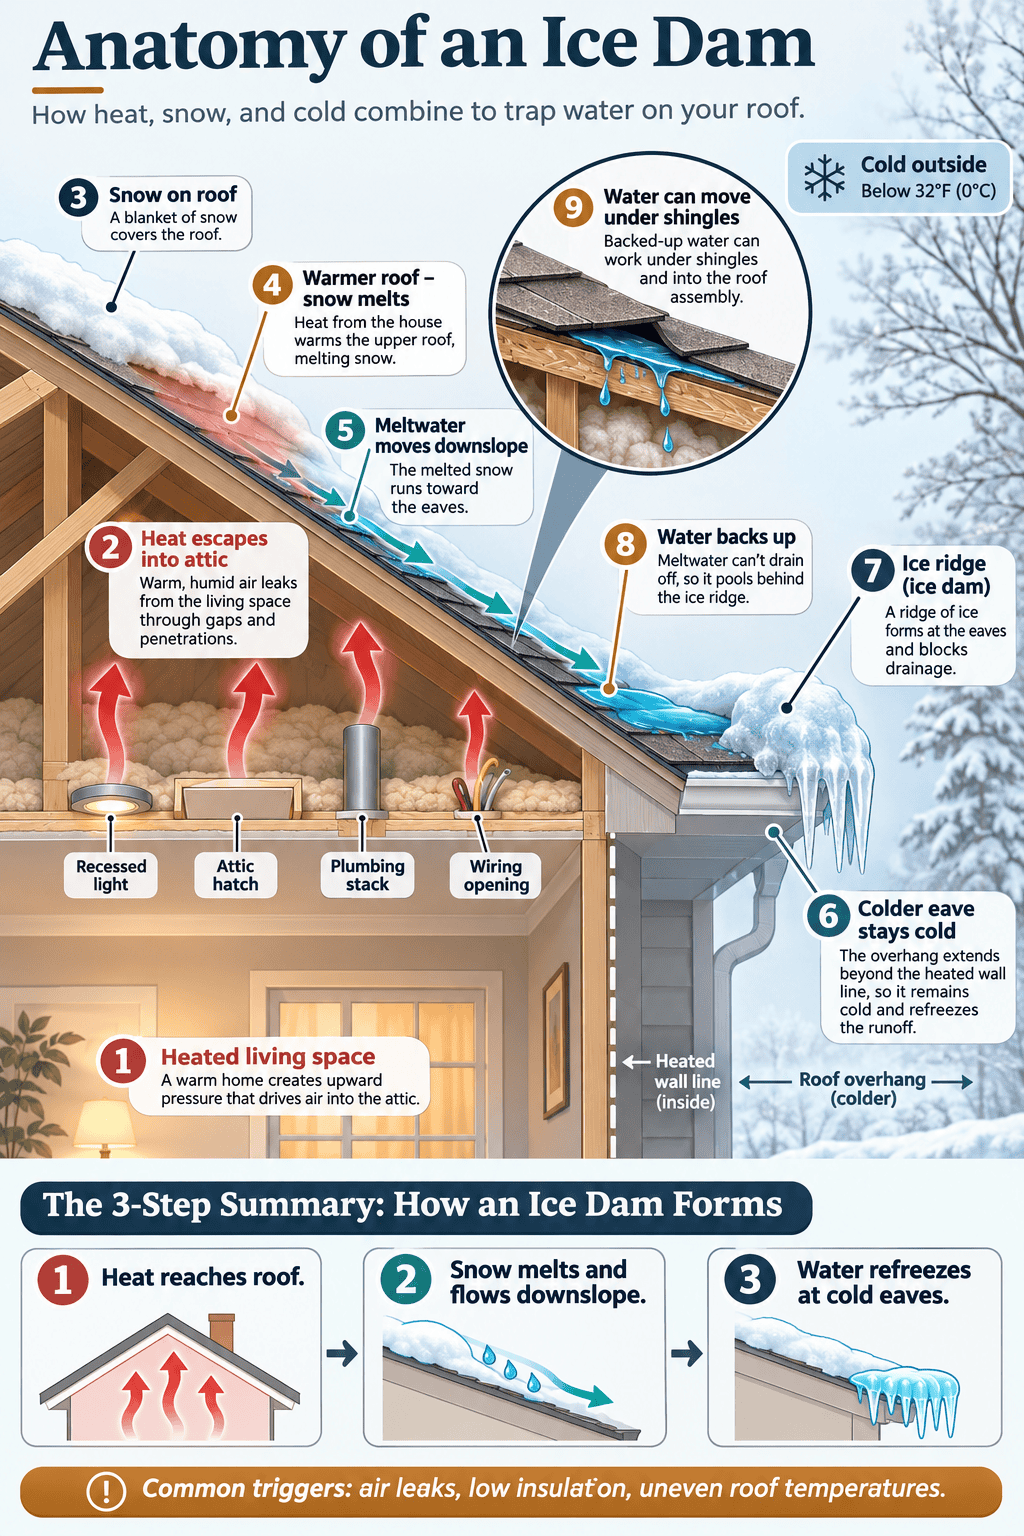
How to Prevent Ice Damming on Your Roof?

The best way to prevent ice damming is to seal air leaks between your home and attic, install adequate attic insulation, and maintain ventilation appropriate to your roof design. These improvements reduce the heat escaping through your roof, helping prevent the uneven snowmelt and refreezing that create ice dams.

Clearing roof snow and keeping gutters unobstructed can also help during winter. However, these measures do not address the underlying heat loss that often causes ice dams to return.

Understanding how ice dams form-and which prevention methods actually address their causes-can help you protect your roof from recurring winter damage.

What Causes Ice Dams to Form on a Roof?

Ice dams form when snow melts on a warmer section of a roof, flows toward the colder eaves, and refreezes into a ridge of ice that prevents additional meltwater from draining.

Anatomy of an Ice Dam

This happens when the roof surface has uneven temperatures. Heat escaping from the house can warm the roof deck beneath accumulated snow, even when outdoor temperatures remain below freezing.

As the snow melts, water travels down the roof until it reaches the overhang beyond the heated walls. Because this section typically stays colder, the water freezes again.

With continued melting and refreezing, ice accumulates along the roof edge. The growing ridge traps water behind it, where that water can work beneath shingles and leak into the attic, insulation, ceilings, or walls.

Several conditions can increase the likelihood of ice dam formation:

  • Attic air leaks: Warm indoor air escapes through openings around plumbing, wiring, recessed lights, and attic access points.
  • Insufficient insulation: Heat passes through the ceiling and warms the attic or roof deck.
  • Inadequate ventilation: In a conventional vented attic, restricted airflow can contribute to uneven roof temperatures.
  • Other attic heat sources: Leaky heating ducts, exhaust systems, and chimneys can warm specific roof areas.
  • Complex roof construction: Valleys, dormers, skylights, and irregular framing can make continuous air sealing and insulation more difficult.

Ice dams are most common in cold climates where snow remains on roofs for extended periods. However, their formation depends on the combination of snow cover, roof temperatures, and freezing conditions-not simply how cold the outdoor air becomes.

How to Prevent Ice Damming for the Long Term

Long-term ice dam prevention focuses on keeping the roof surface consistently cold enough to limit snowmelt caused by heat escaping from the house. For a conventional unconditioned, vented attic, this generally means air sealing the ceiling, improving insulation, and maintaining appropriate attic ventilation.

These measures address different ways heat reaches the roof, so they work best as part of a coordinated approach.

 1. Seal Air Leaks Between the Living Space and Attic

Air sealing is generally the first step in preventing heat loss that contributes to ice dams.

Warm air naturally rises and can escape into the attic through gaps in the ceiling. These openings often develop around attic hatches, plumbing pipes, electrical wiring, recessed lighting, and framing connections.

When heated indoor air enters an unconditioned attic, it can raise temperatures near the roof deck and cause snow to melt unevenly.

Sealing attic air leaks reduces the movement of warm indoor air into the attic, helping keep the roof deck cooler during freezing weather.

Professional air sealing involves identifying leakage paths and closing them with materials appropriate for each location. Depending on the opening, this may include sealants, rigid blocking, or expanding foam.

Openings around chimneys and furnace flues require special treatment because of high temperatures and fire-safety clearances. These areas may need metal flashing and heat-resistant sealants rather than ordinary spray foam.

Air sealing should generally be completed before additional insulation is installed. Otherwise, warm air can continue moving through gaps beneath the insulation.

 2. Improve Attic Insulation to Reduce Heat Loss

Even with air leaks sealed, heat can pass through the ceiling by conduction. Insulation slows this heat movement, helping maintain the temperature difference between the heated living space and the attic.

In a conventional vented attic, insulation is generally installed along the attic floor, above the ceiling of the occupied rooms.

To help prevent ice dams, attic insulation should provide continuous coverage at a level appropriate for the local climate and building requirements, with particular attention to the areas above exterior walls.

Poorly insulated sections near the eaves can create warmer roof areas that encourage localized snowmelt.

Blown-in cellulose, fiberglass, and other approved insulation materials can provide effective thermal resistance when correctly installed. The appropriate material and insulation level depend on the existing construction and local energy requirements.

Simply adding insulation does not automatically resolve every ice dam problem. Air leakage, gaps in coverage, and other sources of attic heat can continue warming the roof even after insulation is upgraded.

For this reason, air sealing and insulation should be evaluated together rather than treated as separate solutions.

 3. Maintain Proper Attic and Roof Ventilation

Ventilation helps regulate attic temperatures and remove accumulated moisture in roof assemblies designed to be vented.

In a typical vented attic, outside air enters through soffit vents near the roof edges and exits through vents higher on the roof. This airflow helps keep the underside of the roof closer to outdoor temperatures.

Insulation baffles may be needed near the eaves to prevent insulation from blocking the ventilation pathways.

Proper attic ventilation can help reduce ice dam formation, but ventilation alone cannot compensate for significant heat loss through an unsealed or poorly insulated ceiling.

Adding powered attic fans is not a routine ice dam prevention solution. In some homes, mechanical ventilation can create pressure differences and moisture problems.

Not every roof should use the same ventilation arrangement. Unvented roof assemblies require a different air, insulation, and moisture-control strategy.

Before altering roof ventilation, it is important to understand how the existing attic and roof assembly were designed to function.

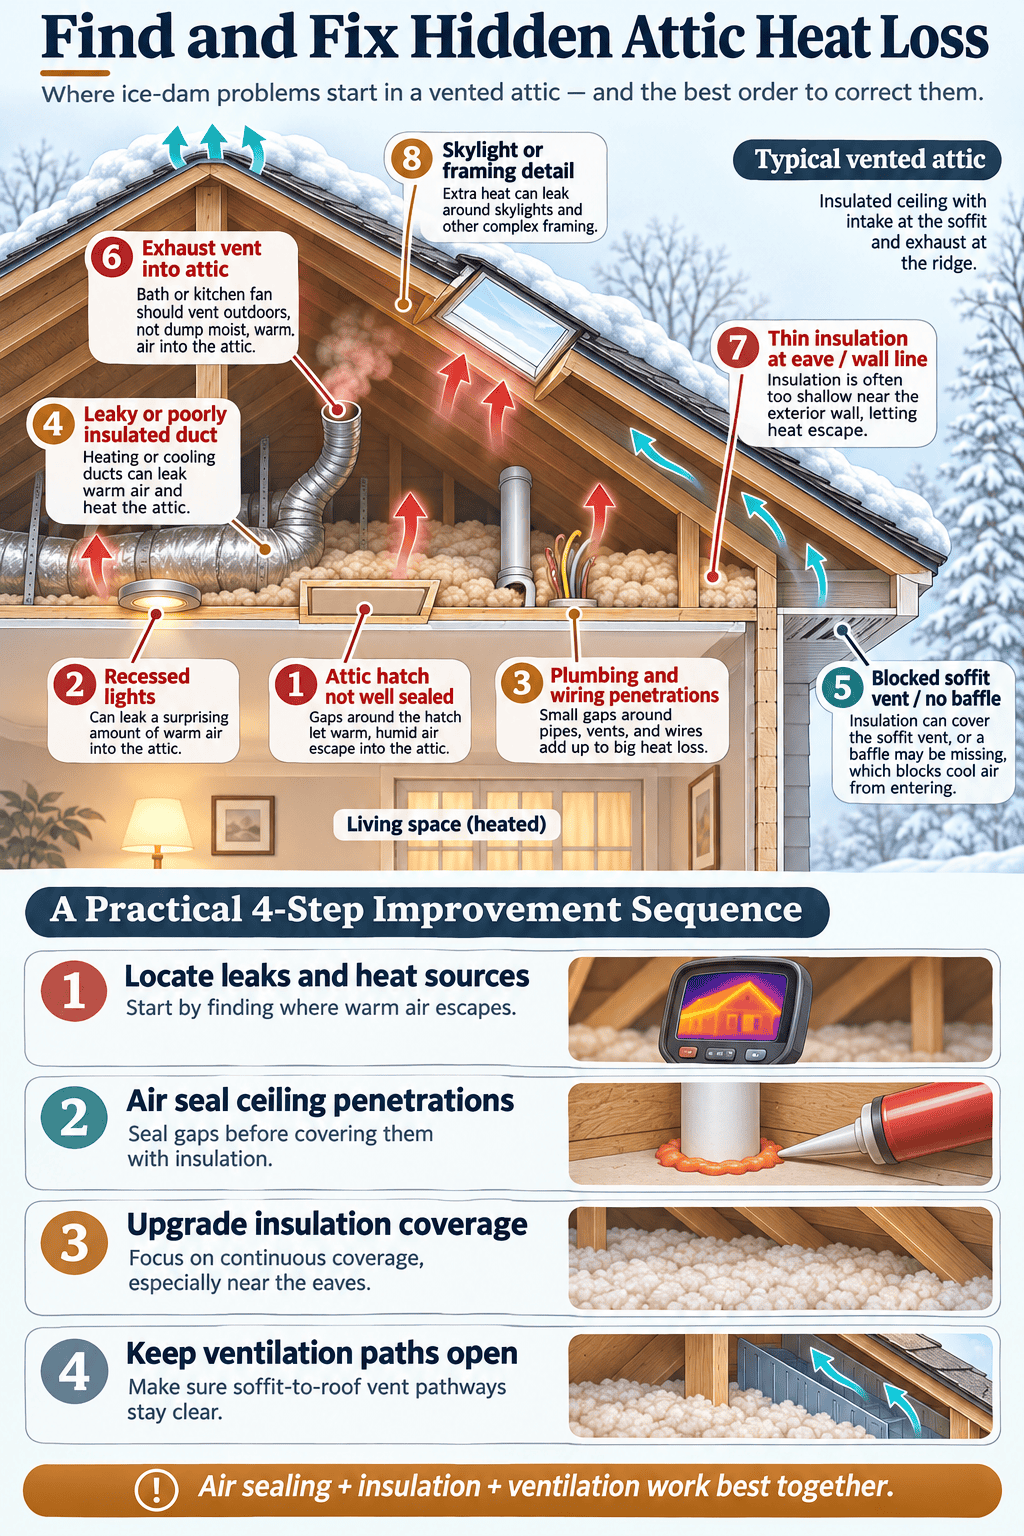
 4. Address Heating Ducts and Other Attic Heat Sources

Some ice dams occur because heat reaches the roof from specific locations rather than being distributed evenly throughout the attic.

Find and Fix Hidden Attic Heat Loss

Leaky or inadequately insulated heating ducts can release warm air into unconditioned spaces. Recessed lights, attic access points, skylights, and complicated framing details may also create localized heat-loss problems.

Bathroom and kitchen exhaust systems should discharge outdoors through properly designed ducts rather than releasing warm, moist air into the attic.

Correcting these conditions can help reduce the temperature differences responsible for recurring ice dams.

Does Removing Snow From the Roof Prevent Ice Dams?

Removing accumulated roof snow can reduce the likelihood of ice dam formation because it removes the snow that would otherwise melt and refreeze. However, roof snow removal is a short-term preventive measure, not a permanent correction for attic heat loss.

A roof rake designed for snow removal may allow some snow near the eaves to be cleared while the operator remains on the ground.

Even so, snow removal requires caution. Roof rakes can damage shingles or other roofing materials if used improperly, and falling snow or ice can create injury hazards.

Avoid climbing onto snow-covered or icy roofs. Steep roofs, difficult-to-reach sections, and heavy snow accumulation may require professional assistance.

A properly sealed and insulated attic can also allow more snow to remain on the roof because less indoor heat reaches the roof deck. Roofs must therefore be capable of supporting expected snow loads. If a home’s structural capacity is uncertain, a qualified professional should evaluate it.

Can Cleaning Gutters Prevent Ice Damming?

Keeping gutters and downspouts clear helps meltwater drain away, but clean gutters cannot prevent ice dams caused by uneven roof temperatures.

Leaves, debris, and existing ice can obstruct drainage and make winter roof problems more difficult to manage.

Cleaning gutters before freezing weather is useful preventive maintenance. Downspouts should also remain unobstructed so water can drain away from the building.

However, ice dams can form directly on the roof above the gutters. When melting snow reaches a roof edge that remains below freezing, it can refreeze regardless of whether the gutter is clean.

Gutter maintenance is therefore a supporting measure, not a substitute for attic air sealing and insulation.

Do Roof Heating Cables and Ice-and-Water Shields Prevent Ice Dams?

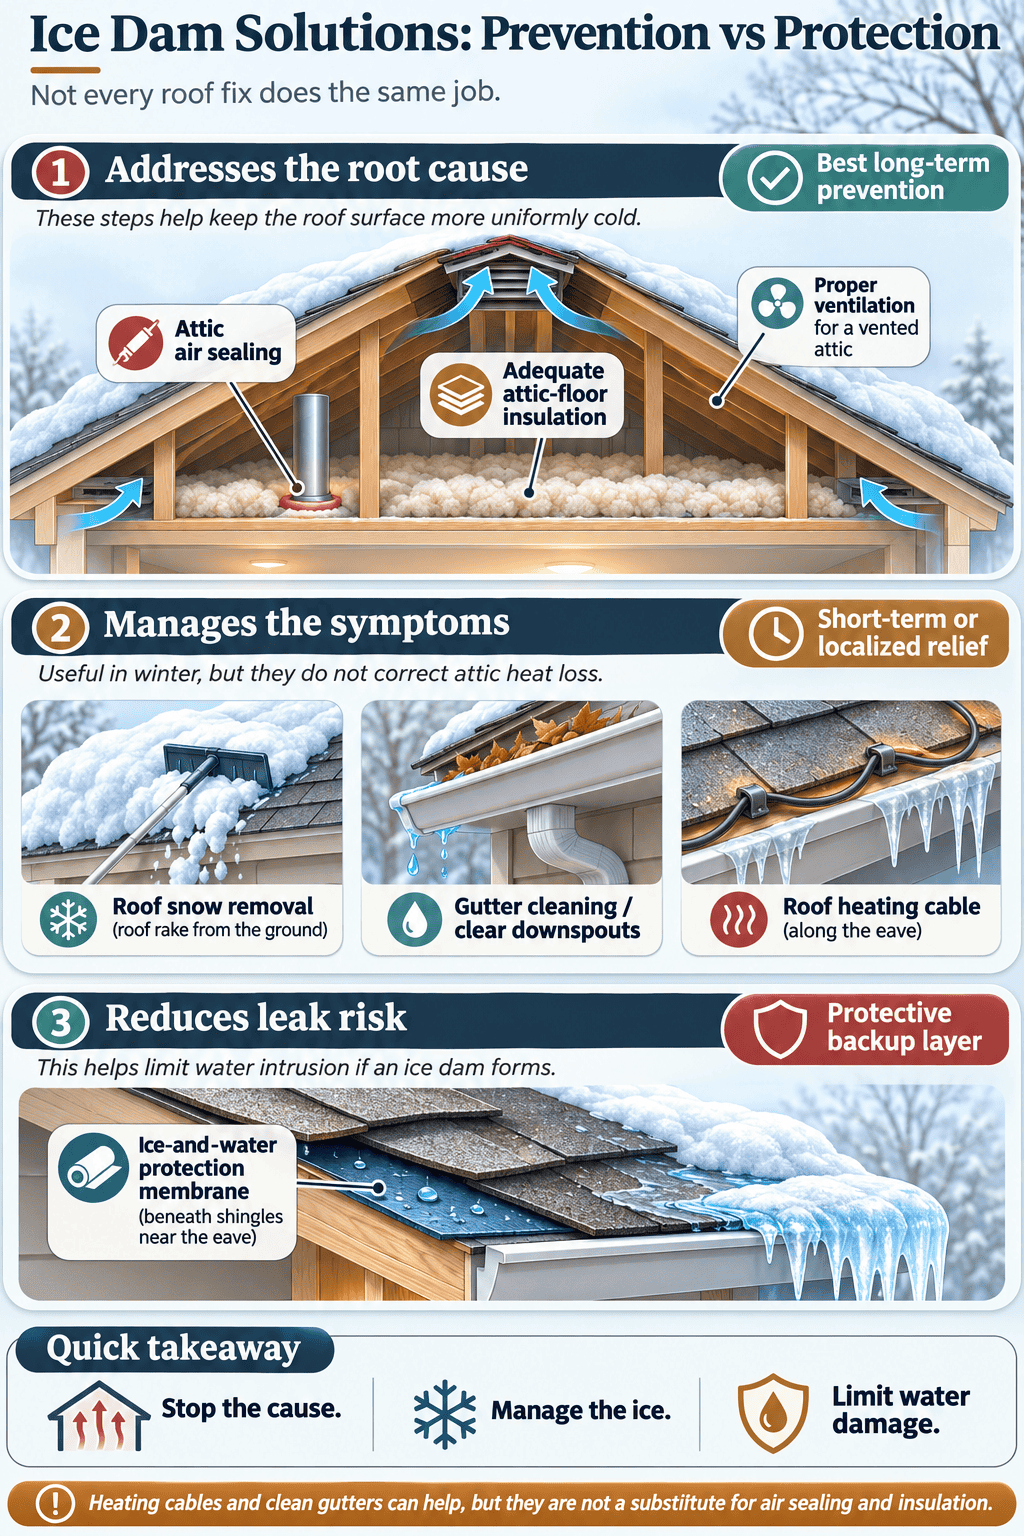
Roof heating cables and ice-and-water protection membranes can help manage ice-related problems, but they perform different functions.

 Roof Heating Cables

Roof heating cables can help maintain drainage channels through localized ice buildup, but they do not correct the heat loss that causes snow to melt unevenly.

These electrically powered systems are installed in selected roof-edge or gutter areas to reduce ice accumulation and allow some meltwater to drain.

Their effectiveness depends on proper product selection, installation, and operation. They also consume electricity and may require ongoing maintenance.

Heating cables can be useful in certain situations, but recurring ice dams should still prompt an assessment of the attic and roof assembly.

 Ice-and-Water Protection Membranes

Ice-and-water protection membranes help reduce water intrusion when ice dams occur; they do not stop ice dams from forming.

Ice Dam Solutions Comparison

These self-adhering roofing underlayments are installed beneath the roof covering in areas vulnerable to backed-up meltwater.

If an ice dam traps water near the eaves, the membrane provides an additional layer of protection against leakage into the roof assembly.

Appropriate membrane coverage depends on the roof construction, climate, and applicable building requirements.

Unlike insulation and air sealing, a protective membrane addresses potential water damage rather than the temperature conditions responsible for ice dam formation.

What Should You Do if an Ice Dam Has Already Formed?

If an ice dam is already present, the immediate priority is preventing injury and limiting water damage. Permanent prevention measures can be addressed once the existing ice and any active leaks are under control.

Avoid striking or chopping ice with axes, picks, or other sharp tools. These methods can damage shingles and roofing materials while creating serious safety hazards.

Do not climb onto an icy roof or stand beneath large icicles or unstable snow buildup.

If water is entering the attic or living space, contact a qualified roofing or ice-dam removal professional. Appropriate removal methods depend on the roof conditions and severity of the buildup.

Water-damaged ceilings, insulation, and other materials should be dried, and the source of water intrusion should be addressed before permanent interior repairs are completed.

Removing an ice dam may resolve the immediate drainage problem, but it does not prevent another one from forming when similar weather conditions return.

Why Do Ice Dams Keep Coming Back?

Recurring ice dams often indicate unresolved heat loss, uneven insulation coverage, or problems with the attic and roof assembly. Addressing the ice itself without correcting these conditions can leave the underlying cause unchanged.

One useful warning sign is uneven snowmelt. If snow repeatedly disappears from one section of the roof while remaining elsewhere, heat may be reaching that section from below. However, sun exposure and roof geometry can also influence snowmelt patterns.

A professional attic assessment may examine:

  • Air leakage through the ceiling and attic access points.
  • Insulation thickness, coverage, and gaps.
  • Ventilation pathways and blocked soffit openings.
  • Heating ducts, exhaust systems, and other local heat sources.
  • Roof framing and construction details that contribute to uneven temperatures.

Weatherization professionals may use blower door testing to evaluate air leakage and infrared imaging, under suitable conditions, to investigate areas of unusual heat loss.

The goal is to identify why the roof is warming unevenly and select improvements that address the actual cause.

Protect Your Roof With Better Attic Insulation and Air Sealing

Preventing ice dams starts with controlling how heat moves from the living space into the attic and roof. For many homes with conventional vented attics, sealing air leaks and installing sufficient insulation are the most important long-term improvements.

Proper ventilation, roof maintenance, and protective roofing materials can provide additional benefits, but they should support-not replace-an effective attic air and thermal barrier.

Radiant Barrier Cost in Houston: What Drives the Price

Updated October 13, 2026. First Defense Insulation, 12 Greenway Plaza Suite 1147, Houston, TX 77046.Radiant barrier cost for a professional install runs $710 to $2,840 nationally, about $0.70 to $2.00 per square foot of attic. The cheapest quotes often lay foil on the attic floor insulation, a method the U.S. Department of Energy strongly recommends against. Your Houston price depends on area, product, access and prep.

TL;DR

  • The U.S. Department of Energy strongly recommends against laying foil on top of attic floor insulation, the quickest and lowest-labor method.
  • Rafter installs cover the roof underside, which runs 5% to 41% larger than the attic floor depending on pitch, so per square foot quotes can count different areas.
  • Product type, attic access, ducts and framing, old insulation and add-on work move the price the most.
  • There’s no federal tax credit for a 2026 install, and Texas HOMES and HEAR rebates haven’t launched.
  • A fair quote states the area, where the barrier goes, the product, prep work and warranty.

One liner: Compare radiant barrier quotes on area and install location first, then price.

What Radiant Barrier Installation Costs

In short: National data puts radiant barrier installation cost at $350 for a small 500 sq ft attic and up to $4,000 for a 2,000 sq ft attic.

Size drives most of the spread. Here’s how the 2026 national figures break down by attic size:

Attic size Installed cost (national) Per sq ft
500 sq ft $350 to $1,000 $0.70 to $2.00
1,000 sq ft $700 to $2,000 $0.70 to $2.00
1,500 sq ft $1,050 to $3,000 $0.70 to $2.00
2,000 sq ft $1,400 to $4,000 $0.70 to $2.00

Labor is a big share of that. Installers charge about $0.60 to $1.00 per square foot to put up foil or spray coatings, which works out to roughly $30 to $80 an hour, and labor makes up roughly half the project cost.

Treat these numbers as a starting point, not a Houston quote. A real price starts with someone measuring your attic, checking how easy it is to get into, and deciding where the barrier goes. Two quotes for the same 1,500 sq ft attic can sit almost $2,000 apart inside the national range, so the method behind each total matters as much as the total itself.

Why the Cheapest Radiant Barrier Quote Often Skips the Rafters

In short: The U.S. Department of Energy strongly recommends against laying a radiant barrier directly on top of attic floor insulation, and that floor-laid method is also the quickest, lowest-labor way to install one.

Some quotes come in low because the plan is to roll foil across the top of your attic floor insulation. The U.S. Department of Energy advises against exactly that: it says not to apply radiant barriers directly on top of attic floor insulation, because the foil collects dust and may trap moisture in the insulation below.

Dust matters because a radiant barrier works by reflecting heat, and DOE notes that dust on the reflective surface cuts how well it reflects. Foil lying flat on the attic floor is a shelf for that dust. For new homes, DOE describes foil draped face down between the rafters to keep dust off the reflective side. In an existing attic, the same material can be stapled to the bottom of the rafters from inside.

Detail Rafter install Floor-laid foil
Where it goes Stapled to the bottom of the roof rafters, drooped for at least 1 inch of air space below the roof Rolled across the top of the attic floor insulation
Labor More: overhead stapling around the framing Less: rolled out across the joists
Dust Reflective face points down, little place for dust to settle Top face sits open to settling dust
Moisture Sits away from the insulation May trap moisture in fiber insulation
DOE position Method DOE describes for new and existing attics Strongly recommended against

So when two quotes for the same attic sit far apart, ask each installer one question: where does the barrier go? If the answer is the attic floor, the lower price may buy foil that reflects less every year as dust builds up. DOE also says a radiant barrier’s results depend on proper installation. At First Defense, radiant barriers go on the underside of the roof rafters, facing an open air space.

Radiant Barrier Cost Per Square Foot: Which Square Feet?

In short: Radiant barrier cost per square foot only compares fairly when two quotes count the same area, and a rafter install covers the roof underside, which is larger than the attic floor.

National cost guides price radiant barriers by attic size. Foil stapled to the rafters doesn’t cover the attic floor, though. It covers the underside of the roof, and a sloped roof has more surface than the flat floor below it. The steeper the pitch, the bigger that gap gets.

Roof pitch Roof underside over a 1,500 sq ft attic floor Extra area
4/12 About 1,580 sq ft 5%
6/12 About 1,680 sq ft 12%
8/12 About 1,800 sq ft 20%
10/12 About 1,950 sq ft 30%
12/12 About 2,120 sq ft 41%

Those figures are roof math alone. Overhangs, dormers and any gable walls the installer also covers add more.

Here’s why it matters. Say an installer charges $1.20 per square foot. On floor area, a 1,500 sq ft attic comes to $1,800. Price the same job on the roof underside of a 6/12 roof and it’s about $2,020. Neither number is wrong, but one installer can look cheaper per square foot while billing more total area, or the reverse. When you compare radiant barrier cost per square foot installed, ask each quote to state the area it covers and whether it was measured on the floor or the roof.

What Changes the Attic Radiant Barrier Price

In short: Product type, total area, attic access, obstacles, old insulation and add-on work move an attic radiant barrier price more than anything else.

Pricing a radiant barrier works a lot like pricing a paint job. Open wall goes fast, while corners and trim eat the hours. In an attic, open rafter bays are the easy part. Tight eaves, ductwork and bracing are where the time goes.

Driver What raises the price Why
Product type Two-sided foil or a spray coating instead of one-sided foil Materials run about $0.10 to $0.50 per sq ft for one-sided foil, $0.50 to $0.90 for two-sided and $0.65 to $1.00 for spray coatings
Area and pitch A bigger attic or a steeper roof The roof underside runs 5% to 41% larger than the floor across common pitches
Attic access A small hatch, low headroom, no walkway More time moving material and crew
Ducts and framing Ductwork, braces and trusses crowding the rafter bays Foil has to be cut and fitted around each one
Old insulation Wet or damaged insulation found during the visit Removal or replacement is separate work with its own price
Add-on work An insulation top-up or air sealing in the same visit Adds cost, but one setup can save a second trip

Most of these land on labor, not materials. A cramped attic with ducts in every bay takes longer to staple than an open one, even with the same foil.

If your attic insulation is thin or patchy, price a top-up in the same visit. The two do different jobs: a radiant barrier cuts radiant heat gain from the roof, while insulation slows heat moving by conduction. That’s why a good quote lists them as separate lines. Nationally, blown-in attic insulation runs about $0.50 to $2.30 per square foot.

What a Radiant Barrier Quote Should Include

In short: A fair radiant barrier quote states the area, where the barrier goes, the product, the prep work and the warranty, so you can compare one bid against another line by line.

Picture two quotes on the kitchen counter. One says “radiant barrier, $1,900.” The other says “radiant barrier, $1,400.” There’s no way to tell which is the better deal, because neither one says what you’re buying. A useful quote spells out these eight lines:

  1. Area covered in square feet, and whether it was measured on the attic floor or the roof underside
  2. Where the barrier goes: stapled to the rafters with an air space below the roof, not laid on top of the attic floor insulation
  3. Product name and type (one-sided foil, two-sided foil or a spray coating), with the spec sheet available
  4. The product’s fire rating
  5. How attic vents, wiring and light fixtures stay clear of the foil
  6. Prep work, including how old or damaged insulation will be handled and priced
  7. Cleanup and how long the job takes
  8. Warranty terms on the product and the labor

If a quote leaves out lines 1 and 2, ask for them in writing before you sign. Those two lines decide whether a lower price is a real saving or a smaller, faster job. First Defense gives free estimates after an on-site look at your attic, so the quote reflects the attic you actually have.

Tax Credits, Rebates and Financing in Houston

In short: There’s no federal tax credit for a radiant barrier installed in 2026, Texas home energy rebates haven’t launched, and financing is the main way to spread the cost.

Some cost guides still say a radiant barrier may qualify for a federal tax credit. That window has closed. The IRS Energy Efficient Home Improvement Credit covers qualifying property placed in service before December 31, 2025. The state side isn’t open yet either. The Texas Comptroller says its home energy rebate programs are still in planning and design, with no rebates available and no applications being taken.

Option Status in 2026 What it means for you
Federal Energy Efficient Home Improvement Credit (25C) Covers property placed in service before December 31, 2025 No federal credit on a 2026 install
Texas HOMES and HEAR rebates Not launched, no applications open Nothing to claim yet; HEAR will be limited to income-qualified households
First Defense financing Available on approved credit Monthly payments instead of one lump sum

First Defense offers financing through two lenders. The EnerBank USA installment loan, provided by Regions Bank, carries a fixed APR of 8.99% to 24.49%, subject to change, with repayment terms of 12 to 144 months. Its minimum monthly payment runs $11.37 to $94.80 per $1,000 borrowed and is never less than $50. On an $1,800 job, that puts the minimum payment between $50 and about $171 a month. Foundation Finance Company is the second option, and its prequalification uses a soft credit pull.

Does a Radiant Barrier Pay Off in Houston?

In short: The U.S. Department of Energy says radiant barriers do the most good in hot climates, especially when cooling ducts run through the attic.

DOE puts a number on it: some studies show radiant barriers can cut cooling costs 5% to 10% in a warm, sunny climate. If your summer cooling bill runs $250 a month, that’s $12.50 to $25 back each month while the AC works hardest. DOE also notes the lower heat gain may even allow for a smaller air conditioning system.

Those results depend on proper installation, which brings it back to where the foil goes. A barrier stapled to the rafters keeps its reflective face out of the dust. For the longer answer on whether a radiant barrier works, including its R-value and where it should go, see the FAQ on our radiant barrier page.

Radiant Barrier Cost FAQ

In short: quick answers on price, floor-laid foil, DIY, spray foam, reflective insulation, tax credits and install time.

How much does radiant barrier cost?

Professional installation runs $710 to $2,840 nationally, or about $0.70 to $2.00 per square foot based on attic size. Your price depends on the area covered, whether it’s measured on the floor or the roof, the product, attic access and any prep work. A Houston quote starts with measuring your attic.

Can a radiant barrier go over existing attic insulation?

The U.S. Department of Energy strongly recommends against it. Foil laid directly on top of attic floor insulation collects dust, which cuts its reflectivity, and it may trap moisture in the insulation. The method DOE describes is foil stapled to the bottom of the rafters, drooped to leave at least 1 inch of air space below the roof.

Can I install a radiant barrier myself?

Some homeowners do, but it means stapling foil overhead across every rafter bay in a hot attic, leaving an air space below the roof and keeping the foil clear of vents, wiring and light fixtures. DOE notes a radiant barrier’s results depend on proper installation, so a mistake can cost you the savings you paid for.

Is a radiant barrier cheaper than spray foam?

Yes, a radiant barrier is the more affordable of the two, but they do different jobs. A radiant barrier reduces radiant heat gain from the roof and doesn’t slow heat conduction. Spray foam adds insulation value and seals air leaks. The right pick depends on whether your attic’s main problem is roof heat or air leaks.

Is reflective insulation the same as a radiant barrier?

Not quite. A radiant barrier is reflective foil that cuts radiant heat gain from the roof. Reflective insulation systems combine a radiant barrier with an insulation material, so the foil acts as the insulation’s facing. The foil reflects heat in both cases, but only the insulation layer slows heat moving by conduction.

Is there a tax credit for a radiant barrier in 2026?

No. The IRS Energy Efficient Home Improvement Credit covers qualifying property placed in service before December 31, 2025. Texas home energy rebates under the HOMES and HEAR programs haven’t launched and aren’t taking applications. First Defense offers financing if you’d rather spread the cost over monthly payments.

How long does radiant barrier installation take?

First Defense finishes most residential insulation projects in a single day, typically within 4 to 6 hours. A radiant barrier job’s time depends on attic size, access, roof pitch and how much ductwork and framing the crew has to work around, so the estimate visit is where you get a firm schedule.

Ready to compare a real number with the ranges above? Call First Defense Insulation at (713) 808-9853 for a free estimate. We’ll measure your attic, show you where the barrier goes and why, and spell out every line of the quote.

Sources

  1. Angi, How Much Does a Radiant Barrier Cost to Install? [2026 Data], 2026-07-09
  2. U.S. Department of Energy, Energy Saver, Radiant Barriers, accessed 2026-10-07
  3. Internal Revenue Service, Energy Efficient Home Improvement Credit, reviewed 2026-04-28
  4. Texas Comptroller of Public Accounts, State Energy Conservation Office, Inflation Reduction Act Home Energy Rebates, updated 2026-05-19
  5. First Defense Insulation, Radiant Barrier Installation Houston, Texas, accessed 2026-10-07
  6. First Defense Insulation, Houston Attic and Spray Foam Insulation Contractor, accessed 2026-10-07

What Is the Life Expectancy of Attic Insulation?

Attic insulation does not have one fixed expiration date. In many homes, it stays useful for decades, but its real service life depends on the material, installation quality, moisture, pests, settling, and attic conditions. Houston adds heavy summer heat and humid weather to that list. Homeowners looking into attic insulation in Houston TX often ask if old insulation must be removed or if a top-off is enough. 

Age alone does not answer that. Dry, clean insulation may still have value, while wet, contaminated, compressed, or badly settled material may need replacement. The sections below focus on warning signs, material differences, local conditions, and cost-related choices.

How Long Does Attic Insulation Usually Last?

Typical Service Life by Insulation Material

Attic insulation can stay useful for decades, but the service life varies by material. Fiberglass insulation often lasts 30 years or more if it stays dry and undisturbed. Some fiberglass products can remain effective much longer. Cellulose insulation may perform well for about 20 to 30 years. 

It can settle over time, which may reduce its depth and thermal resistance. Spray foam can last several decades because it bonds to the surface where it is applied. Its performance still depends on proper installation and dry conditions.

Material type is only part of the answer. Water leaks, pest activity, foot traffic, and poor installation can shorten useful life. Insulation that has compressed or shifted may also leave parts of the attic with weak coverage. A visual check can show if the material still covers the attic floor evenly and has enough depth to perform as intended.

Why Condition Matters More Than a Calendar Date

Age alone does not tell you if attic insulation needs replacement. A 25 year old layer may still work well if it remains dry, clean, and evenly spread. A much newer installation can lose value sooner after a roof leak, pest problem, or heavy compression. This is why the physical condition of the insulation matters more than the date it was installed.

Homeowners should look for signs such as bare spots, flattened material, moisture stains, strong odors, or animal waste. Uneven indoor temperatures and rising cooling costs can also point to weak attic performance, though other home issues may cause those problems too.

The main question is not simply, “How old is the insulation?” A better question is, “Is it still doing its job?” Checking depth, coverage, moisture, and contamination gives a clearer answer. That approach can also help homeowners avoid removing insulation that still has useful life.

What Shortens the Life of Attic Insulation in Houston?

Moisture, Roof Leaks, Heat, and Humid Air

Houston has a hot and humid climate, which can put added stress on attic insulation. Moisture is one of the biggest threats. A roof leak can soak fiberglass or cellulose and reduce how well the material slows heat flow. Wet insulation can also sag, clump, or lose depth. If the source of the water is not fixed, the damage can spread across a larger area.

Humid air can also enter the attic through gaps around ceiling lights, pipes, attic doors, and other openings. Over time, repeated moisture exposure can affect insulation and nearby building materials. Heat adds another challenge. 

Houston attics can become very hot during summer, so weak or damaged insulation may struggle to limit heat transfer into the living space. Keeping the roof dry, sealing air leaks, and checking attic conditions can help protect the insulation from early decline.

Pests, Compression, Foot Traffic, and Settling

Pests can shorten the useful life of attic insulation. Rodents may tunnel through loose material, move it away from certain areas, and leave waste behind. Insects can also enter through gaps in the roof or walls. Heavy pest activity may leave parts of the attic with poor coverage or contamination that requires removal.

Compression is another common problem. Fiberglass works best when it keeps its proper thickness. Boxes, stored items, boards, or workers stepping on the material can flatten it. This reduces the air spaces that help slow heat transfer. Loose fill insulation can also settle over time. 

Some settling is normal, but too much can lower the depth and reduce performance. Foot traffic may create thin paths around ducts, wiring, or attic equipment. Checking for low spots, bare areas, and disturbed material can show where added insulation or repairs may be needed.

What Are the Signs Attic Insulation Needs Replacement?

High Cooling Bills, Hot Rooms, and Uneven Temperatures

A sudden rise in cooling costs can point to weak attic insulation. The air conditioner may run longer because heat moves into the living space more easily. This can be more noticeable during hot Houston summers. Higher bills can also come from duct leaks, aging equipment, or thermostat problems, so insulation should not be blamed without checking the attic.

Hot rooms are another warning sign. Upper floors may feel warmer than lower areas when attic insulation is thin, compressed, or missing in spots. Uneven temperatures between rooms can also suggest poor coverage above certain parts of the home. 

Homeowners may notice that one bedroom stays hot even while nearby rooms feel comfortable. These patterns often mean heat is entering through weak areas in the attic. A visual inspection can help show if the insulation depth and coverage still meet the needs of the home.

Wet Spots, Odors, Thin Coverage, and Pest Waste

Visible damage often gives a clearer sign that attic insulation may need replacement. Wet spots can form after roof leaks, plumbing leaks, or moisture problems. Damp insulation may clump, sag, or lose some of its ability to slow heat flow. A strong musty smell can also point to moisture in the attic or nearby building materials.

Thin coverage is another sign to watch. Loose fill insulation can settle over time or get moved by foot traffic, repairs, or pests. Bare areas may leave parts of the ceiling with little protection from attic heat. Pest waste can create another serious problem. Rodents may leave droppings, urine, nesting material, or damaged insulation behind. 

Contaminated material may need to be removed instead of covered with new insulation. Homeowners should look for staining, unusual odors, low spots, and disturbed areas. These signs can help show if repair, added material, or full replacement is the better option.

Should Old Attic Insulation Be Removed or Topped Off?

When a Top Off May Be the Better Choice

Adding new insulation over existing material can be a good option when the old layer is dry, clean, and free from pest waste. The existing insulation should also be in fair condition without signs of mold, major water damage, or strong odors. In these cases, adding more material can increase insulation depth and improve thermal resistance without removing material that still works.

Before adding insulation, the attic should be checked for air leaks and blocked vents. Gaps around pipes, wiring, ceiling openings, and attic access points can allow conditioned air to escape. These leaks should be sealed before more insulation goes in. Existing material may also need to be leveled if it has shifted or settled unevenly. A top off often requires less labor than full removal and can be practical when the main problem is low insulation depth rather than contamination or damage.

When Full Removal Makes More Sense

Full removal may be needed when old attic insulation has serious damage or contamination. Water soaked material is one example. A roof or plumbing leak can leave insulation wet, compressed, or stained. The leak should be repaired before new material goes into the attic. Removing damaged insulation also gives workers access to the attic floor so hidden moisture or air leaks can be found.

Pest contamination is another common reason for removal. Rodents may leave urine, droppings, nesting material, and damaged insulation behind. Covering contaminated material with a fresh layer does not fix the underlying problem. Strong odors, mold growth, fire damage, and widespread dirt can also support a removal decision.

Full removal can also help during major attic repairs. It gives clear access to wiring, ceiling penetrations, ducts, and other areas that may need work. The right choice depends on the condition of the existing insulation and the problems found during an attic inspection.

What Should Houston Homeowners Check Before Paying for New Insulation?

Air Sealing, Vent Baffles, Attic Airflow, and Duct Leaks

New insulation works best when other attic problems are handled first. Air leaks can let cooled indoor air enter the attic through gaps around pipes, wiring, ceiling lights, and attic access openings. Sealing these gaps can reduce unwanted air movement before more insulation is added.

Vent baffles also deserve attention. They help keep insulation away from soffit vents so outside air can move through a vented attic. Blocked vents may limit airflow and create moisture problems. Ducts should also be checked for loose joints, damaged sections, or poor insulation. Leaky ducts can waste cooled air inside a hot attic and make some rooms harder to cool.

Homeowners should ask for these areas to be checked before approving the work. Adding insulation alone may not solve comfort problems if air leaks, blocked vents, or damaged ducts remain.

R Value Target, Material Choice, Cost, and Quote Scope

The right R Value depends on the attic, the amount of insulation already present, and the type of material used. R Value measures resistance to heat flow. A higher number means greater resistance. Houston falls within a warm climate zone, so attic insulation should match the needs of that climate and the home itself. ENERGY STAR lists different attic recommendations based on climate zone and existing insulation levels.

Material choice also affects price, installation method, depth, and future maintenance. Fiberglass, cellulose, and spray foam have different properties and costs. A written quote should clearly state the material, target R Value, planned depth, attic area, removal work, air sealing, and labor charges. It should also list any extra work that may affect the final price. Clear details make it easier to compare bids and understand what each contractor plans to provide.

Frequently Asked Questions

How Often Should Attic Insulation Be Replaced?

Attic insulation does not need replacement on a fixed schedule. Replace it when moisture, pests, compression, settling, or poor coverage reduces its performance.

Can I Add New Insulation Over Old Attic Insulation?

Yes. New insulation can often go over old material if the existing layer is dry, clean, and free from pest waste. Air leaks and moisture problems should be fixed first.

Does Wet Attic Insulation Need to Be Replaced?

Wet insulation may need removal if moisture has damaged the material or caused contamination. The water source should be repaired before new insulation is installed.

What R Value Should an Attic Have in Houston, Texas?

Houston is in IECC Climate Zone 2. ENERGY STAR lists R 49 for an uninsulated attic and R 38 when about 3 to 4 inches of insulation is already present.

Choose First Defense Insulation for Your Attic Project

Old attic insulation can still have useful life if it remains dry, clean, evenly distributed, and able to meet the home’s thermal needs. Replacement makes more sense after water damage, pest contamination, major settling, or poor coverage that leaves hot rooms and rising cooling costs. A site review can also show if air leaks, blocked vents, or damaged ducts are part of the problem. 

First Defense Insulation serves Houston homeowners who want a clear scope for attic work based on current conditions, not age alone. A good quote should state the material, target R-value, removal needs, air-sealing work, and any attic preparation. For a local quote, go to https://fdinsulation.com/. You can also visit us at 12 Greenway Plaza, Suite 1147, Houston, Texas 77046, or call 713-808-9853 for attic insulation service.

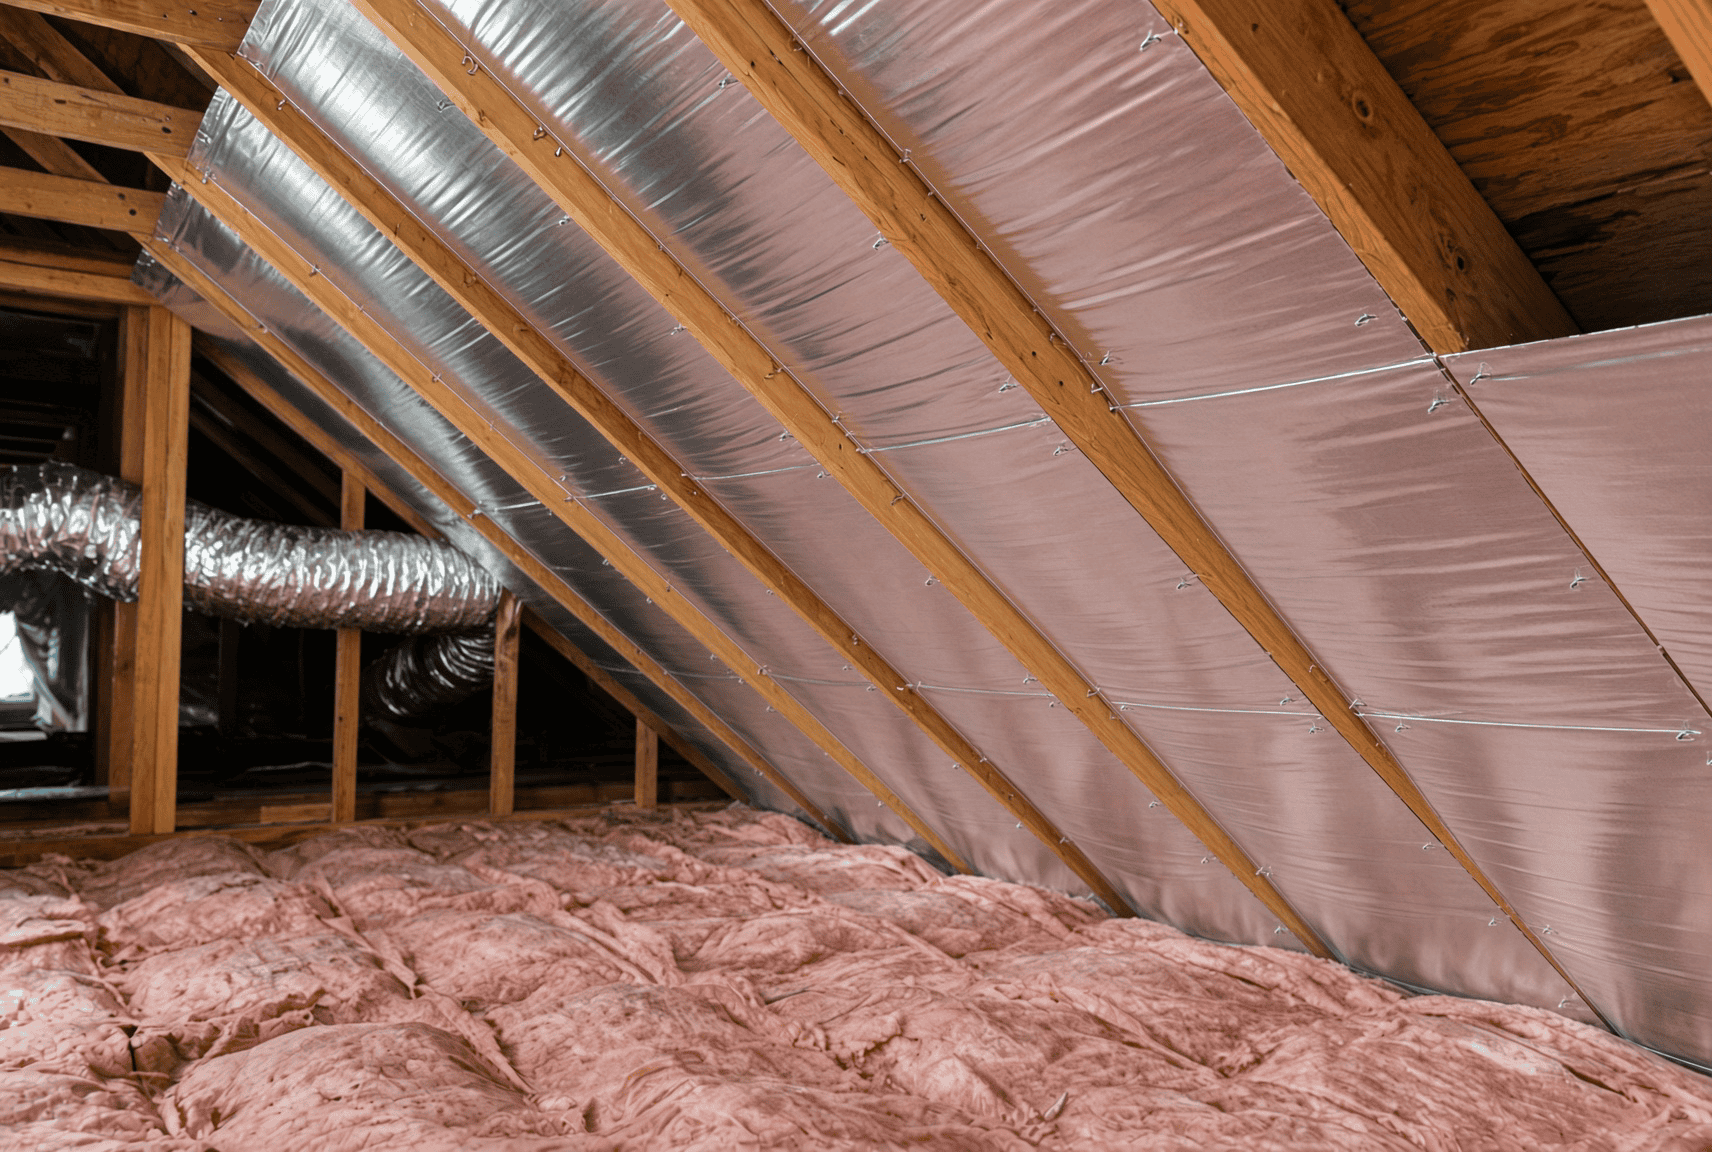
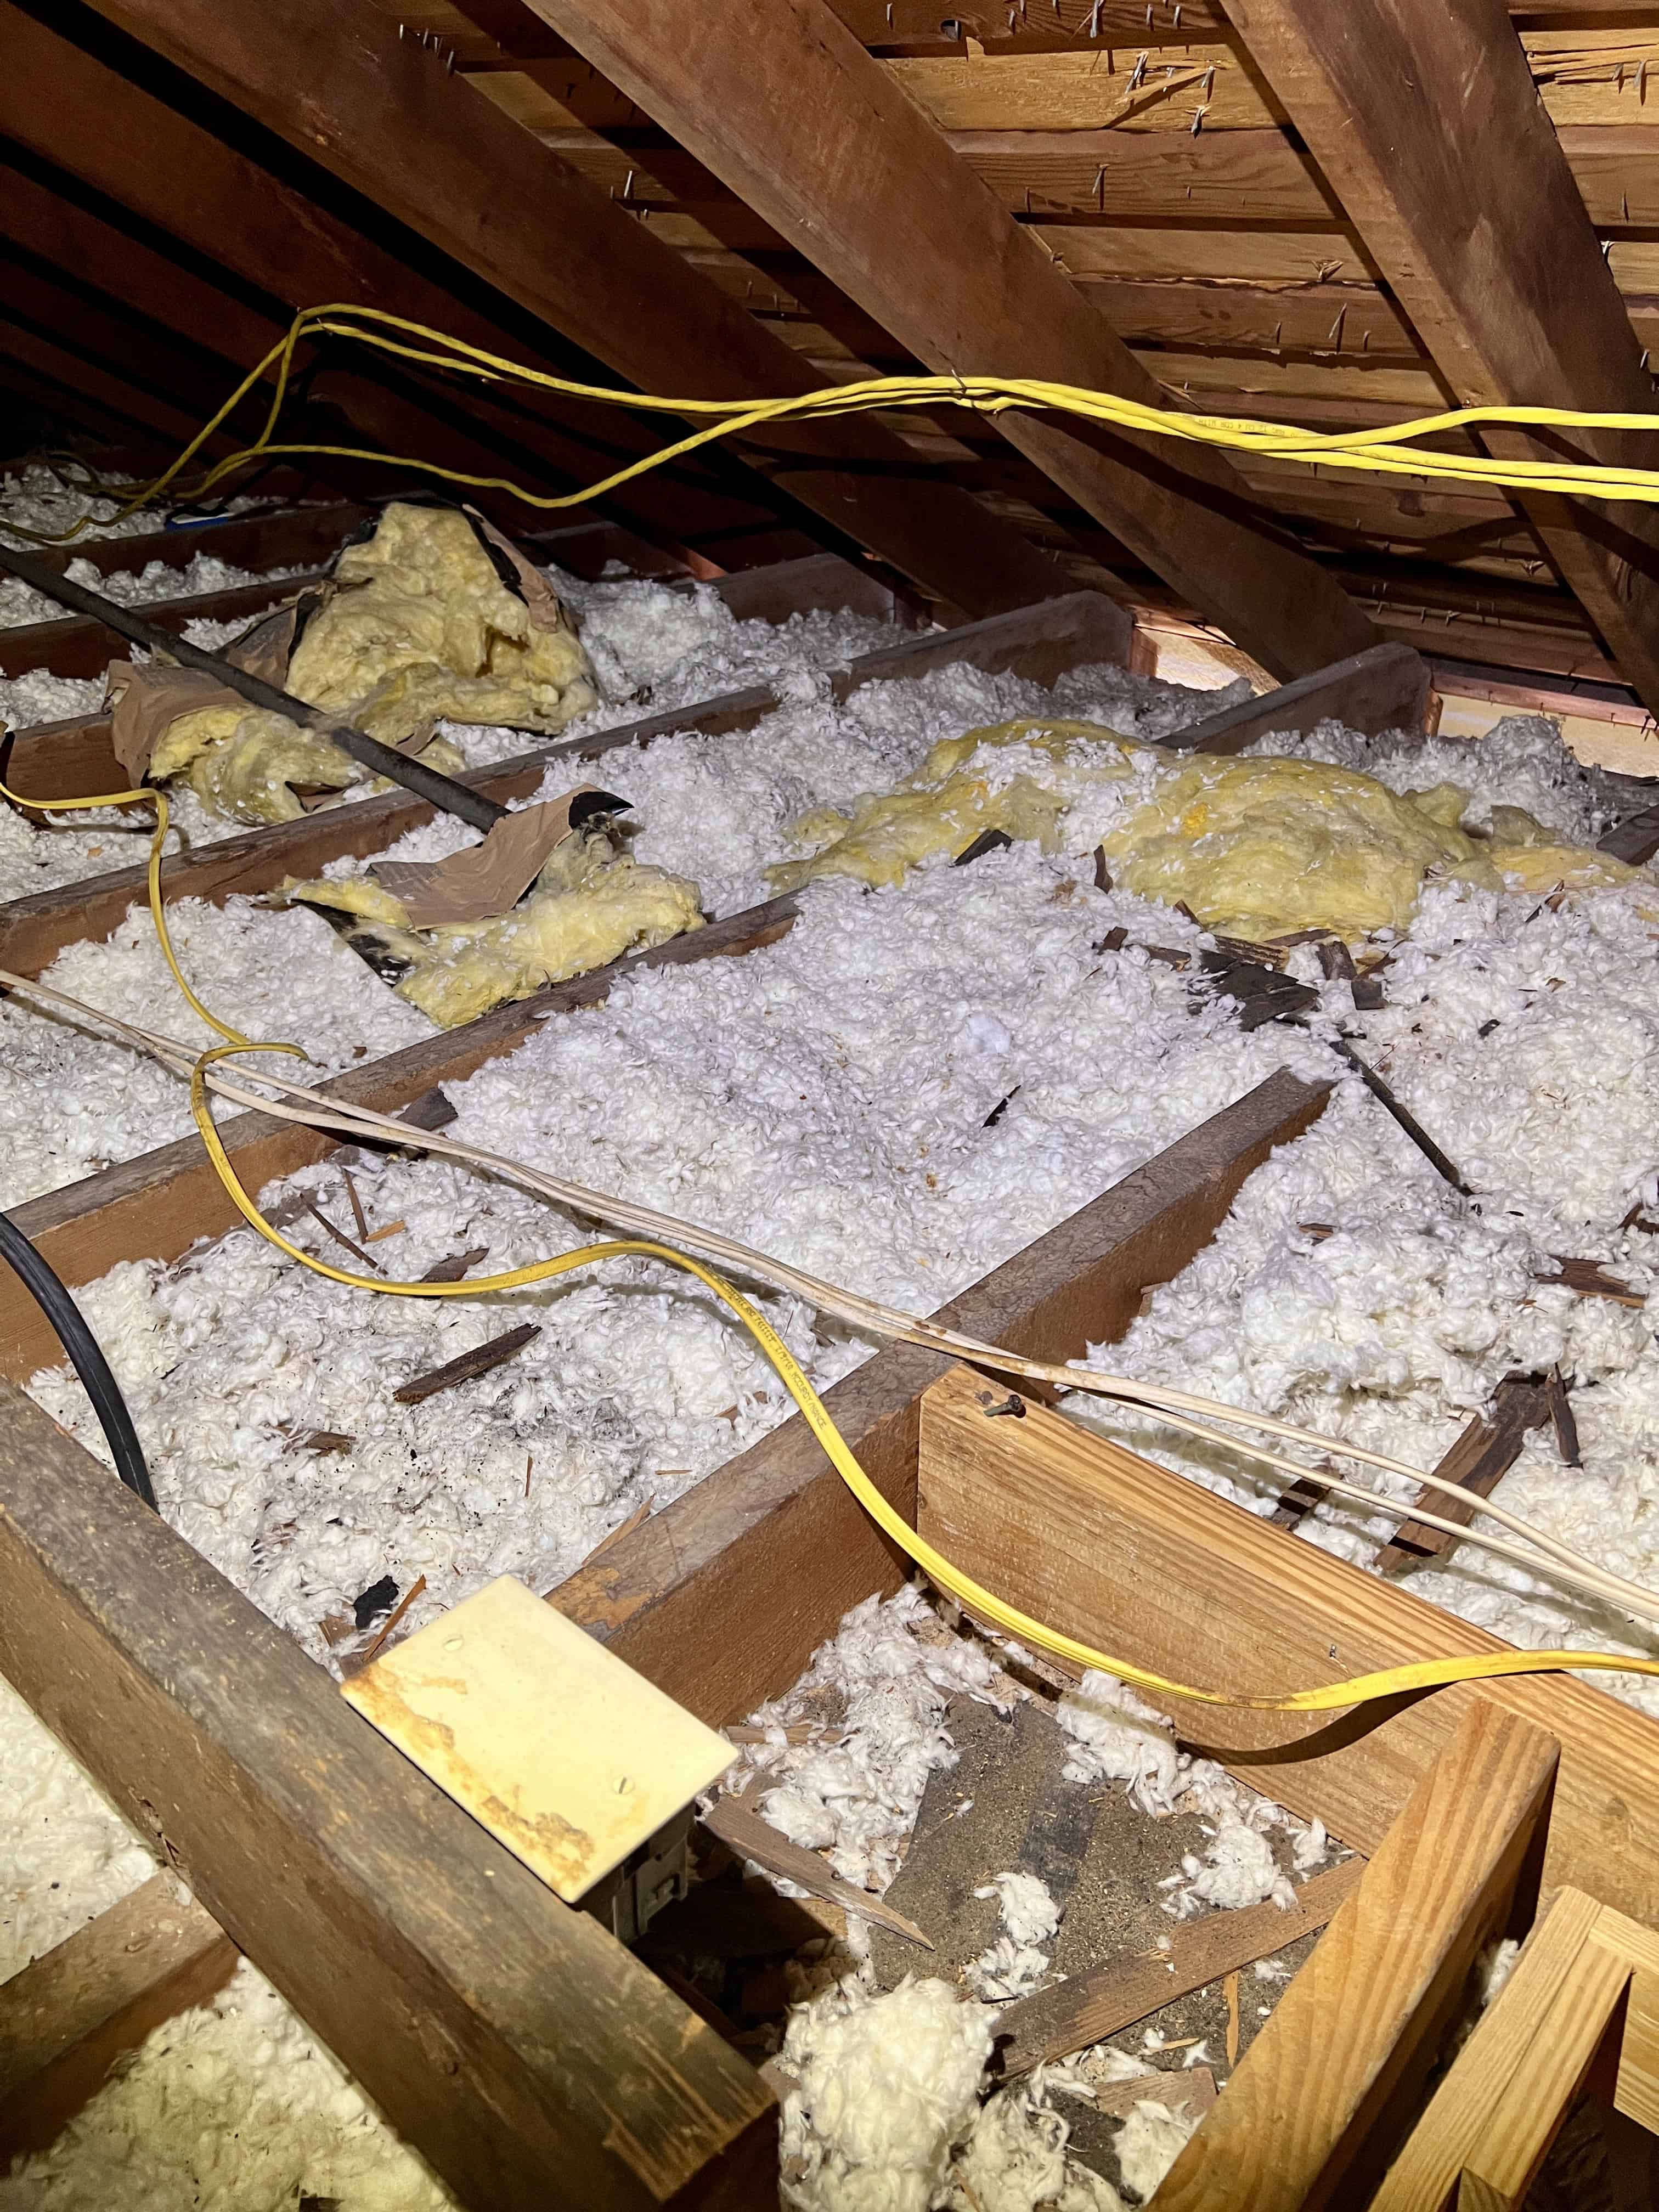
Attic space with exposed wooden rafters, yellow electrical cables, and fluffy insulation on the floor.

What Is That White, Fluffy Material in Your Attic?

White, fluffy material in an attic is usually loose-fill fiberglass, though pale cellulose can look similar. Fiberglass often resembles soft cotton, while cellulose tends to look denser, dustier, and more paper-like. Color alone cannot prove what you have. Older attics may contain layered materials, and granular vermiculite deserves added care because some products were contaminated with asbestos. 

Do not disturb material that looks pebble-like or mica-like until it has been assessed. A proper attic insulation check should identify the material, measure its depth, note gaps or damp areas, and check air leaks before any new product goes in. Those steps help homeowners choose safe, useful next steps.

What Is the White Fluffy Insulation in My Attic?

Is It Loose Fill Fiberglass or Cellulose?

White, soft, cotton like material often points to loose fill fiberglass. The fibers may look light, airy, and slightly shiny under a flashlight. Fiberglass pieces can vary in size. Some areas may look packed down after years of dust, foot traffic, or air movement.

Cellulose usually has a denser look. It often appears gray, dull, or brown. The texture can look like torn paper or soft lint. Cellulose comes from treated paper fibers, so small printed pieces may appear in older material. Still, color alone does not give a firm answer.

Many attics contain more than one insulation layer. A newer white fiberglass layer may cover older cellulose below. Dust can also turn bright material gray. Moisture may cause clumps or flat spots. Look at several areas before making a judgment. Check attic corners, access points, and places where the top layer is thin.

Can Color and Texture Identify It Safely?

Color and texture can help narrow the choices, but a photo cannot confirm the material with full accuracy. Lighting changes the way insulation looks. Dust, moisture, age, and camera settings can also hide useful details. Two products may appear almost the same in a picture.

Start with the age of the home. Then look for product bags, labels, depth markers, or installer notes near the attic opening. Old repair records, home inspection reports, and past energy work may also name the product. Check the lower layers from a safe viewing point. Do not stir, scoop, or pull apart material just to see what sits below.

Use care around old, loose material that looks like small flakes, pebbles, or shiny chips. It may not be fiberglass or cellulose. Avoid touching it until a qualified inspector can review it. Wear proper clothing and limit dust when entering any attic.

Could White Attic Insulation Contain Asbestos?

What Does Vermiculite Insulation Look Like?

Vermiculite does not look like soft cotton or loose wool. It has a dry, grainy texture. The pieces often look like small pebbles, flakes, or shiny chips. Some particles may look silver, gold, gray, or light brown. Others may have a layered appearance like mica. The pieces also vary in shape and size.

White fiberglass near the surface does not prove the full attic is free from vermiculite. A past owner may have placed fiberglass over an older insulation layer. The lower material may remain hidden between the ceiling joists. Do not dig through the top layer to check beneath it. Moving suspected vermiculite may send fine dust into the air. Review old home records or ask a trained asbestos inspector to assess the attic from a safe position.

When Should the Material Be Tested?

Arrange an asbestos assessment before any project that may move suspected vermiculite. This includes attic renovation, insulation removal, electrical rewiring, pipework, ceiling repairs, or new storage flooring. Testing may also be useful before workers cut openings or move material near wires, ducts, and joists.

Do not collect a sample on your own. Scooping, sweeping, drilling, or vacuuming can release dust. Keep children and pets out of the attic. Avoid placing boxes on the material. Tell each contractor about the suspected insulation before work starts.

The EPA advises homeowners to assume vermiculite insulation may contain asbestos. It also advises leaving the material undisturbed. Testing is not needed before taking those safety steps. A trained asbestos inspector can decide if sampling fits the planned work. A qualified removal contractor should handle any material that must be moved.

Is My Attic Insulation Still Working?

What Do Depth, Gaps, and Settling Show?

R value measures how well insulation resists heat flow. A higher R value usually gives better thermal control when the material is installed correctly. Depth matters because loose fill insulation needs enough material to reach its rated level. Thin areas may let more heat pass through the ceiling.

Bare spots around pipes, wires, attic hatches, and wall tops can weaken the whole insulation layer. Compressed batts also lose some of their ability to slow heat transfer. Boxes, boards, and stored items may press the material flat. Loose fill can shift after attic work or strong air movement. It may also settle over time.

Look for depth markers attached to the joists. Compare several parts of the attic, not just the area near the access opening. A full attic check should note depth, gaps, compression, damaged areas, and uneven coverage.

What Do Moisture, Odors, and Pest Signs Mean?

Wet insulation cannot perform as intended. Roof leaks may leave damp clumps, dark stains, or matted fibers. Water can also enter near flashing, vents, pipes, or damaged roof sections. A musty smell may point to trapped moisture or growth on nearby wood and building materials.

Pest activity creates other problems. Droppings, nesting material, tunnels, and strong odors may signal rodents, birds, or insects. Animals can move loose fill, tear batts, and damage wiring. They may also crush or pull apart flexible ducts. A damaged duct can leak cooled or heated air into the attic.

Do not cover these signs with fresh insulation. Find and fix the source first. Repair roof leaks, damaged ducts, and entry points. Remove contaminated material using safe methods. The attic should be dry and clean before new insulation is placed.

Should I Add More Insulation or Remove the Old Material?

Can New Insulation Go Over Existing Insulation?

New insulation can often go over an older layer that is dry, clean, and in good condition. The old material should have no signs of mold, pests, smoke damage, or heavy compression. It should also sit evenly across the attic floor. Adding more material can improve coverage and raise the total R value.

The new insulation does not always need to match the existing product. For example, loose fill fiberglass may go over cellulose in some attic systems. The full setup still needs proper depth, safe clearances, and open vent paths.

Removal may be the better choice when the old material is wet, burned, badly damaged, or filled with pest waste. Strong odors and unknown loose material also need closer review. Fix the cause of the damage before adding a fresh layer. Covering a problem can hide it and increase repair costs later.

Why Should Air Leaks and Roof Leaks Be Fixed First?

Insulation slows heat flow, but it does not stop moving air by itself. Small gaps in the ceiling can let indoor air enter the attic. Common openings appear around plumbing pipes, wire holes, attic hatches, duct chases, and recessed lights. These leaks can reduce comfort and waste heating or cooling energy.

Seal safe gaps before adding more attic insulation. Some recessed lights and hot flues need special clearance, so they should not be covered without checking their rated design. Repair damaged attic hatch seals and close open spaces around ducts and wall tops.

Roof leaks also need repair before new material goes in. Water can soak insulation, stain wood, and create lasting odors. In a vented attic, keep soffit and ridge airflow open. Use baffles where needed so loose fill does not block air moving from the eaves toward the roof ridge.

Which Attic Insulation Type Fits My Home?

How Do Fiberglass, Cellulose, and Spray Foam Compare?

Fiberglass often has the lowest starting cost. It comes as batts or loose fill. Crews usually place it on the attic floor. It slows heat flow but does not seal small air gaps. Air sealing often needs separate work.

Cellulose often falls in the middle cost range. It fits around pipes, wires, and framing better than many batts. It can also reduce some air movement due to its dense form. Wet cellulose can clump, settle, and lose performance. Roof leaks should be repaired before installation.

Spray foam usually costs more. Installers may apply it to the roof deck or other parts of the attic. It can resist heat flow and limit air movement in one layer. Poor application may leave gaps or create moisture concerns. Foam on the roof deck can also affect access during future roof repairs. The best result depends on project design, R value, coverage, and airtightness. Color and product name alone do not predict performance.

Is DIY Installation Worth the Cost and Risk?

DIY attic insulation may reduce labor costs, but the work can be hard and risky. Loose fill projects often require a blower rental. One person feeds material into the machine while another handles the hose. Protective clothing, gloves, eye protection, and a suitable mask help limit contact with fibers and dust.

Attics can become very hot. Low headroom also makes movement difficult. Walk only on secure framing or approved platforms. Ceiling drywall cannot support body weight. Electrical boxes, recessed lights, chimneys, and flues may need open space around them. Covering these areas can create a fire risk.

A contractor may be the safer choice for complex air sealing, roof deck foam, damaged wiring, suspected asbestos, or pest waste. These conditions need special tools, training, and cleanup methods. Compare equipment costs, safety needs, material waste, and your available time before starting the work.

Frequently Asked Questions

Is White Fluffy Attic Insulation Dangerous to Touch?

The risk depends on the material and its condition. Fiberglass can irritate your skin, eyes, throat, and lungs. Attic dust can also cause coughing or discomfort. Wear gloves, long sleeves, eye protection, and a suitable mask before entering the area. Do not touch loose material that looks like shiny flakes or small pebbles. It may be vermiculite. Leave suspected vermiculite in place and have it checked before any work begins.

Why Is My Attic Insulation Turning Gray or Black?

Gray or black areas may form where moving air carries dust through the insulation. Smoke and soot can cause similar marks. Dark patches may also point to a roof leak, moisture damage, mold like growth, or pest debris. Check for damp fibers, stains, odors, droppings, and damaged wood. Fix the source before adding new insulation or covering the affected area.

Can Spray Foam Go Over Loose Fill Insulation?

Placement matters. Spray foam on the roof deck creates a different thermal boundary from loose fill on the attic floor. Using both without a clear plan may trap heat or moisture in the wrong area. A contractor should review the attic design, ventilation, ducts, and roof structure first. The loose fill may stay, move, or need removal based on the planned system.

What Affects Attic Insulation Cost in Houston?

Cost depends on attic size, access, material choice, and the target R value. Removal, pest waste, water damage, air sealing, vent work, duct repairs, and cleanup can raise the total. Tight spaces and steep roof lines may also add labor. Compare written scopes from each contractor. Check the listed depth, R value, material, repairs, removal work, and cleanup instead of choosing by price alone.

Choose a Better Attic With First Defense Insulation

White, fluffy insulation may be doing its job, or it may be thin, shifted, damp, contaminated, or hiding air leaks. A home assessment can confirm the material, measure current R-value, inspect problem areas, and show if adding insulation, removal, air sealing, or spray foam fits the attic. 

For Houston-area homeowners, First Defense Insulation provides attic and spray foam services based on the home’s layout and comfort concerns. Clear findings also help clients compare scope, price, and likely value before work begins. To discuss high energy bills, hot rooms, dusty air, or aging insulation, visit us at 12 Greenway Plaza, Suite 1147, Houston, Texas, 77046, or call 713-808-9853 for an attic insulation assessment. Let us inspect your attic and build a plan for a more comfortable home.

What Makes Attic Insulation Healthy for Your Home?

The healthiest attic insulation is not just one product. It depends on the material, the attic’s air leaks, moisture level, old insulation, and installation quality. Houston homes also deal with long cooling seasons, humid air, and AC ducts that often sit above the ceiling. That mix can affect indoor air, comfort, and energy use. A credible Houston attic insulation company can inspect the attic before new material is installed. The right plan should limit dust, reduce heat transfer, support airflow where needed, and avoid moisture traps that may lead to odor or mold concerns.

What Makes Attic Insulation Healthy for a Home?

What Indoor Air Quality Factors Matter Most?

Healthy attic insulation should support clean indoor air, not add new problems above the ceiling. The first factor is the material itself. Some products create more dust during installation. Others may have odors or chemical concerns during curing. The next factor is air movement. If gaps around lights, pipes, fans, or wall tops stay open, attic air can move into living spaces. That air may carry dust, old insulation fibers, pest debris, or odors.

A good attic plan should look at these items:

  • Air leaks between the attic and rooms below
  • Dust from old or loose material
  • Odors from new or damaged products
  • Past pest activity
  • Bathroom fans that vent into the attic
  • Duct leaks above the ceiling

The healthiest choice depends on both the product and the prep work. Clean installation matters as much as the material.

What Role Do Moisture and Dust Play?

Moisture and dust can change how healthy attic insulation feels inside the home. Damp insulation can lose performance. It can also hold odors. If moisture stays long enough, mold may grow on nearby wood, paper, or debris. The insulation itself may not be the only issue. Roof leaks, bathroom fans, poor vent flow, and ceiling air gaps can all add moisture to an attic.

Dust also needs attention. Some dust comes from old insulation. Some comes from pests, loose fibers, stored items, or air leaks. Once attic dust enters the home, it may bother people with allergies or breathing issues. New insulation should not be placed over wet, dirty, or damaged material without checking the cause first. A clean, dry, sealed attic gives any insulation a better chance to work well.

Which Attic Insulation Material Is Safest for Houston Homes?

Is Fiberglass Safe After Proper Installation?

Fiberglass can be a safe and practical attic insulation choice for many Houston homes. It works best when placed at the right depth and kept away from living space air paths. During installation, trained crews use protective gear and clean work methods that limit contact with fibers and dust. After the material is in place, it sits above the ceiling and helps slow heat from the hot attic moving into the rooms below.

In Houston, this matters because attic temperatures can rise fast during long warm seasons. Fiberglass also handles humid areas well when the attic stays dry and has proper airflow. Before new material goes in, the attic should be checked for roof leaks, duct issues, and open ceiling gaps. Air sealing supports cleaner indoor air and better comfort.

Is Cellulose Healthy Despite Dust and Settling?

Cellulose can be a healthy attic insulation option when installed with care. It is often made from recycled paper and treated for fire resistance. It fits well around framing, pipes, and small spaces, so it can help reduce heat movement across the attic floor. Many Houston homeowners like it because blown material can cover uneven attic areas better than some batt products.

Good prep work makes a big difference. Ceiling gaps should be sealed before cellulose is installed, so attic air does not move into the home. Installers also account for settling by adding the right depth from the start. The attic should be dry and clear of active leaks before work begins. With proper planning, cellulose can support comfort, energy control, and healthy indoor air goals.

Is Spray Foam Attic Insulation Healthy or Risky?

What Off Gassing Issues Should Homeowners Know?

Spray foam can be a healthy attic insulation choice when the product fits the home, and the crew follows the maker’s instructions. Some homeowners ask about off gassing because spray foam is applied as a liquid that expands and cures. During that process, odors may be present for a set period. A quality installation plan includes proper mixing, ventilation, and clean work areas. It also keeps people and pets out of the workspace during application.

Once cured as directed, spray foam can help seal small gaps and slow heat transfer. In Houston, that can support comfort because homes deal with long warm seasons and humid air. Homeowners should ask what product will be used, how the attic will be ventilated, and what timing the product maker recommends before normal use.

Why Do Curing Time and Re Entry Rules Matter?

Curing time helps spray foam reach the condition intended by the product maker. Re entry rules help protect the home while the material sets. These time frames can vary by product, attic size, ventilation, and site conditions. That is why trained installers follow the product instructions instead of guessing. A clear plan also helps the homeowner know what to expect before work starts.

Good spray foam planning often includes these steps:

  • Review the product instructions before installation
  • Set a clear re entry time for people and pets
  • Ventilate the work area as directed
  • Keep the attic closed off from living areas during the job
  • Check the finished work after the foam cures

This process helps spray foam perform as planned. It also gives Houston homeowners more confidence in the health and comfort goals of the project.

Should Old Attic Insulation Be Removed Before New Insulation?

What Signs Point to Mold, Pests, or Contamination?

Old attic insulation does not always need to come out before new material goes in. The attic should be checked first. Clean, dry insulation may stay in place in some homes. Removal may be the better first step when the existing material shows signs that could affect air quality, odor, or comfort. This helps the new insulation work from a cleaner base.

Common signs to look for include:

  • Dark spots on insulation or nearby wood
  • A musty smell in the attic
  • Water stains near roof decking or vents
  • Rodent droppings or nesting material
  • Flattened or uneven insulation depth
  • Dust that moves through ceiling gaps
  • Bathroom fans that release air into the attic

These signs do not mean every attic needs full removal. They mean the space needs a closer check before new insulation is added.

What Should You Do With Vermiculite or Suspected Asbestos?

Vermiculite needs special care because some older vermiculite insulation may contain asbestos. It often looks like small, light pebbles or flakes. It may be gray, brown, silver, or gold. Homeowners should not touch it, sweep it, vacuum it, or move it around. Disturbing the material can release fibers into the air if asbestos is present.

The safest step is to leave the material in place and have it checked by a licensed asbestos professional. Testing and removal should follow proper safety rules. This protects the home and the people inside it. New attic insulation should not be placed over suspected asbestos until the attic has been reviewed. A safe plan may include testing, containment, or removal by a qualified asbestos contractor before any new insulation work begins.

What Attic Insulation Mistakes Can Affect Health and Comfort?

Why Is Air Sealing Needed Before New Insulation?

New attic insulation works best when air leaks are sealed first. Gaps around lights, ceiling fans, plumbing pipes, wiring holes, and wall tops can let attic air move into rooms below. That air may carry heat, dust, odors, and humid air. It can also make the AC work harder during Houston’s long warm season. Insulation slows heat flow, but it does not stop moving air by itself. That is why air sealing belongs near the start of the project.

A good crew will look for hidden openings before adding more material. Common sealing spots include ceiling penetrations, attic hatch edges, duct chases, and dropped soffits. Once those areas are sealed, the new insulation can sit in a cleaner and more stable space. The result is better comfort, steadier indoor temperatures, and less attic air mixing with the living area.

Why Do Bathroom Vents, Ducts, and Soffits Matter?

Bathroom vents, ducts, and soffits can affect attic health as much as the insulation depth. A bathroom fan should move moist air outdoors, not into the attic. If warm, damp air stays above the ceiling, it can raise humidity in that space. Over time, that can affect wood, dust levels, odor, and comfort. Proper vent routing helps the attic stay drier and cleaner.

Ducts also need attention in Houston homes. Many AC ducts run through the attic. If they leak, cooled air can escape before it reaches the room. That can lead to hot rooms and longer AC run times. Soffits matter because they help fresh air enter a vented attic. New insulation should not block them. Baffles can help keep air paths open while insulation covers the attic floor.

Frequently Asked Questions

Is Attic Insulation Toxic?

Most attic insulation is safe when installed the right way. Problems are more likely during removal, poor installation, or when old material has moisture, pests, or unknown debris.

What Attic Insulation Has the Lowest Odor?

Fiberglass and mineral wool often have low odor after installation. Spray foam may smell during curing, so proper ventilation and re entry timing matter.

Can Attic Insulation Cause Mold?

Insulation does not cause mold by itself. Mold needs moisture. Roof leaks, blocked airflow, or bathroom vents releasing air into the attic are common causes.

Can New Attic Insulation Go Over Old Insulation?

Yes, if the old insulation is dry, clean, and in good condition. Wet, damaged, pest affected, or suspect material should be checked first.

Choose First Defense Insulation for a Healthier Houston Attic

The healthiest attic insulation is the material that fits the home, stays dry, limits dust, has low odor after installation, and works with proper air sealing. In many Houston homes, fiberglass, cellulose, mineral wool, or spray foam can all be smart options when the attic is checked first. The right choice depends on the current insulation, airflow, moisture level, duct layout, and ceiling gaps.

A well planned attic project can support cleaner indoor air, steadier room temperatures, and better comfort during long warm seasons. First Defense Insulation helps homeowners choose attic insulation based on the home’s real needs, not just a product name. For a healthier attic plan, visit us at 12 Greenway Plaza, Suite 1147, Houston, Texas, 77046, or call 713-808-9853 for quality attic insulation service.

Can You Use R13 Insulation in a Houston Attic?

R13 insulation can sound like a simple fix for a hot attic, but it is often too low for attic floors in Houston. Many homes need more depth, better air sealing, and clear vent paths to reduce heat gain from the attic into living rooms. A good plan starts with what is already there, then checks for gaps, crushed batts, wet spots, bathroom fan routing, and blocked soffits. A local attic insulation contractor in Houston can help match R-value, material, and attic conditions to the home rather than guessing from a label on the roll.

Can You Use R13 Insulation in the Attic?

Where R13 May Fit

R13 insulation can fit in some attic areas, but it depends on the job. It is often used in wall cavities, short attic walls, knee walls, and tight spaces where deeper insulation will not fit well. It may also help as a first layer above a ceiling if the attic has little or no insulation. In that case, it is better than bare drywall or open ceiling joists. 

Still, it should not be the full plan for most attic floors. The attic floor faces strong heat from the roof. Houston homes can feel this fast during long, hot months. Before using R13, check the space, vent paths, old material, and air leaks. R13 can play a role, but it usually needs help from more insulation.

Why R13 Alone Is Usually Too Low

R13 alone usually does not give enough heat resistance for an attic floor. The attic sits above the living space, so heat moves through the ceiling when the insulation is too thin. That can make rooms feel warmer and place more strain on the AC system. R13 batts also lose value when they get crushed, split, or installed with gaps. 

Small openings around lights, pipes, wires, and attic hatches can let hot attic air pass into the home. That lowers comfort even more. Many attic projects need deeper coverage, often with blown material over the ceiling area. The goal is steady depth with no bare spots. R13 may help as a base layer, but it should not be the only layer in most Houston attics.

What R Value Does a Houston Attic Need?

Recommended Attic Levels for Zone 2

Houston sits in a hot climate area, so attic insulation must slow the heat before it reaches the rooms below. R13 is usually too low for an attic floor in this region. Many attic projects aim for a much higher total R value, often around R30 to R49, based on the home, attic space, and current insulation depth. 

The right level also depends on air leaks, duct location, roof vents, and past damage. More insulation cannot fix every attic problem by itself. Air sealing still matters. Open gaps around wires, lights, pipes, and attic doors can let hot air move through the ceiling.

Attic Condition Common Need
Bare attic floor New insulation with proper depth
Thin R13 layer More insulation added above it
Wet or torn material Removal before new work
Hot rooms below attic Air sealing plus better coverage

Why R13 Is More Common for Floors and Walls

R13 batts fit many wall cavities because walls have limited space. A standard wall cavity is not deep enough for thick attic insulation. That is why R13 often appears in walls, garage walls, short attic walls, and some floor areas. An attic floor works differently. It has more open space above the ceiling. That space allows deeper insulation, which can give higher resistance to heat flow. 

This matters in Houston because attic heat can build fast during long warm seasons. R13 can still help in small spots, but it is not the typical end goal for a full attic floor. It may work as a base layer if it is clean, dry, and fitted well. The attic still needs enough total depth to reduce heat transfer into the living area.

Should You Add More Insulation Over Existing R13?

Clean, Dry Batts That Can Stay

You can often add more attic insulation over existing R13 if the batts are clean, dry, and lying flat. The old layer can still add value if it has no mold signs, pest waste, heavy dust, or water stains. It also needs to touch the ceiling surface below it. Gaps under batts let air move through the attic floor and reduce comfort. 

Before adding more material, check the attic for open spaces around pipes, wires, light boxes, and the attic hatch. Seal those gaps first. Then add blown material or new batts above the R13 to reach a better total R value. Do not press the new layer down. Crushed insulation does not work as well.

Wet, Dirty, or Damaged Batts That Need Removal

Some R13 batts should not stay in the attic. Wet insulation can hold moisture against wood and drywall. It may also lose much of its heat resistance. Dirty insulation can point to air leaks, pest activity, roof leaks, or years of attic dust moving through gaps. Torn batts, missing pieces, and flattened sections also leave weak spots across the ceiling. 

Adding new material over bad insulation can hide these problems. It can also make later repairs harder. Remove batts that show stains, odors, nesting, rodent waste, or signs of mold. After removal, find the cause before new insulation goes in. Check roof leaks, vent paths, bath fans, and air leaks. A clean attic floor gives the next layer a better chance to work well.

Which Attic Insulation Type Works Better Than R13 Batts?

Blown In Fiberglass or Cellulose for Attic Floors

Blown in fiberglass and cellulose often work better than R13 batts on attic floors because they fill open areas more evenly. Batts come in set widths. They can leave gaps around wires, pipes, braces, and uneven framing. Loose material can cover those odd spaces with fewer breaks. That helps the attic floor hold a steadier R value across the ceiling. 

Fiberglass is light and does not settle as much as some materials. Cellulose is denser and can help slow air movement after air gaps are sealed. Both need proper depth to work well. The installer should keep soffit vents open and use baffles where needed. They should also mark depth so the final level is easy to check.

Spray Foam for Special Attic Plans

Spray foam may fit special attic plans, but it is not the same as adding loose material to the attic floor. It often goes along the roof deck instead of the ceiling surface. This can change the attic from a vented space to a sealed attic setup. That choice needs careful planning because it affects airflow, moisture control, HVAC equipment, and roof deck conditions. 

Spray foam can help in homes with ducts in the attic because it may bring that area closer to indoor temperatures. Still, it costs more than many loose fill projects. It also needs proper prep, safe application, and code aware installation. For many Houston homes, blown in insulation over a sealed attic floor is the simpler path. Spray foam may make sense when the whole attic design supports it.

What Mistakes Happen With R13 Attic Insulation?

Skipped Air Sealing

Air sealing often gets skipped because insulation looks like the main fix. That can cause poor results. R13 batts slow heat flow, but they do not stop air leaks by themselves. Hot attic air can pass through gaps around pipes, wires, ceiling lights, bath fans, and attic doors. Those leaks can carry heat, dust, and moisture into the living area. In Houston, that can make rooms feel warm even after new batts go in. 

Seal gaps before adding more insulation. Use the right sealant for each opening. Keep foam and caulk away from unsafe heat sources. Check duct chases and dropped ceilings too. These hidden spots can leak a lot of air. A cleaner, tighter attic floor helps any insulation layer work better.

Blocked Vents, Crushed Batts, and Heat Clearance Issues

R13 batts can fail when they are placed in the wrong way. One common mistake is pushing batts into soffit areas. That blocks air intake and can trap heat and moisture in the attic. Vent baffles can keep air moving from the soffits while insulation stays in place. Crushed batts cause another problem. Fiberglass needs loft to slow heat flow. Once it gets packed down under boards, storage boxes, or extra layers, it gives less value. 

Heat clearance also matters. Insulation should not touch unsafe light fixtures, flues, chimneys, or other hot parts unless the product and setup allow it. Some fixtures need rated covers or open space around them. A careful layout protects airflow, insulation depth, and home safety.

What Should You Ask an Attic Insulation Contractor in Houston?

Questions About Air Sealing, Depth, and Vents

Ask direct questions before work starts. A good attic plan should cover more than the R13 batts you can see from the attic hatch. It should also look at air leaks, insulation depth, and vent flow. Houston homes deal with long heat seasons, so small attic problems can affect comfort fast. Ask the contractor to explain the full condition of the attic in plain terms. You should know what stays, what gets removed, and what gets sealed before new material goes in.

Helpful questions include:

  1. What total R value do you suggest for this attic?
  2. Will you seal gaps around pipes, wires, lights, and attic doors?
  3. Are the soffit vents open and clear?
  4. Will you use baffles near the eaves?
  5. How will you protect bath fans, flues, and light fixtures?

Questions About Cost, Access, and Cleanup

Cost can vary by attic size, current insulation, access, material type, and removal needs. Ask for a written quote that breaks down the work. It should explain the material, depth, prep work, cleanup, and any removal. This helps you compare each quote fairly. Do not pick only by the lowest price. A low quote may leave out air sealing, damaged insulation removal, or vent work. Those items can change the final result.

  1. Ask these questions before you approve the job:
  2. What is included in the quoted cost?
  3. Will you remove old or damaged R13 if needed?
  4. How will your crew enter and protect the home?
  5. Will you clean dust and loose debris from the work area?
  6. Do you provide photos of the attic before and after the work?

Schedule Attic Insulation Service With First Defense Insulation

Hot upstairs rooms, rising AC bills, and thin attic batts often point to the same issue: the attic system is not doing enough. A smart next step is an attic review that checks R-value depth, air leaks, soffit vents, attic hatch gaps, duct leaks, moisture marks, and safe clearance around heat sources. 

First Defense Insulation can help homeowners choose a practical attic plan based on the home’s current condition and Houston’s hot, humid climate. The right fix may be more blown-in insulation, better air sealing, removal of damaged material, or a mix of steps. For attic insulation help in Houston, visit us at 12 Greenway Plaza, Suite 1147, Houston, Texas, 77046, or call 713-808-9853 for an attic insulation check.

Blown vs. Rolled Attic Insulation and the Better Fit for Your Home

Your attic plays a big role in indoor comfort, energy use, and roof health. The right insulation helps slow heat flow, reduce drafts, and keep rooms more stable. Many homeowners compare blown insulation with rolled batts because both can work well in attics. The better choice depends on attic shape, access, budget, and current insulation gaps. Blown material fills odd spaces and corners. Rolled batts offer neat coverage in open, easy-to-reach areas. For help with attic insulation in Houston TX, homeowners want clear facts before planning their project. A choice starts with attic needs, not guesswork.

Blown Attic Insulation Basics

How Loose Fill Covers Gaps

Loose fill insulation uses small pieces of fiberglass or cellulose. A crew blows it across the attic floor with a machine and a hose. The material spreads into small spaces that rolled batts may miss. It can cover around wires, pipes, vents, framing, and uneven joist areas. This helps create a more even layer across the attic. Even coverage matters because gaps let heat move through the ceiling. Loose fill does not seal air leaks by itself. Air sealing should happen before the crew adds insulation. That means sealing holes around light boxes, plumbing cuts, and wall tops. Once those leaks get sealed, blown material can perform better. It works well because it settles around odd shapes instead of needing exact cuts.

Best Attic Setups for Blown Material

Blown material fits many attics with tight access and many obstacles. It works well in older homes with uneven framing or mixed insulation levels. It also helps in attics with low slopes near the edges. Those spots can feel hard to reach with rolled batts. Loose fill can spread into those areas with less cutting and moving. It also suits attics that already have old insulation, as long as the old material stays dry and safe. A crew can add blown insulation over existing material to raise the total R value. The attic still needs clear vents, safe wiring, and proper air sealing first. Blown insulation can also suit larger attic floors because the machine places material faster than hand placed batts.

Rolled Attic Insulation Basics

How Batts Fit Open Joist Bays

Rolled attic insulation comes in long blankets called batts or rolls. Installers place them between attic joists on the attic floor. The best fit happens when the joist bays are open, straight, and easy to reach. Each batt needs full contact with the surface below it. Gaps can lower performance because heat can move around the material. Batts also need careful cuts around pipes, wires, and framing. A tight fit matters, but the material should not get packed down. Compressed batts lose some insulation value. Many rolls come in set widths for common framing spaces. That can speed up the job in a clean attic. Rolled insulation works best when each piece sits flat and fills the full cavity.

Best Attic Setups for Rolled Batts

Rolled batts work well in attics with wide access and few obstacles. They suit open attic floors where joists run in straight lines. Newer homes with clean framing can be a good match. So can attic areas above garages, storage zones, or simple room layouts. The installer can unroll the material, cut it to length, and place it with care. Rolled batts also help when a homeowner wants clear sections for future service work. The material stays in defined strips, so workers can lift a piece and put it back. Batts need dry conditions and safe wiring clearance. They also need open vents near the roof edge. Air sealing should come first, since batts do not stop air leaks by themselves.

Performance Differences That Affect Comfort

Coverage Around Pipes, Wires, and Corners

Attics often have pipes, wires, light boxes, braces, and tight corners. These areas can affect how well insulation works. Blown insulation usually covers these spots with less cutting. The loose material settles around small shapes and fills narrow spaces. This can help reduce thin areas across the attic floor. Rolled batts need more careful fitting in the same spots. Each piece may need cuts around wires, pipes, and wood framing. A poor cut can leave open space. That space can let heat pass through faster. Batts also need full contact with the attic floor. Folded or lifted edges can weaken performance. Blown material can cover uneven areas better, but it still needs good prep. Air leaks should be sealed before any insulation goes in.

R Value, Air Gaps, and Heat Flow

R value measures how well insulation slows heat flow. A higher R value gives better resistance to heat movement. Both blown and rolled insulation can reach strong R values. The real difference often comes from fit and coverage. A batt with gaps may not perform like its rated value. Blown insulation can give steadier coverage over uneven attic spaces. It can also fill low spots more easily. Rolled batts can work well when they fit tightly and stay flat. Air gaps reduce comfort because warm air moves through open paths. In Houston, attic heat can build fast during long, hot months. Good insulation helps slow that heat before it reaches living spaces. The best result comes from the right depth, good air sealing, and clear attic ventilation.

Cost, Labor, and Project Time

Material Price and Tool Needs

Material cost can change based on attic size, insulation depth, and product type. Rolled batts often look simple at first because the material comes in ready to place rolls. A homeowner may only need a utility knife, ruler, gloves, mask, and protective clothing. That can help in small, open attic areas. Blown insulation usually needs a blowing machine and a hose. Many stores rent the machine with a large material order. The machine can add cost, but it can also speed up coverage. Blown material may need more bags than expected if the attic has low existing depth. Rolled batts may create waste from cuts around framing and vents. The best price depends on how much clean coverage the attic needs.

Installation Skill and Equipment Needs

Rolled batts need careful placement. Each piece must fit the joist bay without gaps, folds, or tight compression. The installer must cut around pipes, wires, boxes, and framing. Small mistakes can leave open spaces that reduce comfort. Blown insulation needs a different skill set. One person feeds material into the machine. Another person controls the hose in the attic. The crew must spread the material to the right depth across the full area. They also need to protect vents and keep material away from heat sources. Both types need air sealing before the insulation goes in. Attic work can feel hot, dusty, and tight. Good safety gear matters. Proper lighting, stable footing, and clear attic access help the work move faster.

Which Type Fits Your Attic Best

Attic Shape, Access, and Existing Insulation

Attic shape has a big effect on insulation choice. Blown insulation often works better in tight spaces, low roof edges, and areas with many pipes or wires. The hose can place material where hands may not reach well. Rolled batts work better in open spaces with straight joist bays. They need room for careful cutting and flat placement. Access also matters. A small attic hatch can make rolls harder to move. A larger opening can make batt placement easier. Existing insulation can also guide the choice. Dry, loose material may allow a new blown layer over it. Wet, dirty, or damaged material should come out first. A clean attic floor gives both options a better chance to work well.

Moisture, Ventilation, and Long Term Results

Moisture can harm both blown and rolled insulation. Wet material can lose performance and may support mold growth. Roof leaks, bath fans that vent into the attic, and blocked vents can all cause trouble. The attic should have good air flow before new insulation goes in. Soffit vents and roof vents help move warm, damp air out of the space. Vent baffles can keep insulation from blocking air paths near the roof edge. Blown insulation can shift if strong air moves through open gaps. Rolled batts can sag or compress if moisture stays in the attic. Long term results depend on dry conditions, good depth, and careful placement. A well prepared attic helps either material last and perform better.

Get Better Attic Comfort With First Defense Insulation

Blown and rolled attic insulation both have strong uses, but they solve different attic problems. Blown material works well in tight corners, uneven spaces, and attics with many wires or pipes. Rolled batts can suit open joist bays with clear access and fewer obstacles. Cost matters, but coverage often matters more. Small gaps can let heat move fast and make rooms feel uneven. A trained crew can check depth, air leaks, vents, moisture signs, and old material before work starts. First Defense Insulation helps Houston homeowners plan a cleaner attic upgrade with options that match the space and budget. For help with a better attic, visit us at 12 Greenway Plaza, Suite 1147, Houston, Texas 77046, or call 713-808-9853 for attic insulation service.

Attic insulation with blown-in fiberglass under decking.

Can Plywood Go Over Attic Insulation?

Adding plywood in an attic can seem like a smart way to gain storage space. Still, the job needs care. Plywood should not squash insulation or block airflow. That can hurt energy use and raise moisture problems over time. A better plan starts with knowing what sits below the storage area and how your attic moves air. 

Good attic insulation helps keep rooms more comfortable and can lower strain on your HVAC system. Before you lay down any sheets, it helps to check joist height, vent paths, and the type of insulation already in place above your ceiling. Small details can prevent bigger problems later.

When Plywood Works in an Attic

Raised Platforms Above Loose Fill Insulation

Plywood can work in an attic if it sits above loose fill insulation instead of pressing into it. Loose fill insulation needs room to stay thick and hold air. That air helps slow heat flow through the ceiling. If plywood rests right on the insulation, the material gets packed down. That can lower its R value and reduce how well it does its job. A raised platform helps avoid that problem. 

The platform sits on supports fixed to the joists, with space left below for the insulation. This setup also helps keep vent paths open near the roof edge. Air needs room to move through the attic. Before the job starts, check joist height, insulation depth, and vent placement. A small raised area often works better than covering the whole attic.

Light Storage Over Framed Support Areas

Plywood also works in attic areas that already have framed support for light use. Some homes have a stronger section near the attic opening or near equipment that needs service. In spots like that, plywood can create a stable surface without pressing down large amounts of insulation. The main issue is weight. Most attics are not built for heavy loads. 

Large furniture, full book boxes, and heavy tools can stress the framing. Light bins, holiday items, and small household goods are a better fit. Spread items out and keep paths open. Leave room around wiring, ducts, and vents. Check the wood before adding panels. Look for cracks, water marks, soft spots, or loose fasteners. A small storage area often works best and helps avoid damage.

When Plywood Causes Problems

Thin Joists Leave Little Room for Insulation

Plywood can cause trouble in attics with shallow joists. Many older homes have joists that do not leave much depth for insulation. If you place plywood right on top of those joists, the insulation below can get pressed down. That reduces the air pockets inside the material. Those air pockets help slow heat flow. Once they get crushed, the insulation may not work as well as it should. That can lead to hotter rooms in summer and colder rooms in winter. 

The attic may also lose some of its energy saving value. Another problem is weight. Thin joists may not handle extra load well. Plywood, stored items, and foot traffic all add stress. In that case, a raised setup with proper support is usually a better choice than laying panels flat across the joists.

Blocked Vents Trap Heat and Moisture

Plywood can also create problems if it blocks attic vents. Attics need airflow to move heat and moisture out of the space. Many homes use soffit vents near the roof edge and other vents near the top of the roof. That air path helps keep the attic dry and helps control heat buildup. If plywood covers insulation and pushes it into the vent area, air may not move as it should. Moisture can then build up inside the attic. 

Over time, that can lead to damp wood, stains, and mold growth. Heat can also collect in the space and raise the attic temperature. Before adding any plywood, check where the vents sit and keep those paths open. Good airflow helps protect the roof structure and helps the insulation keep working well.

Better Ways to Support Attic Storage

Sleepers Can Lift the Plywood

Sleepers can help create space between the plywood and the insulation. A sleeper is a strip of wood set across or along the attic joists. It raises the plywood so the insulation below does not get packed down. That extra height helps the insulation keep its shape and hold air. It also gives you a firmer surface for walking or storing light items. The amount of lift matters. 

The sleeper should provide enough room for the insulation depth already in place. It also helps to keep the plywood level across the area. Before adding sleepers, check the attic framing for damage, loose boards, or signs of past leaks. A raised surface can work well, but it still needs proper support and open vent paths around the roof edge.

Small Walkways Limit Pressure

A small walkway often works better than covering a large attic area with plywood. This approach limits pressure on the insulation and puts less weight on the framing. It also helps you reach key spots, such as the attic hatch, air handler, or other service points, without stepping on loose fill insulation. A narrow path leaves more of the attic open, which helps the insulation stay thick across the rest of the floor. 

That can support better heat control in the rooms below. Walkways also use fewer materials, so the job stays simpler. Keep the path over supported framing and avoid weak spots. Leave space around vents, wiring, and ducts. A focused path can give you access where you need it without changing the whole attic floor.

Safety Checks Before You Start

Wiring, Lights, and Ducts Need Clearance

Before you place any plywood in the attic, look at everything that runs across the floor or through the framing. Electrical wiring needs open space and should not get pinched under a panel. Recessed lights also need care. Some fixtures give off a lot of heat, and insulation packed too close can create problems. Ducts need room as well. If a board presses on a duct, airflow can drop, and rooms below may not heat or cool as they should. 

Watch for junction boxes, loose cables, and bath fan vents. These parts should stay visible and easy to reach. Plywood should never block access to service points. A careful look before the job starts can help prevent damage, poor airflow, and safety issues later.

Roof Leaks Should Be Fixed First

A roof leak can turn a simple attic project into a bigger problem fast. If water gets into the attic, it can soak the insulation, stain the wood, and weaken parts of the ceiling below. Wet insulation does not work as well as dry insulation. It can also hold moisture for a long time. Before adding plywood, look for dark marks on rafters, damp spots on insulation, rusty nails, or a musty smell. 

These signs may point to a leak above. Check around roof vents, chimneys, and valleys, since those areas often leak first. Fixing the leak first helps protect the attic space and the materials you add later. Dry conditions give you a better base for any plywood work.

Smart Storage Rules After Install

Keep Weight Near Strong Framing

After the plywood is in place, storage habits still matter. The safest plan is to keep the weight near strong framing points. These areas often sit close to the attic opening, near support walls, or above joists that carry more load. Heavy boxes placed in weak spots can strain the ceiling below. That can lead to sagging, cracked drywall, or loose fasteners over time. Use the attic for light items first. 

Holiday bins, small keepsakes, and empty luggage are often better choices than books, tools, or large furniture. Spread items across the surface instead of stacking them in one tight area. Leave some open space between boxes. That helps you move around safely and lowers stress on one section of the attic.

Leave Service Areas Open

Open access matters after plywood goes down and storage begins. Attics often hold wiring, ducts, bath fan vents, junction boxes, and parts of the heating and cooling system. These areas should stay clear. Boxes and bins should not block them. A worker may need to get to these parts later for repair or routine care. If stored items crowd the space, simple work can take longer and cost more. 

Closed off areas can also hide leaks, loose wires, or damaged ducts. Keep a clear path from the attic opening to all main equipment. Leave space around vents so air can move as planned. A neat attic with open access is safer, easier to use, and easier to inspect over time.

Protect Your Attic With First Defense Insulation

Plywood can help create storage space in the attic, but the setup should protect insulation, airflow, and ceiling strength. Pressing insulation down can reduce its performance and lead to moisture trouble. A raised platform often works better because it leaves room for the insulation to do its job. 

First Defense Insulation can help homeowners choose a better attic setup for comfort, storage, and energy savings. If you want a safer attic space that supports your home year-round, we are here to help. Visit us at 12 Greenway Plaza, Suite 1147, Houston, Texas 77046, or call 713-808-9853 for attic insulation help.

A Tighter Attic Means an Easier Day for Your HVAC

Hot Houston summers can push your AC hard. Cold snaps can do the same to your heater. A leaky, under-insulated attic lets treated air slip out fast. Outdoor heat and humidity slide right in. That forces longer run times and more starts. With attic insulation Houston TX and with tight weather sealing, your system holds temperature longer. Rooms feel steadier. 

Your thermostat stops chasing swings. You may notice the system starts less often. Filters stay cleaner longer. You also get fewer drafts near ceilings and doors. Small gaps add up. Sealing them can cut waste and keep the whole house calmer.

Attic Air Leaks Add Work for Your HVAC

Leak Spots Around Recessed Lights, Hatches, and Top Plates

Attic air leaks often happen around recessed lights, hatches, and top plates. These spots allow air from outside to enter or conditioned air to escape. Recessed lights, for example, have gaps around them where air can sneak through. Sealing these gaps can improve the comfort inside your home. Hatches leading to the attic can also be weak spots. Insulation and air barriers around the hatch can help block air from getting through. 

Top plates, where the walls meet the roof, are another common area for leaks. Sealing the edges of the top plate can help keep warm or cool air from escaping. All these areas can lead to higher energy bills if left unsealed. Fixing these leaks helps reduce your HVAC system’s workload and keeps your home more comfortable.

Weather Sealing Materials That Stop Drafts

Several materials can help stop drafts and seal leaks. Weatherstripping is one of the most common options. It’s easy to apply and works well for doors and windows. Caulking is another useful material. It can fill in small cracks and gaps, especially around windows and baseboards. For larger gaps, foam sealant might be a good choice. It expands to fill bigger spaces and blocks air from passing through. 

Insulation is also helpful, especially in attics and walls. Adding more insulation can help reduce heat loss in the winter and keep your home cool in the summer. Another option is spray foam, which seals gaps and provides a barrier against drafts. Using these materials correctly can save energy and improve the efficiency of your HVAC system.

Insulation Slows Heat Flow Through the Ceiling

R-Value, Depth, and Even Coverage

The R-value of insulation tells you how well it resists heat flow. The higher the R-value, the better the material is at keeping heat inside during winter and outside during summer. It’s important to choose the right R-value for your area. A higher R-value is needed in colder climates, while a lower one is enough for warmer areas. The depth of insulation also matters. More insulation means better heat protection. 

However, it’s not just about adding more; it’s about placing it evenly. Gaps or thin spots can reduce the effectiveness of your insulation. Make sure it covers the entire ceiling without leaving holes where air can escape. Even coverage will help keep your home comfortable year-round.

Clues Your Attic Needs More Insulation

There are signs your attic may need more insulation. One clue is the big difference between temperatures inside and outside. If your attic is much colder in the winter or hotter in the summer than the rest of your house, you might need more insulation. Another sign is drafts or uneven temperatures in rooms below the attic. If certain rooms feel too hot or too cold, the attic insulation might not be thick enough or well-covered. 

Ice dams in winter are another hint that your attic needs more insulation. They happen when heat escapes through the roof, causing melting and refreezing. If you see any of these signs, it’s time to add more insulation.

Sealed Duct Paths Deliver Air Where You Need It

Supply and Return Leaks in Attics

Leaks in supply and return ducts can waste a lot of energy. These ducts carry air to and from your HVAC system. When there are holes or cracks in the ducts, air escapes. This means your system has to work harder to reach the right temperature. Leaks in the attic can be especially bad. 

The air in these ducts may get mixed with outside air, making your HVAC system less efficient. This can lead to higher energy bills. Sealing the leaks can stop the air from escaping. It also keeps the air flowing to the right places in your home. Regularly checking and sealing ducts in your attic can improve the performance of your HVAC system.

Better Air Balance Between Rooms

Air balance between rooms is important for comfort. If some rooms are too hot and others too cold, the airflow might not be balanced. This can happen if there are leaks in the duct system or if the ducts aren’t sized correctly for the space. You can improve air balance by sealing any leaks in the ducts and making sure they are the right size. 

You can also adjust dampers to control the airflow better. This helps the air flow more evenly throughout the house. A well-balanced system means each room gets the right amount of heating or cooling. Fixing air balance issues can make your home feel more comfortable all year long.

Humidity and Dust Control Starts Above the Ceiling

How Attic Air Affects Coils, Filters, and Comfort

The air in your attic can impact the performance of your HVAC system. When attic air is too humid, it can cause problems with your system’s coils and filters. Humid air can build up on coils, making them less efficient at cooling or heating the air. This can lead to higher energy use and less comfort in your home. 

Dust from the attic can also get into filters, making them dirty faster. A clogged filter forces the HVAC system to work harder. This can lead to uneven temperatures and poor air quality. Keeping the attic well-ventilated can help reduce humidity and dust, allowing your HVAC system to perform better and maintain a comfortable environment in your home.

Fan Use and Venting That Move Moist Air Out

To control humidity, you need to use the right fans and venting in your attic. A good attic fan can help push moist air out, especially during hot or humid weather. Venting systems, like soffit vents and ridge vents, allow air to flow in and out of the attic. This helps reduce the moisture buildup that can cause issues with your HVAC system. 

Proper venting helps maintain air circulation, which lowers the chances of mold and mildew growth. Fans can also help reduce attic temperature, preventing excess heat from affecting the rest of your home. Be sure to use these systems correctly to keep your attic dry and your home comfortable.

Lower Heating and Cooling Load Helps Parts Last Longer

Short Cycling, Hot Spots, and Noisy Starts

Short cycling, hot spots, and noisy starts can all put extra strain on your HVAC system. Short cycling happens when the system turns on and off too often. This wastes energy and wears out parts faster. Hot spots occur when some rooms are too hot or cold compared to others. This uneven air distribution makes the system work harder and can lead to breakdowns. 

Noisy starts happen when the system has trouble starting up, often due to airflow issues. These problems can shorten the lifespan of your HVAC parts. By improving airflow and sealing leaks, you can help prevent these issues and make your system last longer.

Steadier Temperatures With Fewer Thermostat Changes

Keeping your thermostat steady helps reduce strain on your HVAC system. Constantly changing the temperature puts extra stress on the system as it constantly tries to adjust. This can lead to wear and tear on the components. A more stable temperature means the system doesn’t have to work as hard to maintain comfort. 

By setting your thermostat to a comfortable temperature and leaving it alone, your system can run more efficiently. This helps reduce the need for frequent adjustments, which not only saves energy but also extends the life of the parts.

Let First Defense Insulation Help Improve Your Home’s Comfort

Taking care of your attic, ducts, and insulation can make a big difference in your home’s comfort and energy efficiency. Sealing air leaks, improving insulation, and ensuring good airflow help your HVAC system run better. It prevents problems like short cycling, hot spots, and noisy starts. With the right materials and techniques, you can keep your home cooler in the summer and warmer in the winter. 

If you notice temperature imbalances or higher energy bills, it might be time to upgrade your attic insulation and seal leaks. First Defense Insulation is here to assist with any attic or HVAC needs. Visit us at 12 Greenway Plaza, Suite 1147, Houston, Texas 77046, or call 713-808-9853 for more information on improving your home’s energy efficiency.