For homeowners considering residential insulation upgrades, spray foam provides an outstanding option for superior energy efficiency and comfort. As a company, we offer insulation financing to make your life easier. Not only does it act as a complete air barrier, sealing everything from small cracks to larger spaces in walls and floors, but spray foam has one of the highest insulation R-values on the market. In this article, the attic insulation contractor in Houston will explain why you should choose spray foam for your next residential insulation project.
Let’s start by first understanding what spray foam insulation is.
Day: August 30, 2023
Does Spray Foam Insulation Burn Easily?
One of the questions people ask when choosing spray foam insulation Houston, TX, is whether spray foam insulation is flammable. While it may not look like a significant question, most homeowners want to know if spray foam insulation is flammable, as fire safety is vital in any home. The right insulation can make your house feel safer and more energy efficient.
More people are turning to spray foam as a home insulation option, and it’s hard not to see why. First, spray foam is non-toxic. It is also an effective insulation solution. So, let’s find out about fire safety.
Is Spray Foam Flammable?
Yes, spray foam is flammable; However, it only burns and ignites if exposed to an adequate heat source. Spray Foam usually self-extinguishes when the heat source is removed.
Spray Foam manufactures send their products for testing before their products are available to the marketplace. After testing, a Code Compliance Research Report (CCRR) is provided. This report shows the foams Flame Spread Index and Smoke Development. Building codes dictate how spray foam should be protected by an ignition barrier or thermal barrier. Barriers commonly used include drywall or tested coatings that go over the foam.
Depending how the end user configuration of the space is completed will dictate what path your installer will need to take to ensure code compliance is achieved. Considering spray foam in Houston, Tx? Our team of experts understand code compliance and can guide you in ensuring you are covered by the correct products.
Is Spray Foam an Excellent Insulation Option for your Home?
Despite being flammable, spray foam is still an excellent insulation option for your home. Here’s why spray foam is an excellent solution:
Roofing and Exterior Applications
One of the primary reasons spray foam is the go-to insulation is that it is effective in sealing roofs and other exterior areas in the home. Spray foam creates a powerful bond with the roof and helps strengthen the resistance to pressure and wind. It also reduces sound as it creates a barrier against loud noises.
Attic Applications
Spray foam expands. This expansion feature enables the insulation to fill up all the holes and cracks in crawlspaces and attics. By creating an airtight seal, the insulation makes your attic less penetrable to air infiltration. This insulation also gives your attic a moisture barrier by keeping water from seeping through crevices, holes, and cracks.
Interior Cavity Fills
Spray foam insulation provides better protection against mold and mildew. The polymer contained within the spray foam material creates a barrier from moisture, which ensures that there is no food source for bacteria or mold.
The walls of any building are its main structural component, as they help it withstand any amount of force, like strong winds. The spray foam insulation fills the wall’s interior cavity and efficiently provides additional strength and support to the building.
While every type of insulation is flammable, it still doesn’t impact spray foam’s benefits. Therefore, ensure that you don’t expose your spray foam to any external heat source and keep your family and loved ones safe. But if you are looking for further information on how spray insulation works, you can read about how insulation works.
First Defense Insulation
12 Greenway Plaza Suite 1147 Houston Texas 77046,
713-808-9853
Find us on Social Media
https://www.facebook.com/FirstDefenseInsulation
https://www.instagram.com/firstdefenseinsulation/?hl=en
Four Essential Spray Foam Safety Tips
When it comes to applying spray foam insulation, getting an effective result should not be the only thing you aim for. You must also take safety seriously. Trained spray foam insulation contractor Houston understands the dangers of misusing spray foam. This is why they make sure to educate people who plan on going the DIY way.
If you are considering DIY spray foam insulation, here are some essential safety tips to follow.
Use Respirator and Goggles
The first step to ensuring safety while installing your spray foam is using proper Personal Protective Equipment (PPE). The recommended respirator is a full face fresh air mask.
Protect Your Body
Asides from your eyes and nose, other parts of your body also need protection during spray foam installation. This is because spray foams are aerosols designed to stick and expand on surfaces. Therefore, your skin should be well protected before carrying out the installation process. You can do this by wearing a disposable overall that leaves no part of your skin exposed. It should come with a hood to protect the other parts of your face that are not protected by the goggles and respirator. It is also necessary to use disposable, hand and wrist covering gloves to carry out this task. Taping your gloves to your sleeves is a great way to ensure that they don’t slip off while working.
Prepare The Workspace
Before starting work, you must ensure that everyone not in protective gear has vacated the building. For safe and effective spray foam insulation, you also have to consider the safety of others. You must also ensure that the surfaces that you are applying the spray foam on are dried. Spraying a surface with a moisture rating of over 18% will lead to improper adhesion. To effectively measure the surfaces’ dryness level, you may need a moisture meter.
Always Have A Spray Plan
For an effective result, you will need a spray plan. This plan should include how the spray will be applied, the locations that it will be applied on, and when the building can be reoccupied again. You should ensure that your spray tanks are at the right temperature— 75°F-85°F. You should also check if the spray contents are coming out evenly by first pointing the gun into an empty bag.
Generally, after installing your spray foam, unprotected people will have to wait for up to 24 hours before re-entering the premises again for their safety.
To know more about spray foam insulations and others, make sure to visit https://fdinsulation.com/attic-insulation/spray-foam/
First Defense Insulation
11715 Anderson Road
Willis Texas 77318
713-808-9853
Social Accounts
Common Attic Insulation Problems And How to Solve Them
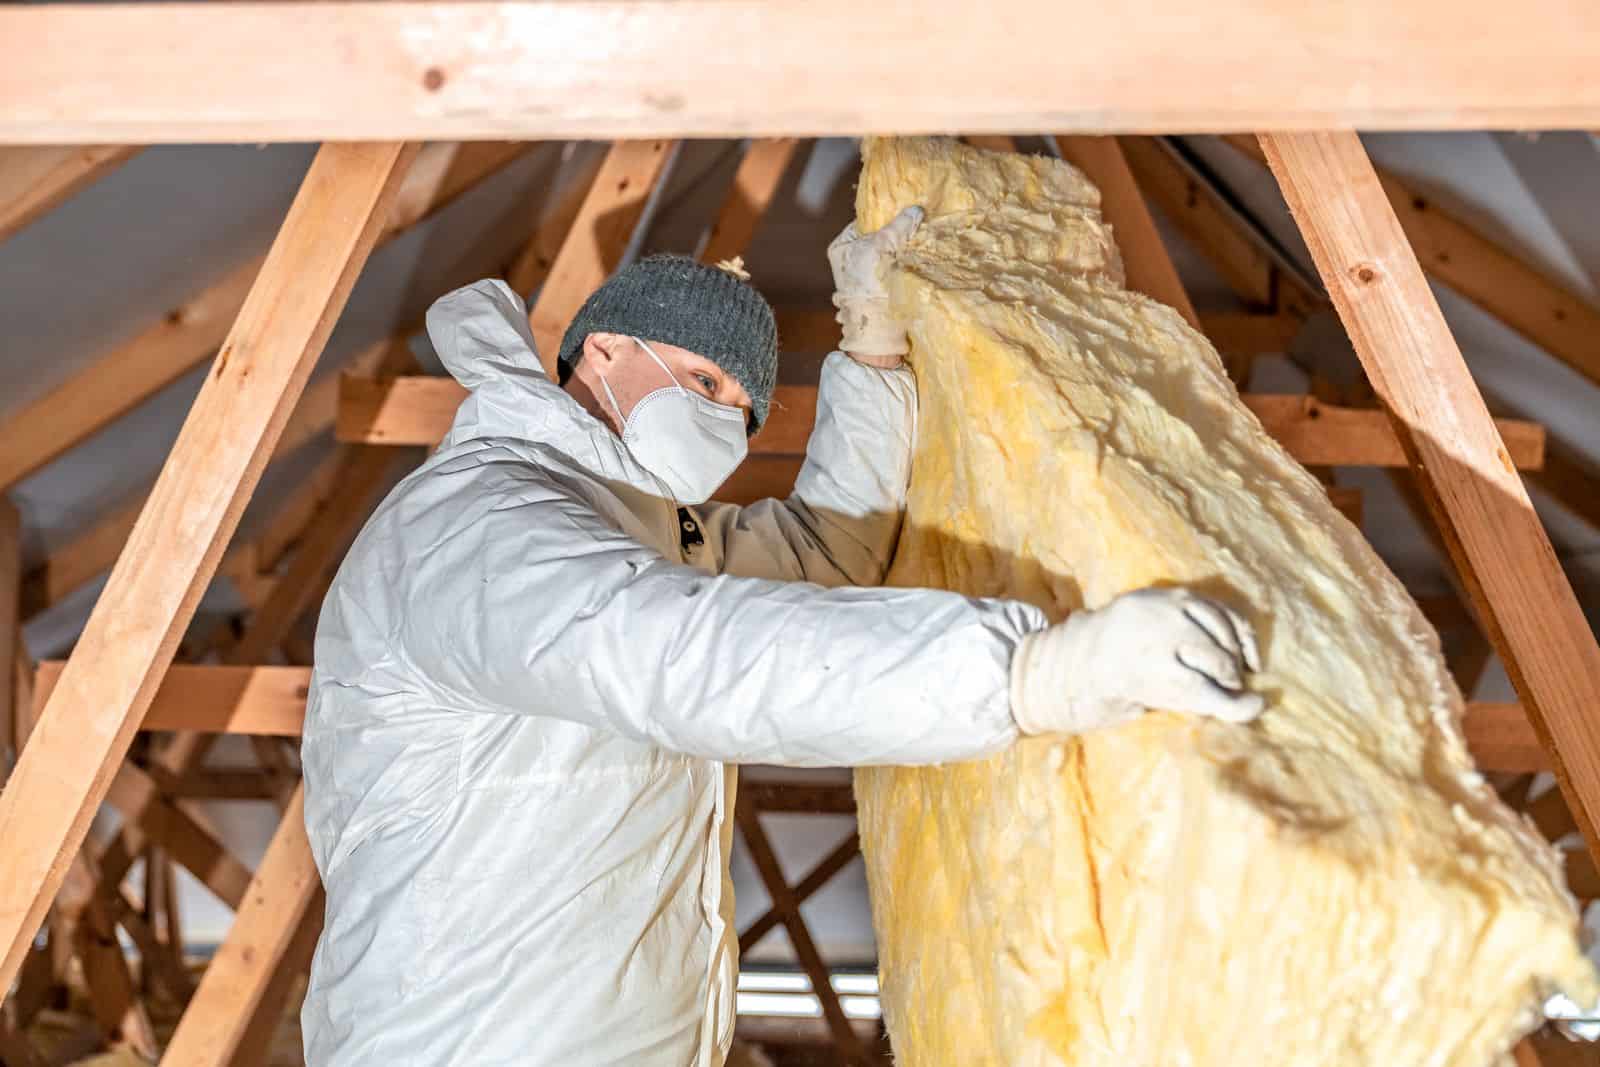
Attic Insulation is very vital for lowering your home’s energy bill and keeping you comfortable all year round. So, if it’s lacking, you should consider contacting a company offering Attic insulation in Houston, TX to help you insulate your home. However, if you notice your energy bills are still on the rise despite having insulation, there are likely to be some faults with your insulation.Â
Your home’s Insulation may develop some issues over time due to age, environment, or lack of proper maintenance and become less effective. Here, we’ll explore common faults homeowners experience with their insulation and how to fix them. Quality should always be primary especially if you want to benefit from grants and insulation financing opportunities.
Common Attic Insulation Problems and How to Solve Them
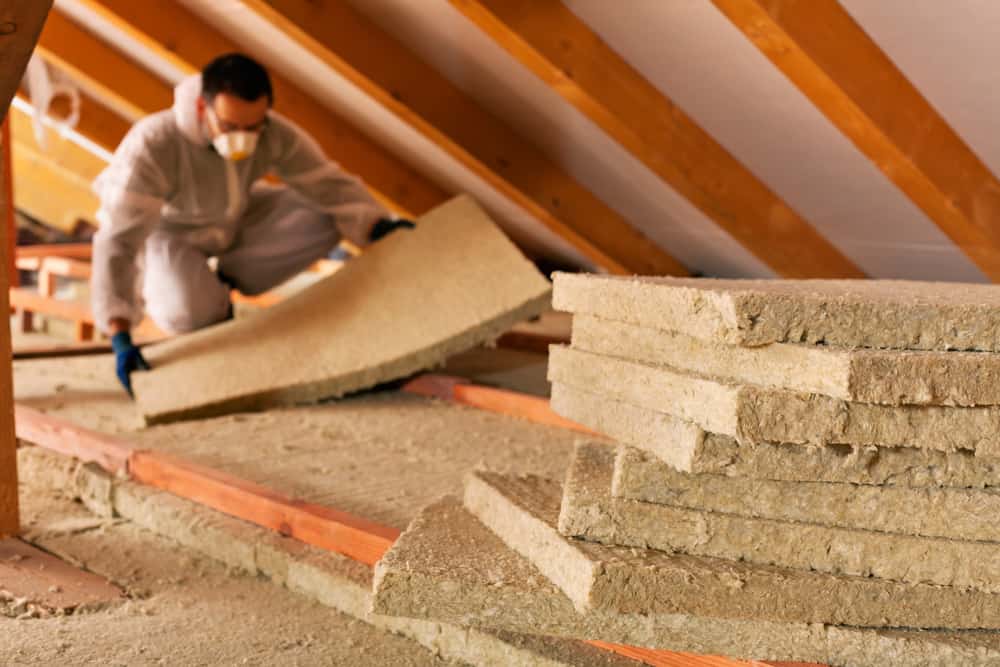
Missing or Inadequate Attic Insulation
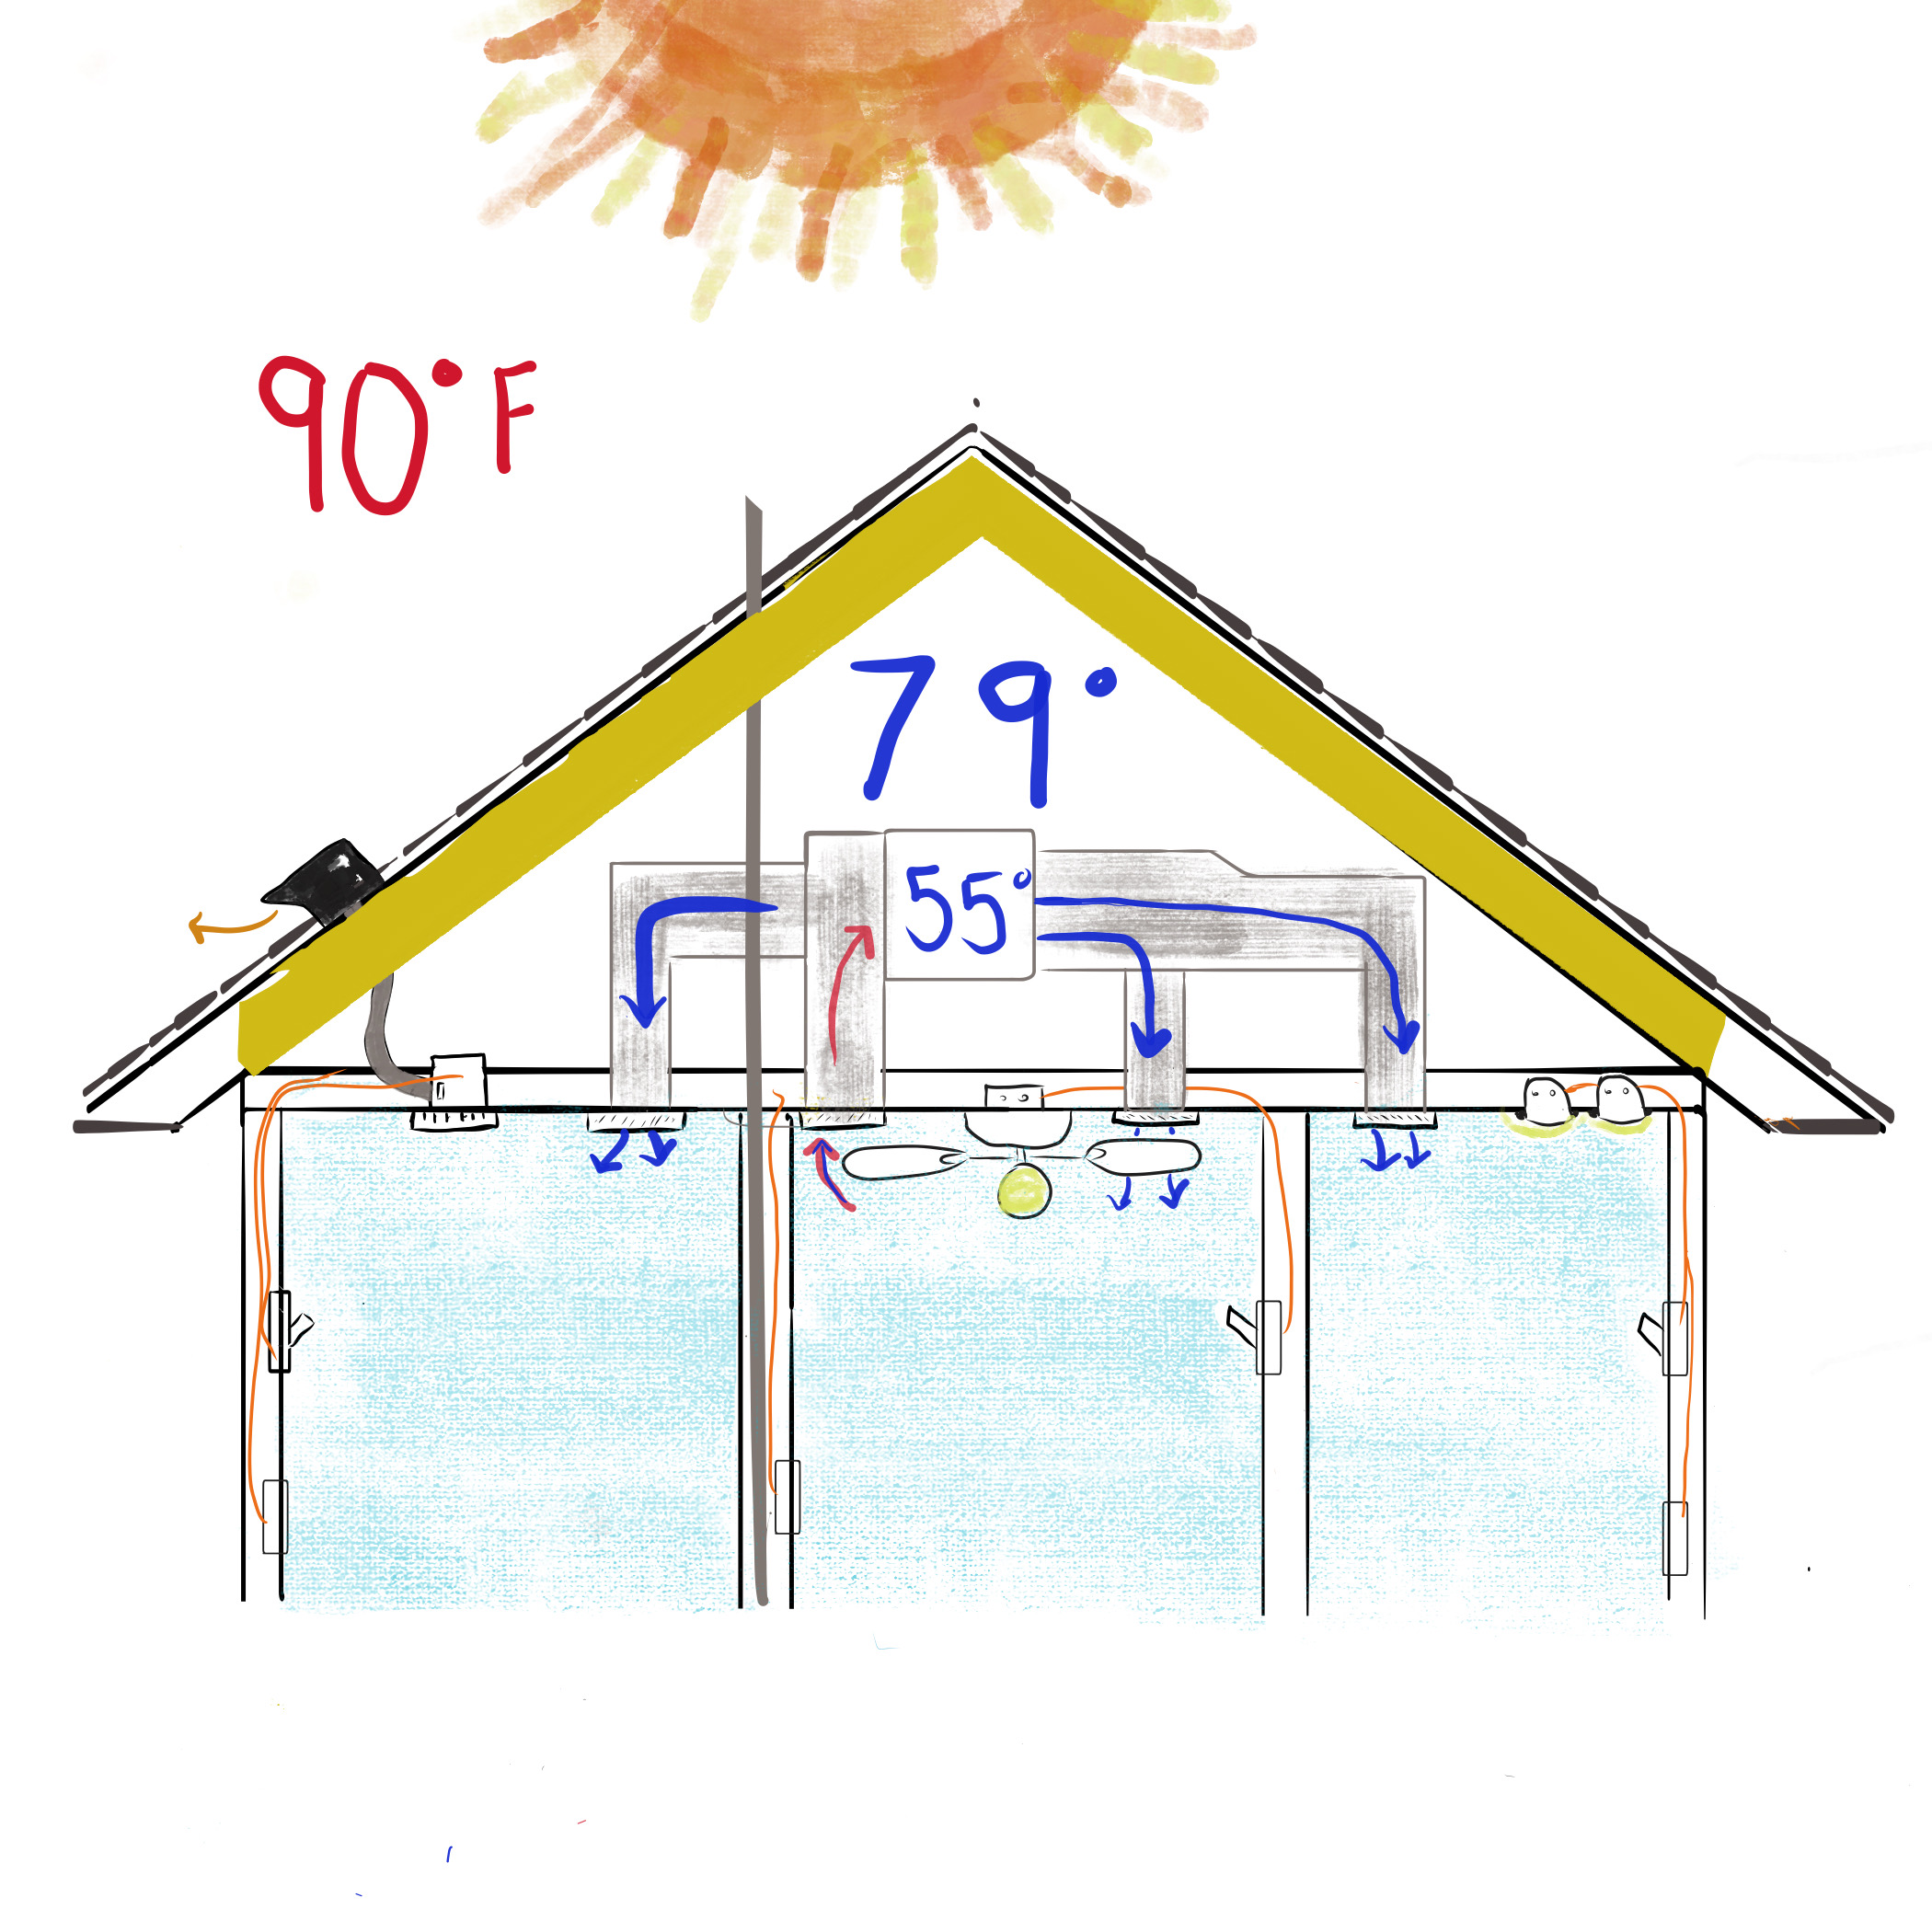
Not installing your insulation properly can increase the humidity in your attic, enhance mold growth, allow pests to enter your attic, and so on. It can also cause your home to be uncomfortable during cold and hot seasons since hot or cold air can easily seep into your home. In addition, your HVAC will have to work harder to regulate your home’s temperature, which will significantly increase your energy bill. Some areas where insulation may be inadequate include attic entrances, vents, windows, skylights, etc.Â
- SolutionÂ
To ensure that insulation is not lacking or inadequate in any part of your attic, have a local insulation contractor examine your home. Experienced contractors will know the weak areas in your attic and ensure that they are properly insulated for maximum effectiveness.Â
Uneven Attic Insulation
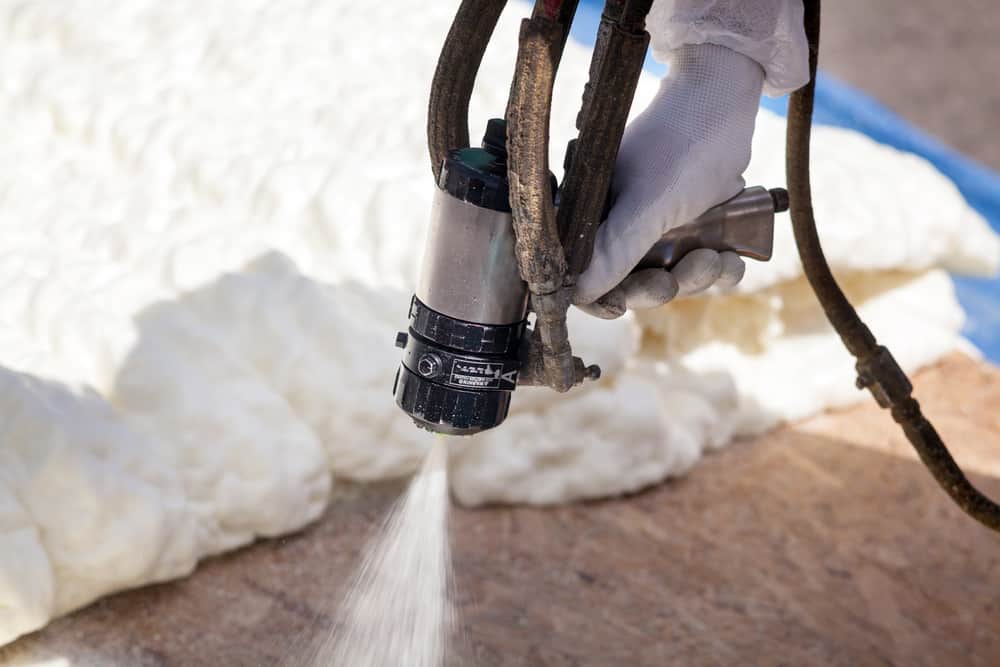
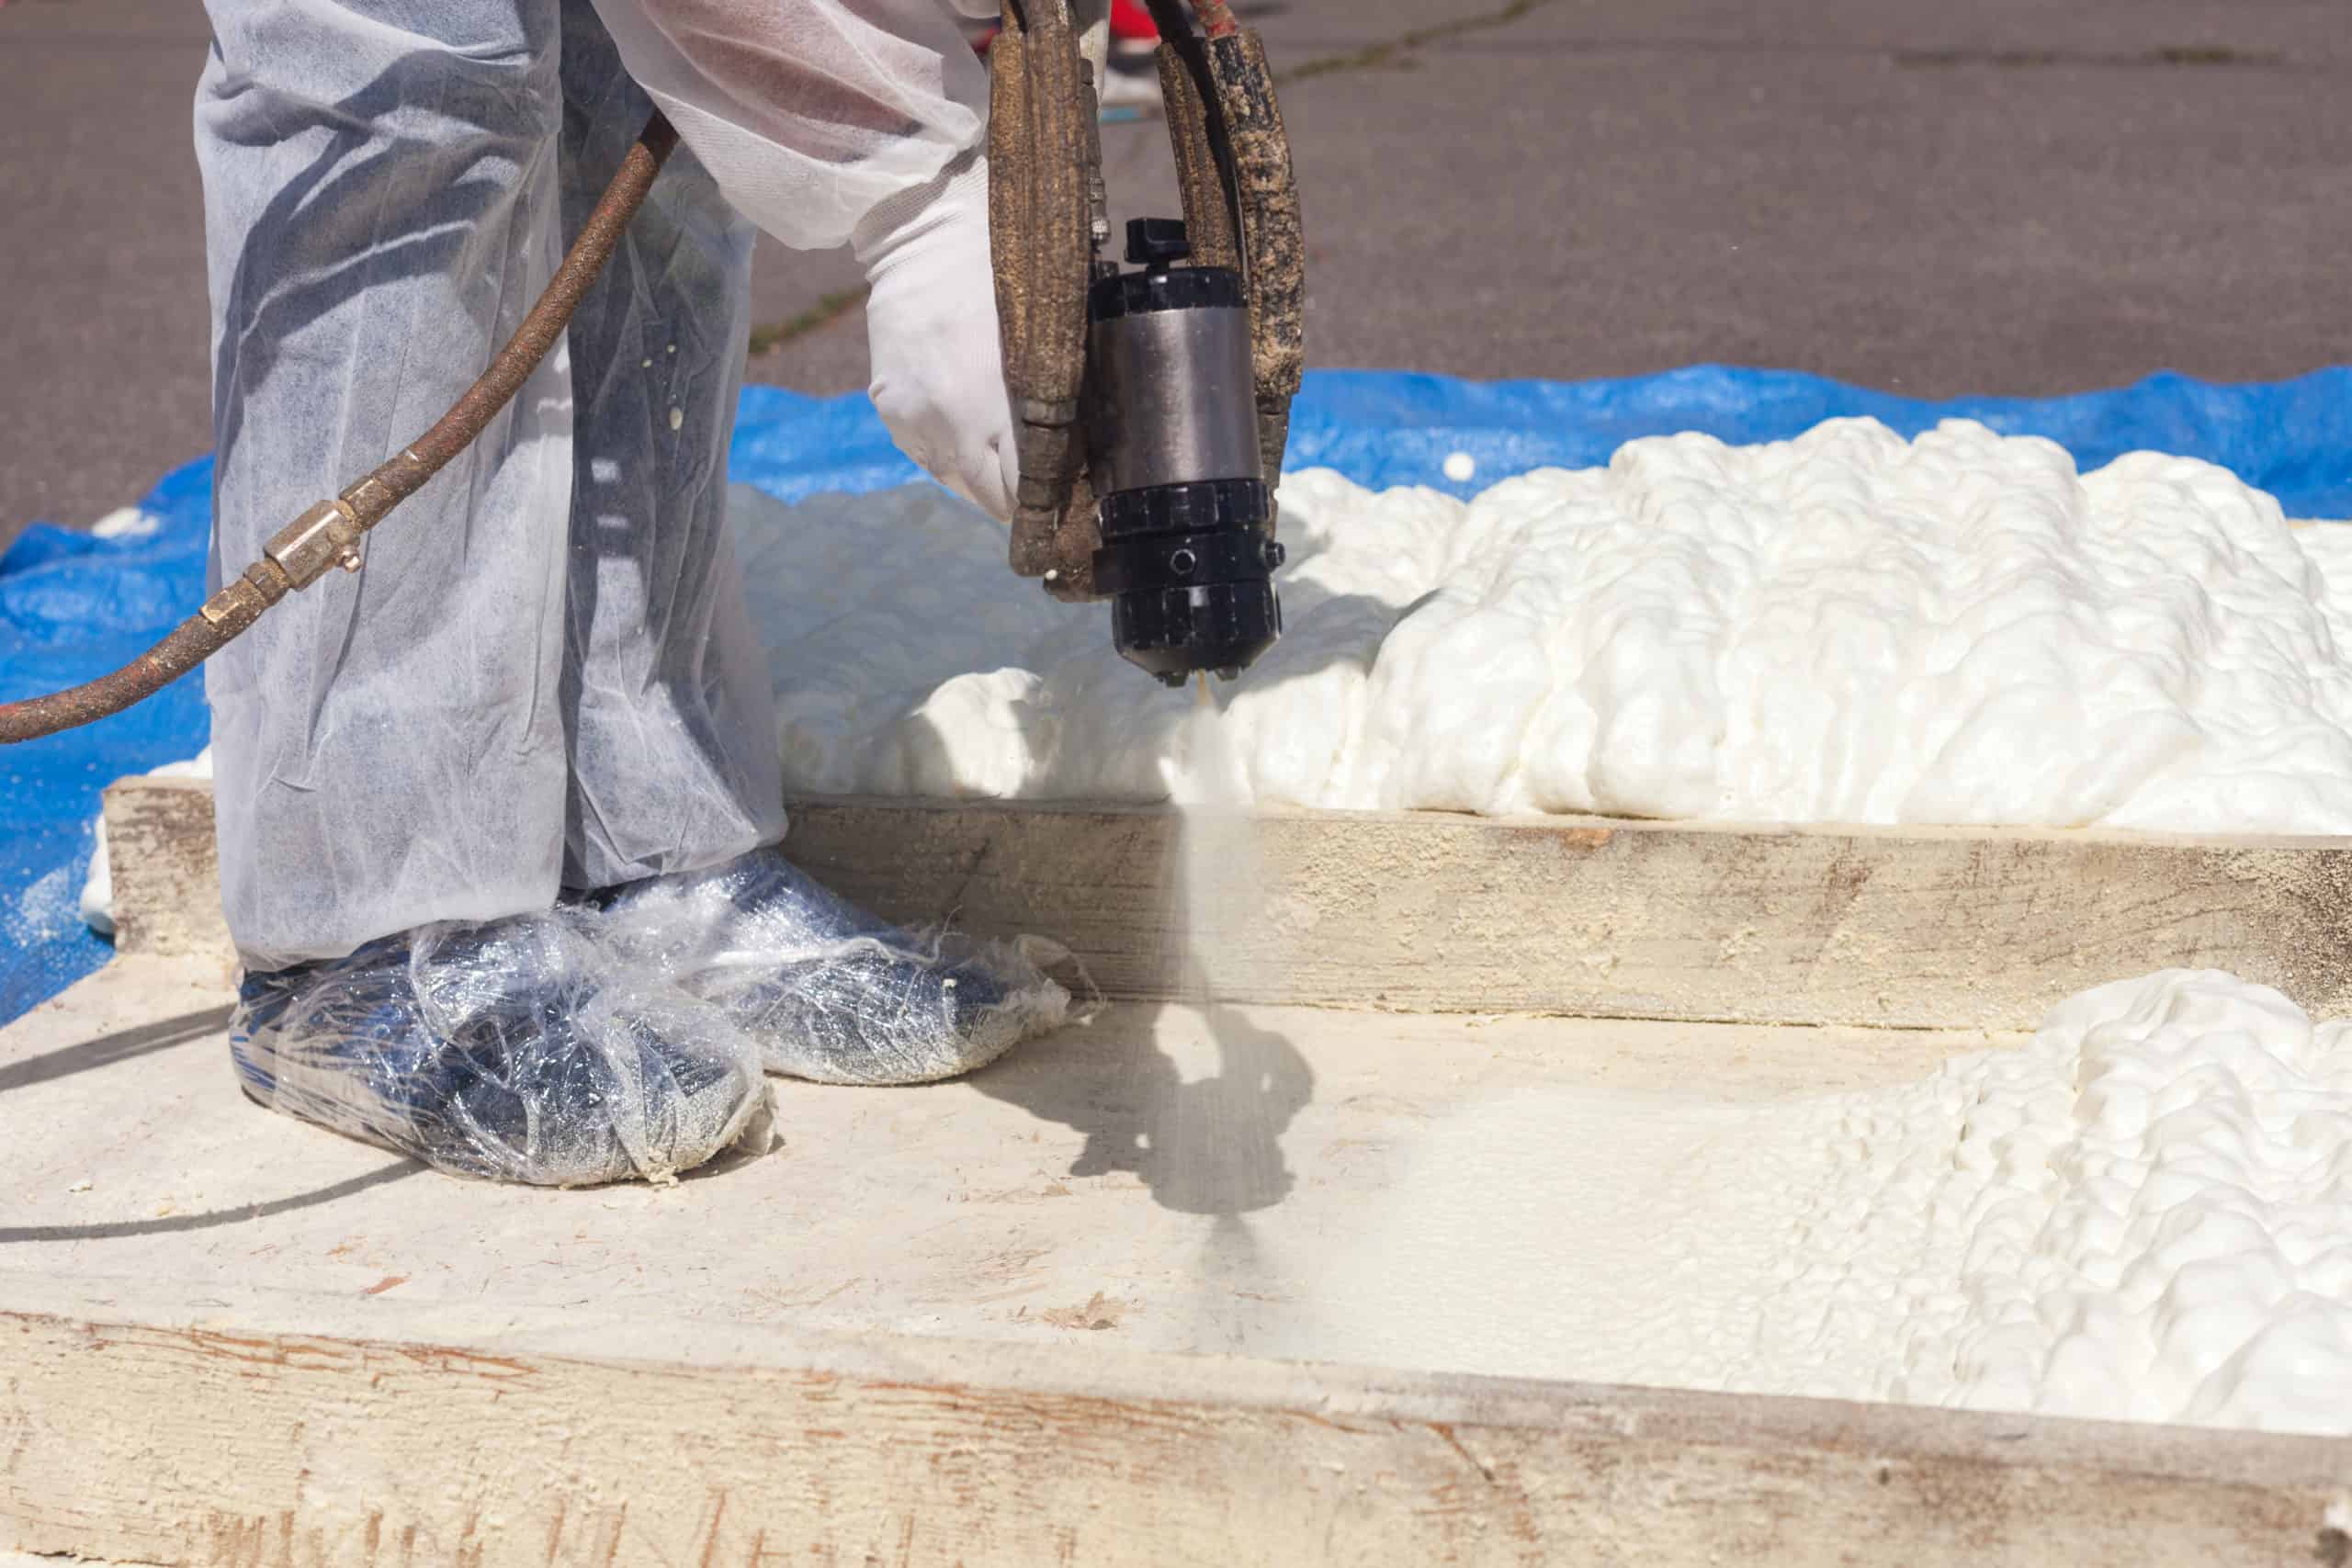
When installing your attic insulation, you should make sure that the material is properly laid in every area. If you’re using blown-in insulation, you should pay attention to how it is laid. That is because, despite blown-in insulation being easy to install, they are rarely distributed evenly across the attic. This can reduce its effectiveness and also increase your energy bill.Â
- Solution
Although some homeowners can try installing their insulation themselves, there are higher chances that it won’t be installed properly. The best way to avoid unevenly layered insulation is to hire an insulation contractor to do the installation.
When you work with an insulation contractor, you can be assured that the insulation will be distributed evenly and work effectively to maintain your home’s temperature.Â
Blocked Attic Ventilation
If you’re using the traditional insulation type, your attic needs to be well-ventilated.Â
If the vents in the attic are blocked, there will be inadequate airflow which may lead to mold or mildew growth. This is extremely hazardous as mold spores can cause several health issues when inhaled.Â
- Solution
When installing your insulation, make sure they are not obstructing the air vents in the attic. If they already are, you can have an insulation contractor rework your insulation.Â
Collapsed Insulation
Attics make for good storage spaces. However, the kind of items you store in your attic can affect its effectiveness. For instance, stacking heavy boxes or bulky items can compact your insulation or cause it to collapse completely. When your attic insulation gets compacted or collapses, it reduces its R-value. That is, it becomes less efficient in maintaining your home’s temperature, which makes your home less energy efficient. Alternatively, with a high R-value, your insulation will be able to maintain your home’s temperature throughout the different seasons of the year.Â
- SolutionÂ
The best way to prevent your insulation from collapsing is to avoid storing heavy items on top of the insulation. You can invest in other attic storage options that won’t impact your insulation over time. You can also consider storing heavy items on solid flooring rather than atop your insulation.Â
Pest Infestations
Your attic can become a perfect space for pests to nest, especially if your attic is not finished properly or the insulation is inadequate. Common pests that you can find living in your attic are Birds, Rats, Squirrels, Raccoons, Spiders, Mice, etc. Pests such as rats, squirrels, and raccoons can be detected easily as they can create sounds that can be heard from outside the attic. Other pests, such as insects, are not easily noticed and are more challenging to deal with.Â
- SolutionÂ
Pest infestation in your attic is mostly due to gaps or holes in your insulation. To solve the problem, first, contact a local pest extermination company to get rid of the infestation. Then find the areas where insulation is missing, and block them off with replacement insulation barriers or spray foams to prevent pests from entering the attic or consider changing the insulation entirely.Â
Ice Damming
People that live in colder climates are more likely to experience ice damming. Although ice damming doesn’t happen in your attic, they can be a sign of faulty attic insulation. Ice damming happens when the snow melts on your roof and re-freezes at the edges of the roof. Asides from creating hazardous icicles on your roof, ice dams can also cause extensive damage to the roof itself.Â
- SolutionÂ
Ice damming often occurs when there is inadequate attic insulation. Attics can get too cold during the winter if it is not properly insulated. This contributes to frozen sheets and icicles forming on your roof. To get rid of the ice dams, you can contact professionals that provide ice dam steaming to remove the frozen sheets for you. Once the winter is over and the weather becomes more favorable, you can look into improving your attic’s insulation.Â
When the temperature in your home becomes uncomfortable for you and your family, and your energy bills begin to skyrocket, it’s a sign that there’s a problem with your attic insulation. Look no further; take the next step by getting an insulator contractor to solve your insulation problems. When you work with insulation experts, you can trust your insulation to serve you well in the coming years.Â
Suppose you don’t know where to turn to for help with your attic insulation; you can visit https://fdinsulation.com/.Â
Â
Name, Address, and Phone
First Defense Insulation,Â
12 Greenway Plaza Suite 1147,Â
Houston, Texas 77046,Â
713-808-9853
Follow Us On Social Media
Common Terms And Concepts Behind Spray Foam Insulation
Not many people understand what spray foam is. Spray foam insulation Houston is an alternative to traditional building insulation, such as fiberglass. The term spray foam can also refer to plastic foam materials used in the building and construction industry to provide heat insulation and minimize air infiltration.
R-value Meaning
This refers to the degree to which a substance can resist heat flow. The higher this value is, the higher the ability of the material to resist heat. Implications with a high r-value are better insulation. For instance, the paper has a lower heat resistance than a styrofoam cooler. Insulation works like a flask and is measured in inches. The higher the insulation capacity, the more efficient the insulation. Spray foam has a high R-value.
Meaning of Board Feet
A board fit simply means one foot by one foot by one-inch thickness. It is used to calculate the r-value in spray foam projects.
Spray Foams Types
There are two main Spray Foam types used in residential and commercial applications. Although they are alike, each has its own uses.
Open-cell
Open-cell foam has a lower R-value per inch. It has an average R-value of 3.7 per inch. This foam is ideal for homes, commercial buildings, and soundproofing.
Closed-cell
Closed-cell foam is denser, often referred to as 2 pound, and achieves a R-value of 6.6 per inch. Closed-cell is a class II vapor retarder and does well in crawl spaces and conditioned wine rooms.
Foam Expansion
Spray foam has the highest expansion abilities. This makes it ideal for insulation since it can fill every space and crevice to provide the best insulation services and the best sealing ability than other materials. Spray Foam can expand up to 100 times its original liquid volume.
Estimating Spray Foam Costs in Insulation
To effectively estimate the cost associated with your project- First Defense Insulation staff can meet you on site. We also can work with scaled plans and return a cost proposal.
For all your Spray Foam needs
Are you building a new home, a commercial building, or you already own a home, but are looking to make your energy efficiency better? First Defense Insulation will take care of you with a wide variety of great services. We have a great team of professionals that take pride in offering insulation services to our customers so that they enjoy the amazing benefits of having a home with reduced heating and cooling costs and a healthier indoor quality.
First Defense Insulation
7730 Pinemont Dr, Ste 100
Houston, Tx 77040
Social Acounts
How to Remove Insulation from Your Attic?
Hey there! If you’re thinking about removing old attic insulation, you’ve made a smart decision. Whether it’s getting dusty, less effective, or you’ve had a critter invasion, replacing old insulation can seriously ramp up your home’s comfort and energy efficiency. We’ve been down this road ourselves and can tell you, fresh insulation makes a huge difference in how your home feels and how your energy bills look.
Insulation Removal and Replacement
Assessing Your Current Insulation
First things first, you’ve got to know what you’re dealing with up there. Pop your head into the attic and take a good look. Is it batt insulation, those fluffy pink rolls? Or is it blown-in cellulose that looks like a sea of gray confetti? The condition matters too—is it soggy, compressed, or does it crumble in your hands? This will tell you if you need to just top it off with new stuff or strip it all out and start fresh. We’ve found that understanding what’s up there is half the battle.
Planning for Removal and Replacement
Now, let’s talk shop about getting this job done safely and effectively. Safety first, always. Gear up with gloves, a good mask, and some goggles. You don’t want to be breathing in those fibers or getting them in your eyes. And let’s not forget about setting up proper lighting; you need to see what you’re doing.
Choosing the right insulation to replace the old stuff is crucial. You want something that suits your climate and energy needs. We’ve been at this for over 35 years at First Defense Insulation, and we always recommend going with materials that are durable and have the best energy efficiency ratings. Getting this right means lower bills and a cozier home, and who doesn’t want that?
Best Way to Remove Attic Insulation
Evaluating Different Methods
When it comes to pulling out old attic insulation, the approach varies based on what kind you’ve got up there. For batt insulation—those rolls or sheets of fluffy material—it’s generally about rolling them up carefully and bagging them. But if you’ve got blown-in insulation, you’re looking at a different game; this type requires a vacuum system to suck all that loose material out efficiently. Each method has its perks, but the key is choosing one that works best for your specific insulation type and your ability to handle the equipment.
Step-by-Step Removal Process
Alright, let’s get down to brass tacks. Here’s how we do it effectively and safely, based on our years in the business:
- Gear Up: Safety can’t be overstated. Get into some coveralls, gloves, a good mask, and safety goggles.
- Clear the Space: Before you start, make sure the attic is clear of any stored items or debris that could get in the way.
- Removal Techniques:
- For Batt Insulation: Start at the farthest corner of the attic. Roll up the batts slowly and place them into large trash bags. Avoid tearing the material as it may release more particles into the air.
- For Blown-In Insulation: Set up the insulation vacuum outside your home with the hose reaching into the attic. Begin at the far corner, methodically moving the hose around to ensure all material is vacuumed up.
- Double-Check Your Work: Once you think you’ve got it all, take another look around. It’s easy to miss spots, especially in those nooks and crannies.
By following these steps, you can ensure that the old insulation is removed effectively, setting the stage for a fresh and efficient upgrade. And remember, if it feels like a bigger job than anticipated, calling in professionals is never a bad idea. We at First Defense Insulation are just a call away and ready to help out.
Using a Vacuum to Remove Attic Insulation
Benefits of Using a Vacuum
For those dealing with blown-in insulation, the thought of manually bagging all that loose material might sound like a nightmare. That’s where using a vacuum comes in as a game changer. It’s not just about ease—though it certainly adds a lot of convenience—it’s about effectiveness. A vacuum can quickly and cleanly remove large volumes of insulation without spreading it all over your attic or into your living space. Plus, it minimizes the amount of airborne particles, which is a big win for your lungs and overall cleanliness.
How to Set Up and Use an Insulation Removal Vacuum
Now, let’s get you set up with using an insulation vacuum. Here’s the step-by-step process we recommend, based on our extensive experience:
- Choose the Right Vacuum: Not all vacuums are up for this job. You’ll need a specialized insulation removal vacuum. These can often be rented from home improvement stores or insulation suppliers.
- Prepare the Area: Before you start, make sure the path to your attic entrance is clear. You’ll be moving a large hose through here, so you want as little obstruction as possible.
- Set Up the Vacuum: Place the vacuum machine outside your home to avoid filling your living spaces with dust. Extend the vacuum hose to your attic. This might require some maneuvering, but it’s worth it to keep the mess outside.
- Start Vacuuming: Begin at the farthest point from the attic entrance. Systematically move the hose around, ensuring you cover every area. The suction power should capture most of the insulation quite efficiently.
- Safety Tips:
- Always wear protective gear: a mask, goggles, and gloves.
- Make sure the vacuum is properly grounded to prevent any electrical hazards.
- Keep the vacuum’s filter clean to maintain optimal suction and efficiency.
- Post-Vacuum Cleanup: Once all the insulation is removed, go over the area with a shop vac equipped with a fine dust filter to pick up any residual particles.
Using a vacuum for insulation removal not only makes the job faster but also significantly cleaner and safer. If you’re unsure about handling this equipment on your own, don’t hesitate to reach out to us at First Defense Insulation. We’re here to help ensure your attic is properly prepped for whatever upgrade you’re planning next.
Removing Attic Insulation by Hand
When to Choose This Method
Sometimes the old-school method of hand removal is your best or only option, especially in certain scenarios. If you’re dealing with smaller attic spaces where a vacuum hose can’t reach, or perhaps you’ve only got a small amount of insulation that needs clearing out, manual removal makes sense. It’s also a viable method when you need to be extra careful not to damage any underlying structures or wiring, which can sometimes be a risk with mechanical methods.
Tips for Effective Manual Removal
Here’s a straightforward, step-by-step guide to removing attic insulation by hand, based on our firsthand experiences:
- Suit Up for Safety: Before you even step foot in the attic, make sure you’re dressed for the job. Long sleeves, gloves, a dust mask, and safety goggles are essential to protect you from irritants.
- Prepare Your Workspace: Lighting is crucial. Ensure you have enough light to see clearly, reducing the risk of stepping on anything you shouldn’t. Lay down some boards to walk on if the joists are exposed—it’s safer for you and your ceiling.
- Start Removing Insulation:
- Batts: Carefully roll up fiberglass or rock wool batts and place them into large contractor bags. Try to disturb the material as little as possible to avoid kicking up dust.
- Loose Fill: Use a dustpan or a small hand shovel to scoop up cellulose or loose-fill fiberglass. Transfer it into trash bags, compressing it gently to avoid airborne fibers.
- Be Thorough: Make sure to check all nooks and crannies. Insulation can hide in the oddest places, and leaving old material behind can negate some of the benefits of replacing it.
- Clean Up: After all the insulation is removed, vacuum the entire area with a shop vac fitted with a HEPA filter to capture any lingering dust and particles.
- Inspect and Repair: Now’s a good chance to inspect the attic for any signs of damage or leaks and make any necessary repairs. This will ensure that your new insulation will perform at its best.
Removing insulation by hand is labor-intensive but completely doable with the right preparation and safety measures.
Attic Insulation Cleanup
Cleaning After Removal
Once the old insulation is out, it’s crucial to clean up thoroughly to make sure no residues or fibers are left behind. This cleanup is key to prepping your attic for new insulation, and it ensures that your space is safe and dust-free.
- Sweep Up: Start with a broom to sweep up any large debris and pile up smaller insulation remnants.
- Vacuum: Use a heavy-duty shop vac with a HEPA filter to vacuum the entire attic floor, especially in the corners and under eaves where particles accumulate.
- Wipe Down: For any surfaces where vacuuming isn’t effective, use damp rags to wipe down and capture finer dust. This includes walls and rafters.
- Air Out: If possible, ventilate your attic for several hours to help clear any airborne dust and fibers. Use fans to help circulate fresh air through the space.
- Final Inspection: Do a thorough walkthrough to ensure no areas are missed. Sometimes a second round of vacuuming is needed after the dust has settled.
Preparing for New Insulation
Getting your attic ready for new insulation is just as important as the cleanup. Here’s how to ensure your space is prepped properly:
- Repair Any Damage: Check for and repair any damages like leaks, holes, or structural issues. These fixes will support the effectiveness of your new insulation.
- Seal Air Leaks: Use caulk or foam spray to seal any air leaks around pipes, ducts, or wiring that penetrate the attic floor. This step prevents heat transfer and increases efficiency.
- Install Vent Baffles: If needed, install rafter vent baffles. These ensure that the airflow from your soffit vents isn’t blocked by the new insulation.
Cost Considerations: While preparing for new insulation, keep in mind that the investment can vary based on the materials chosen and the specific needs of your home. Typically, the cost will reflect the long-term energy savings and increased comfort of your home, making it a worthwhile investment. It’s smart to consult with insulation professionals to understand the potential costs and benefits for your specific situation.
Final words:
Tackling the removal of old attic insulation is a significant step toward improving your home’s energy efficiency and overall comfort. We’ve walked through various methods and steps, from assessing the type of insulation you have to the thorough cleanup required after removal. Remember, each method, whether it’s using a vacuum for blown-in types or manually removing batts, aims to make your home more energy-efficient and comfortable.
Safety is paramount in this process. Always gear up appropriately, use the right tools, and don’t rush through the steps. Insulation removal can be dusty and strenuous, and it’s crucial to keep your workspace clean and safe.
If you’re ever in doubt or if the job feels too big to handle alone, consider reaching out to professionals. We at First Defense Insulation are ready to help. Removing old insulation and replacing it with new, efficient materials can be a game-changer for your energy bills and overall home comfort.
First Defense Insulation,
12 Greenway Plaza Suite 1147 Houston Texas 77046,
713-808-9853
Follow Us On Social Media
https://www.facebook.com/FirstDefenseInsulation
https://www.instagram.com/firstdefenseinsulation/?hl=en
Can I Be Inside My Home During the Foam Insulation Installation?
Foam ranks among the most popular insulation choices across the U.S. Not only is it effective at blocking out heat and cold, but it also helps reduce noise levels and prevent mold growth. However, some people have concerns about the safety of foam insulation installation. As such, you might harbor some reservations if you’re casting about for spray foam insulation Houston.
You might be wondering, can you or your pets be inside your den while the installer does their thing? It depends. Generally, when installed correctly, foam insulation poses no risk to human health.
The key is to install it properly, using the correct type of foam and following all manufacturer instructions. Foam insulation can provide years of safe, reliable performance. Here’s a breakdown of some variables that could determine whether it’s safe to hang around your house as a pro installs spray foam.
Ventilation
When installing foam insulation, ventilation is key to ensuring a successful process. Without proper ventilation, the chemicals in the foam can become concentrated and cause health problems for those in the surrounding area. In addition, the build-up of heat can cause the foam to expand and potentially damage the structure.
Open windows and doors to enable the circulation of fresh air. By ventilating the area during and after installation, you can help ensure the chemicals are properly diluted and that the foam will harden correctly.
In addition, ventilation helps prevent any harmful fumes from accumulating. As a result, taking a few minutes to ensure proper ventilation can safeguard your family’s health in the long run.
Curing Time and Off-gas
Off-gassing has to do with the VOCs in the spray foam. Typically, a product with a high VOC will result in a longer re-occupancy time (as long as 48 hours).
RetroFoam, for instance, is easy to apply and cures in about two hours, transforming into a rigid state over time. As a result, it’s an excellent choice for creating an air-tight seal on concrete block walls.
If you’re a little apprehensive, you may consider leaving your house while the foam insulation cures, and there is no need to worry about fumes or VOCs. Fortunately, with reduced re-occupancy time, you would be back in your den in no time! And once the foam cures, it won’t continue emitting an odor- as some people mistakenly believe.
The Type of Foam You Use Matters
Each insulation material on the market has its pros and cons. For instance, fiberglass is a popular choice for many homeowners because it is relatively affordable and easy to install. However, fiberglass can be challenging to work with and may not provide enough insulation for frigid climates.
Another common insulation type is cellulose, made from recycled newspapers and other paper products. Cellulose is an environmentally friendly option, but it can be flammable and is not as effective as other types of insulation.
RetroFoam is another option gaining popularity due to its safety and effectiveness. It is injected into walls, so it does not require cutting or drilling. Plus, it contains a small amount of volatile organic compounds (VOCs), making it a safe option for homes with children or pets. And while RetroFoam may be more expensive than other types of insulation, it provides superior insulation value and will help reduce energy costs over time.
Steer Clear of the Work Site
Full disclosure, during the application, spray foam produces a slight odor. Since this can be a little off-putting, your contractor may set up a fan in the work area to promote airflow. By so doing, they air out where they’re installing spray foam.
Plus, it’s best to stay away from the work site. The chemicals used in the spraying process can be harmful if inhaled, and it’s essential to give the crew plenty of space to work. If possible, use other rooms in the house or go outside until the job is done.
Hovering can be a safety hazard. It can be very distracting and even unsafe if a worker is trying to focus on their work and has someone constantly in their peripheral vision.
In addition, the professionals know what they’re doing and can complete the task quickly and efficiently. If you’re in the way, it will only slow them down and potentially cause problems.
So, while you don’t need to leave your home during the installation, it’s probably best to take a step back and let the experts handle it. You can always ask questions before the project commences or afterward. But, due to safety and efficiency concerns, it’s best to let them work uninterrupted.
Fortunately, we use spray foam products with the most negligible concentration of VOCs. As a result, even if you’re in the home during the installation, you’ll only notice a slight smell, which dissipates in as little as two hours (as we’ve noted before).
Proper Insulation Is Critical
Most people are conversant with the basic idea of insulation- wrapping your home in a material that will keep the heat in during winter and out in summer. As such, it might be tempting to hire the first contractor who offers to get the job done. After all, it does seem straightforward, right?
Well, that could not be further from reality. Foam insulation isn’t for everyone. For instance, the task can be a fool’s errand without the proper equipment and know-how.
Once you’ve decided that foam installation is necessary, the next step is to find a qualified and experienced professional for the job. You may also need to remove your old insulation material, and often the complex and potentially dangerous process is best left to a trained insulation contractor.
Such professionals understand the nuances of insulation removal in Houston. Thus, they can handle the job without damaging your home or harming you and your family. They also know how to properly dispose of insulation, which is vital from an environmental and health perspective.
Contact a pro for assessment and proper insulation. Getting the job done right means avoiding health hazards and saving money in the long term. Our spray foam insulation installers will work with you to ensure your safety and the quality of the installation. Check us out at https://fdinsulation.com/attic-insulation/spray-foam/ to learn more or for assistance in selecting the ideal type of insulation material.
First Defense Insulation,
12 Greenway Plaza Suite 1147, Houston, TX 77046,
(713)808-9853
Find us on Social Media
https://www.facebook.com/FirstDefenseInsulation/
https://www.linkedin.com/company/first-defense-insulation/
https://www.instagram.com/firstdefenseinsulation/